The IDA 64 is a Russian military oxygen rebreather developed in the mid 60s and
in use for decades as the standard-issue Russian Navy combat swimmers/commando
rebreather. These pages consists of pictures taken as I prepared an example for
use after some 28 years in stores. They are my notes and I hope they aren't
going to be used so you can say "Poor Nigel. So that's what he did
wrong."
Mine, apparently, dates from May 1976 when it was newly placed into stores with
all the stamps and test approvals. There is no way I can tell if it was
refurbished for re-issue or brand new but I suspect new based on the
manufacturers date stamps matching the issue documentation.
The original specification reads a bit scary when you remember that this is a
pure oxygen device:
| Working depth | 20m
|
| Working time | 4-6 hours
|
| Scrubber | O3 (Superoxide) or HP-I (2 x 1.8 litres)
|
| Weight | 16 kg
|
| Counterlung volume | 7 liters
|
| Neutral buoyancy
|
OK. Let me start with a quick reprise of oxygen rebreathers so we know we are
using the same words for things:
An active human being consumes roughly 1 litre of oxygen per minute and less if
at rest. However to flush out the carbon-dioxide produced by our bodies we need
to pass somewhere between 10 and 25 litres per minute of gas through our lungs.
Hence just breathing from a cylinder and letting the exhaled gas bubble away
into the water is a very inefficient way to go diving. Recirculating the
breathing gas and removing the carbon dioxide chemically means a much greater
efficiency and, significant to the military, almost no tell tale
bubbles.
So, in its simplest form, a diving rebreather consists of a loop in which the
gas flow is constrained by one-way valves to circulate through the chemical
'scrubber' and there must be some provision to replenish the oxygen consumed.
One further device required to facilitate a practical rebreather is flexible
bag so the loop can change volume to accommodate the divers inhale/exhale
cycle. The diver's lungs then take as much oxygen as they require and release
carbon dioxide. This exhaled gas passes into the scrubber and then into the
flexible 'counterlung' ready to be inhaled again. When enough oxygen has been
consumed so that the counterlung can no longer supply a full breath a valve
from the oxygen cylinder opens to top up the loop. Hence the operation is
normally independent of the diver. Provided he has set it up correctly if he
can breathe all is well.
Oxygen addition can be performed in several ways. Oxygen sensors and computer
electronics driving valves is a possibility, a chemical system where CO2
removal causes oxygen release works, a constant flow system where a fraction of
the loop gas is being replaced all the time is an alternative but the simplest
trick of all is to only have only oxygen in the loop so if the loop has gas in
it you are OK.
However you never get something for nothing and oxygen, despite the fact that
we need it minute by minute to live, is a very reactive, even dangerous, gas.
Oxygen as 100% of your atmosphere is unhealthy long term and rapidly becomes
worse under pressure. Current theory proposes that the maximum pressure of pure
O2 that you want to breathe is 1.6bar, the pressure you would get breathing
pure Oxygen six meters under the water. This means the pure oxygen rebreather
is seriously depth limited.
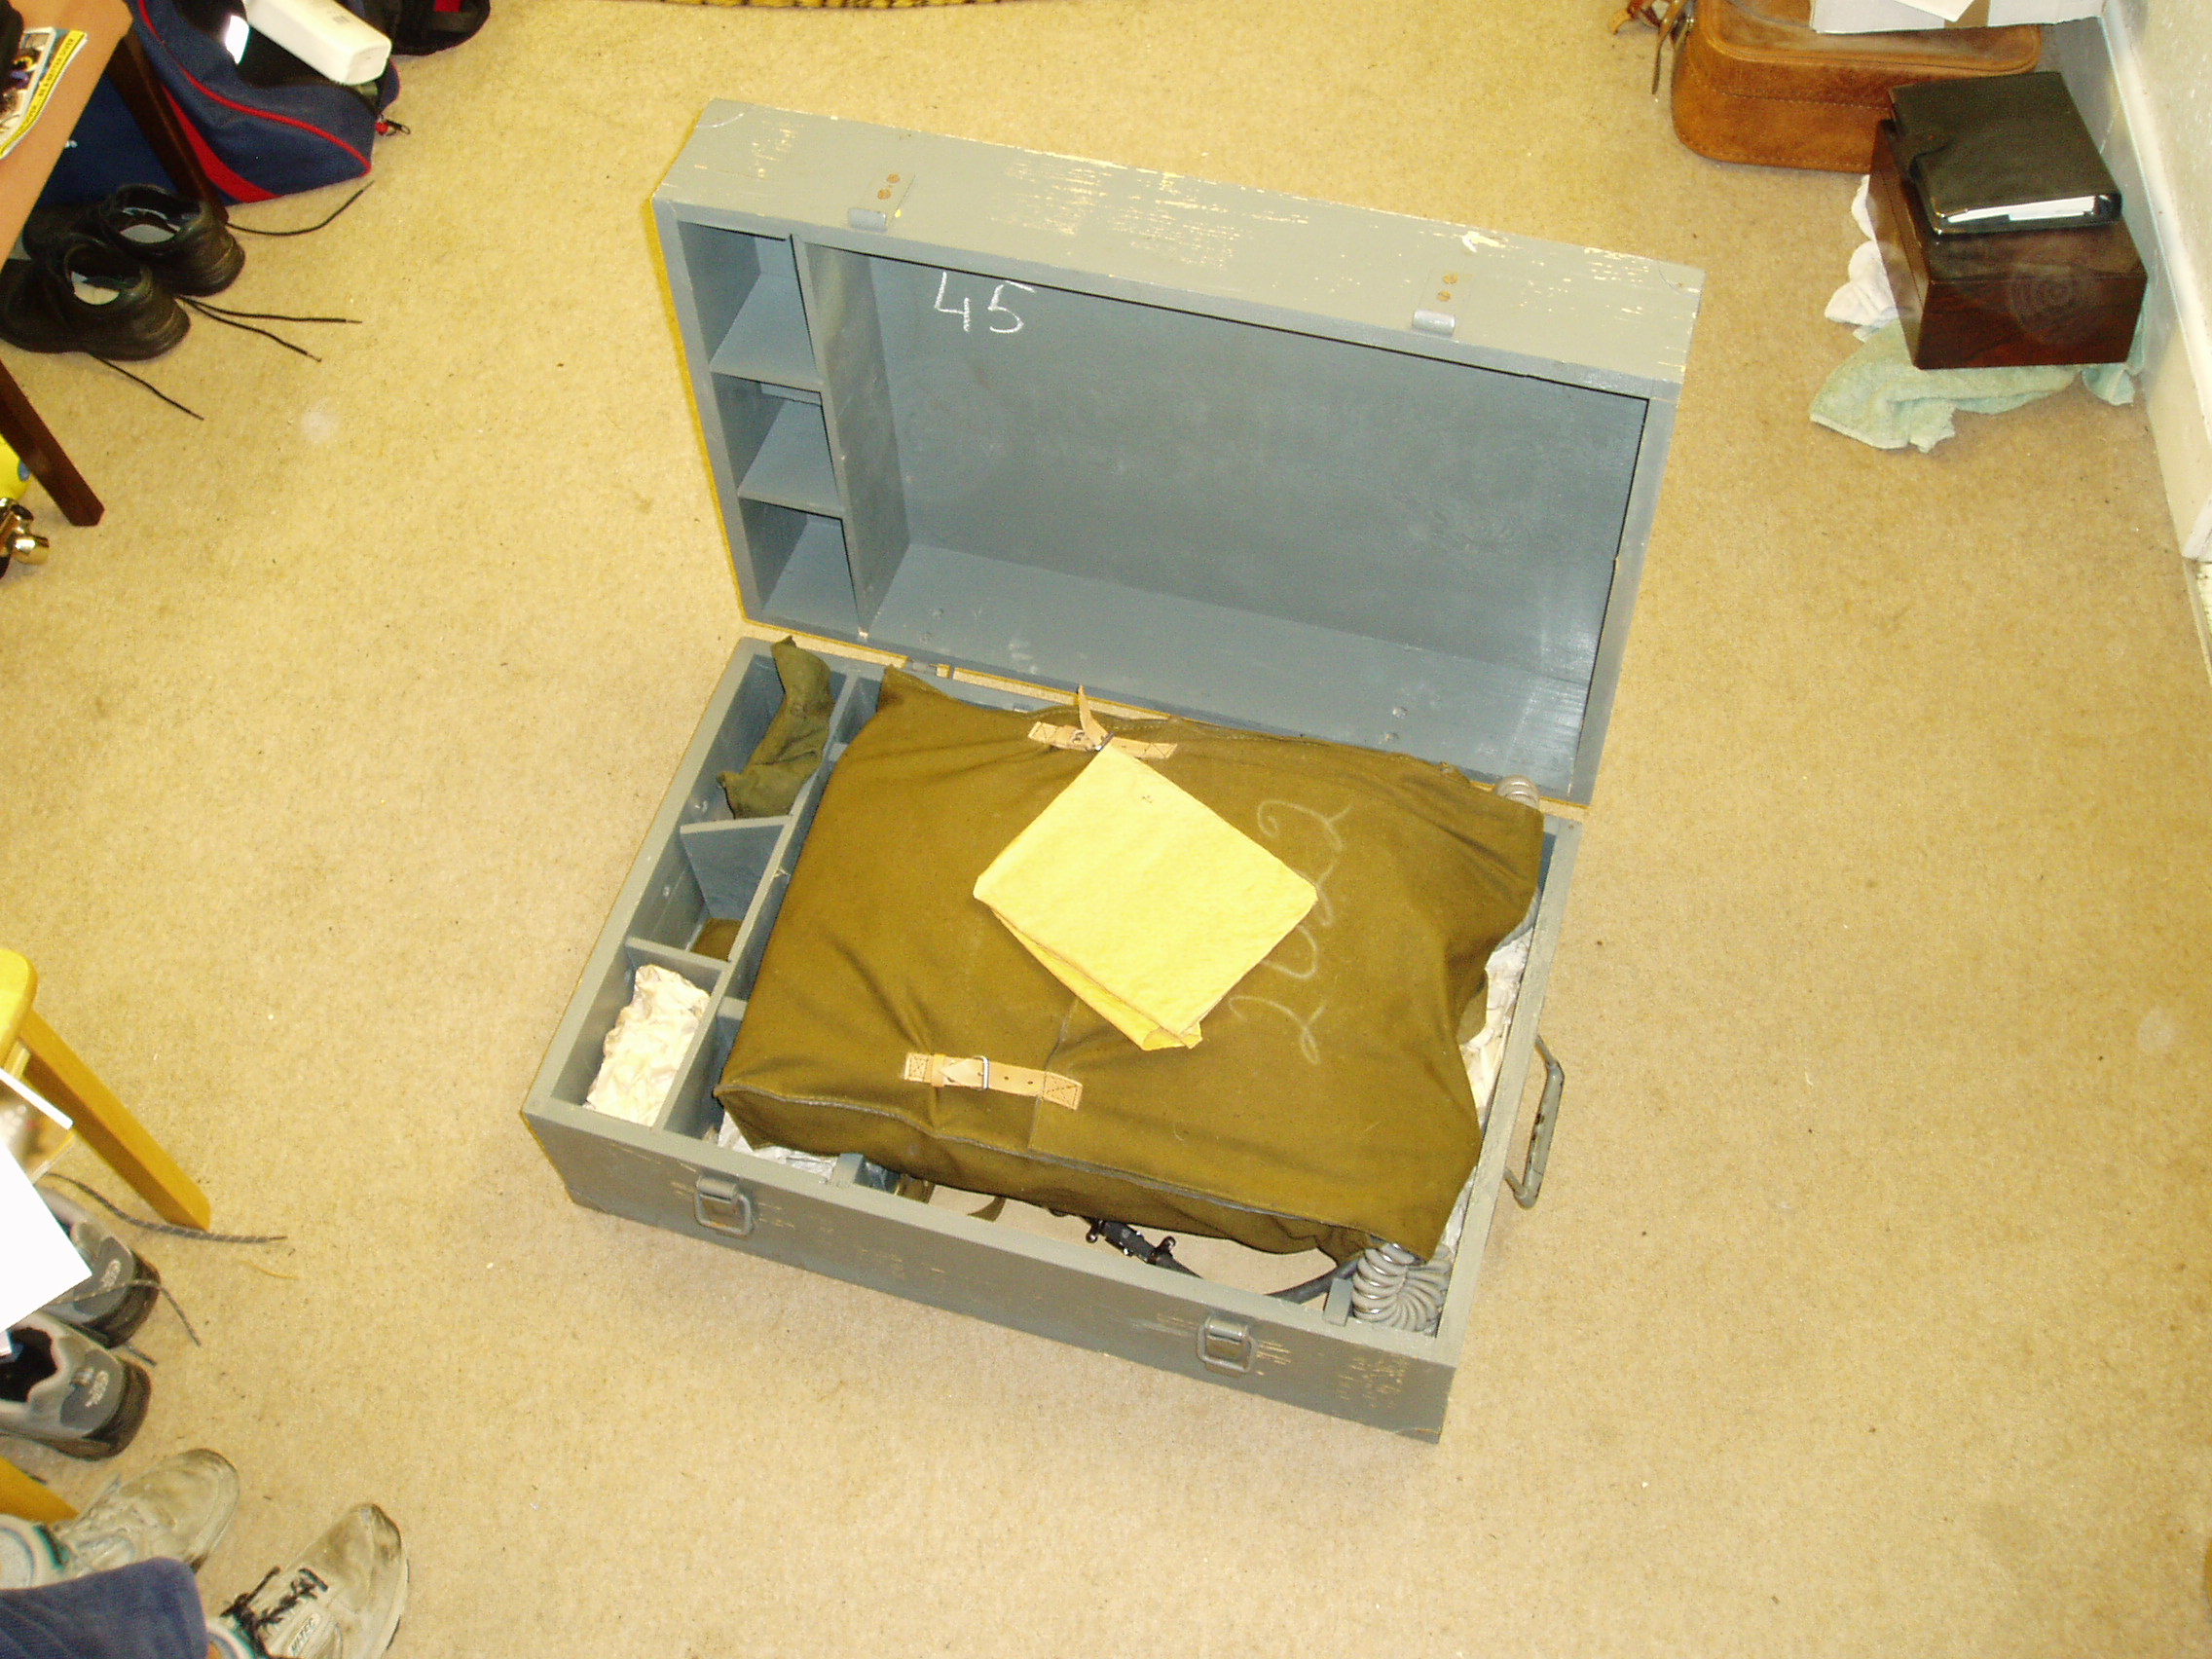
Right. Let's unpack the box.
The crate is timber, 79 x 50 x 32 cms, has going to sea type handles,
catches, hinges and brass corners. It's actually a bit tacky. Lots of wood but
a bit knocked together cheaply. The rebreather itself comes packed in a rubber
lined fabric rucksack shaped thing with a set of documents wrapped and placed
on top. The documents are only its test and release notes. Naturally, I
suppose, a military diver does not need a manual. They learnt it all in
class.
The bag perplexes me. If it held the whole kit so you could put it on your back
and head off to dive it would make more sense but it is a skin tight fit on the
rebreather shell. There is lots else you need to carry to do the job.
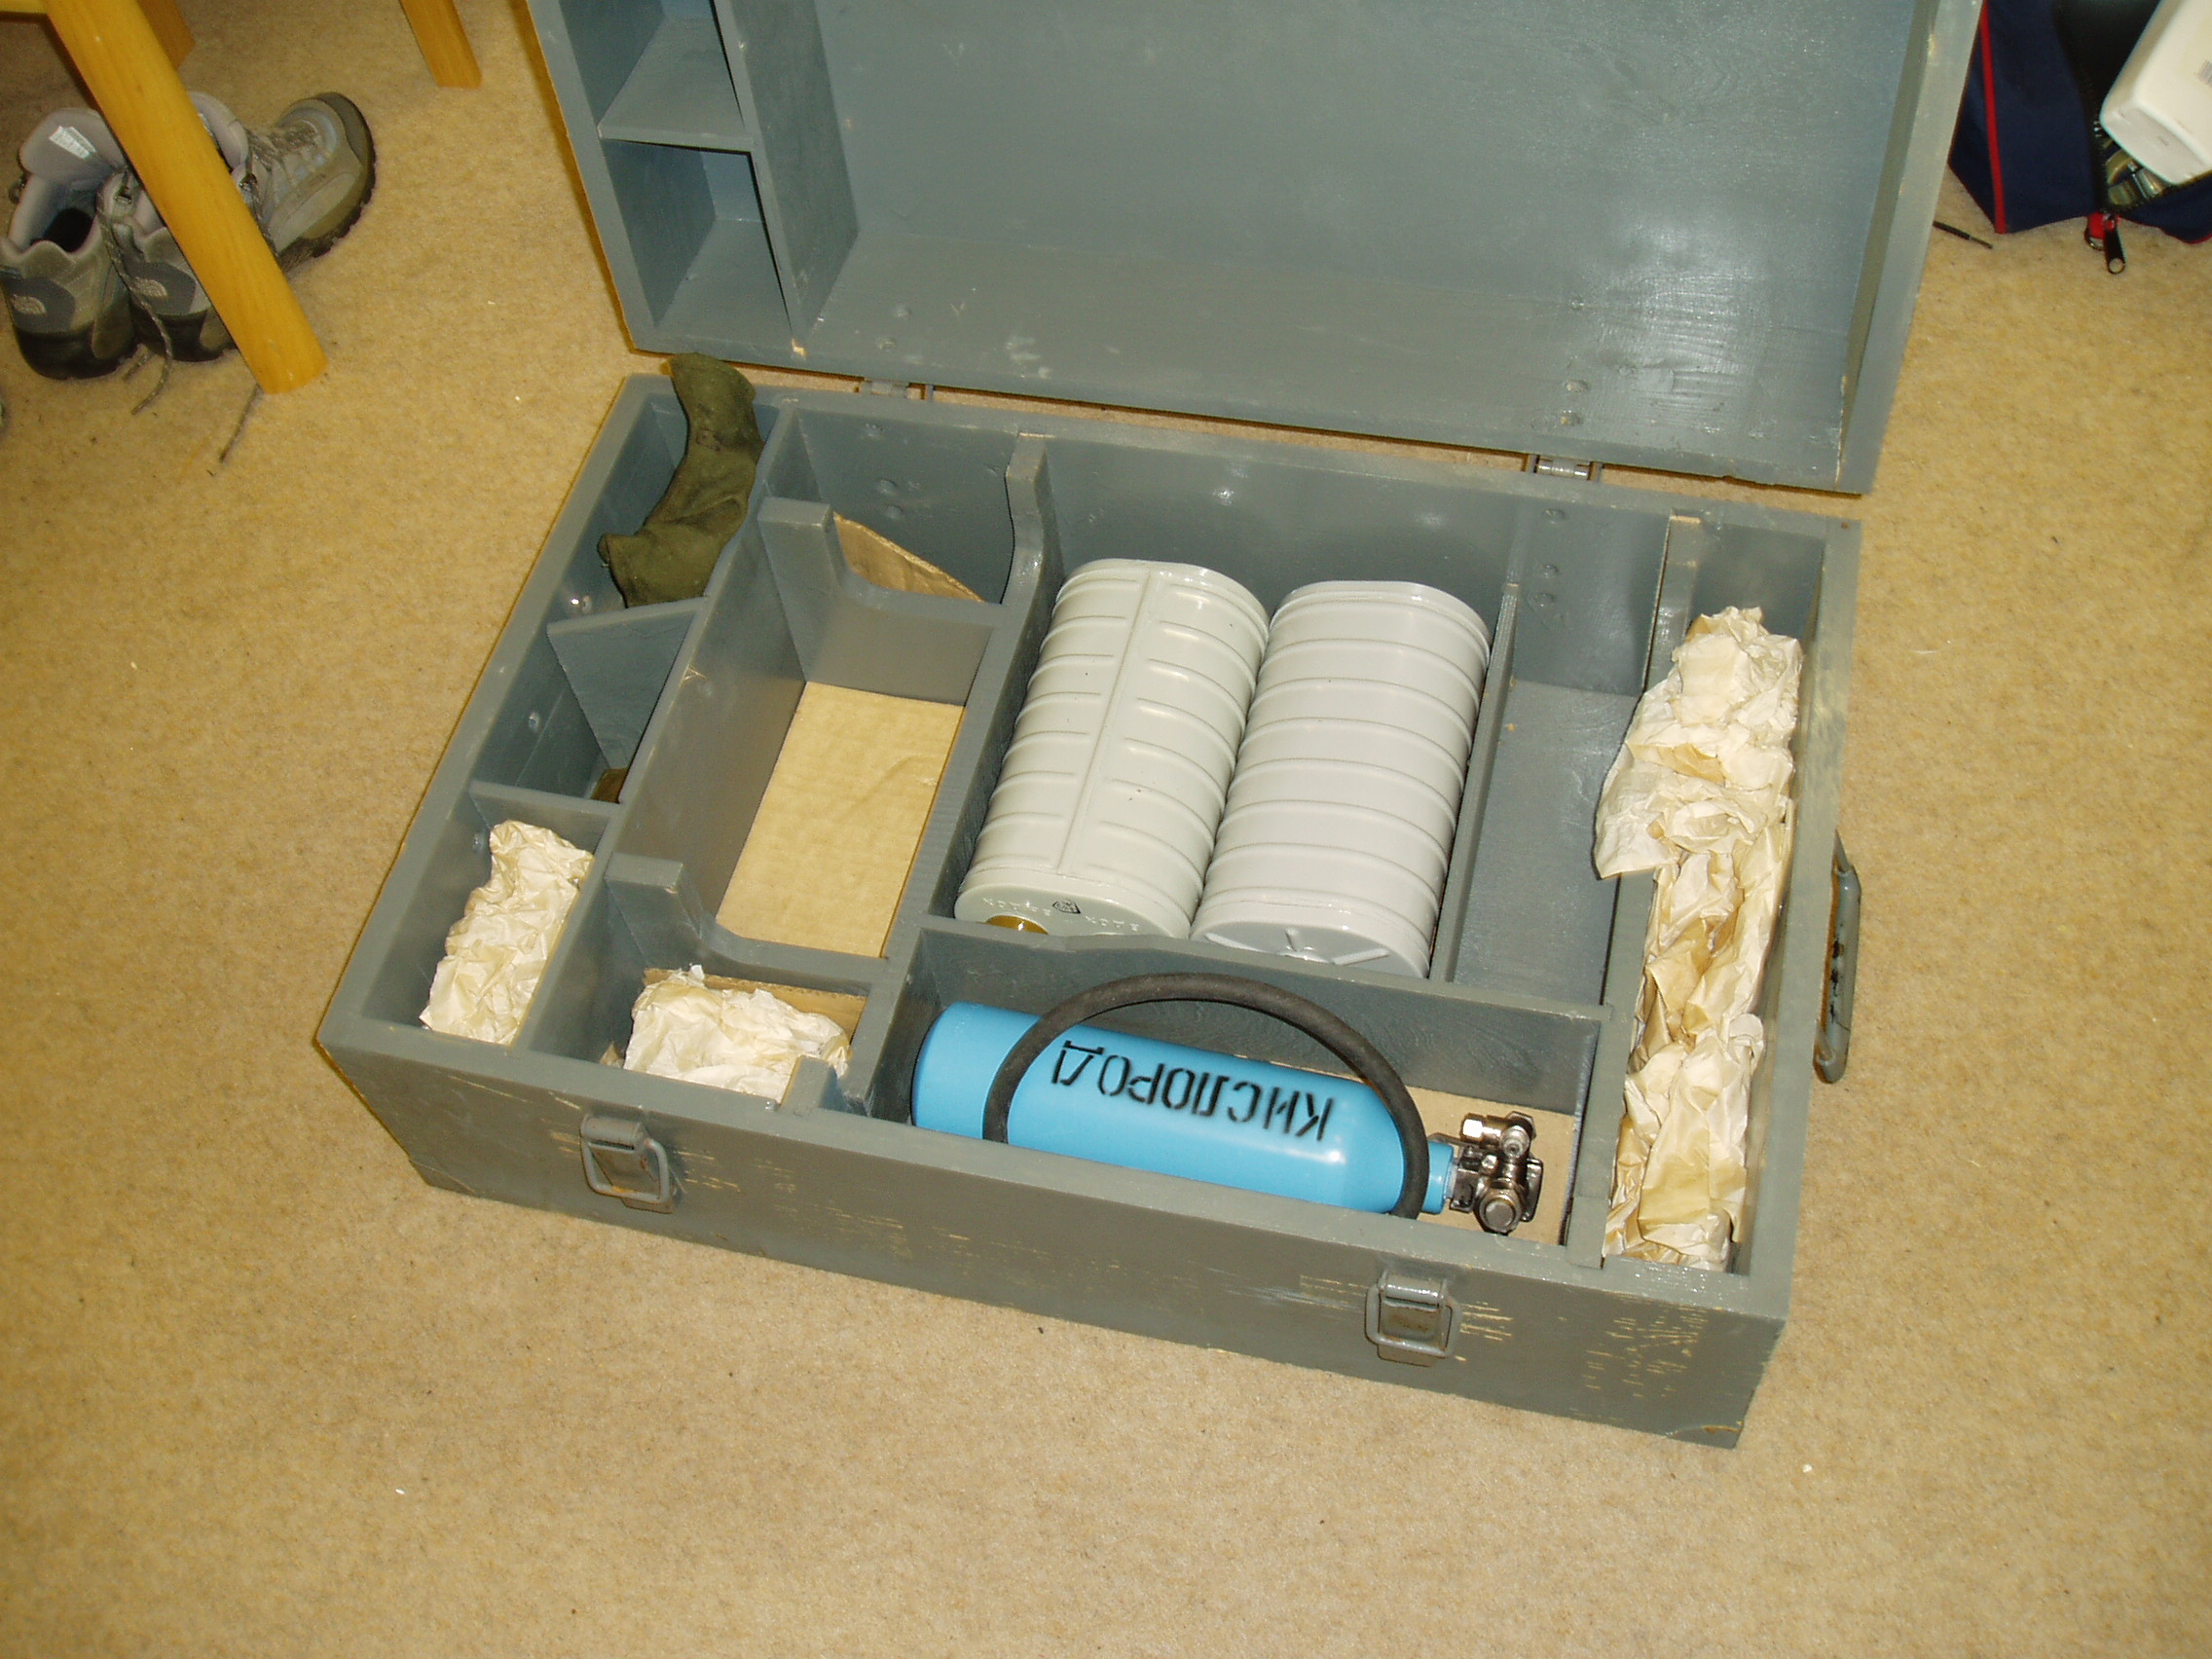
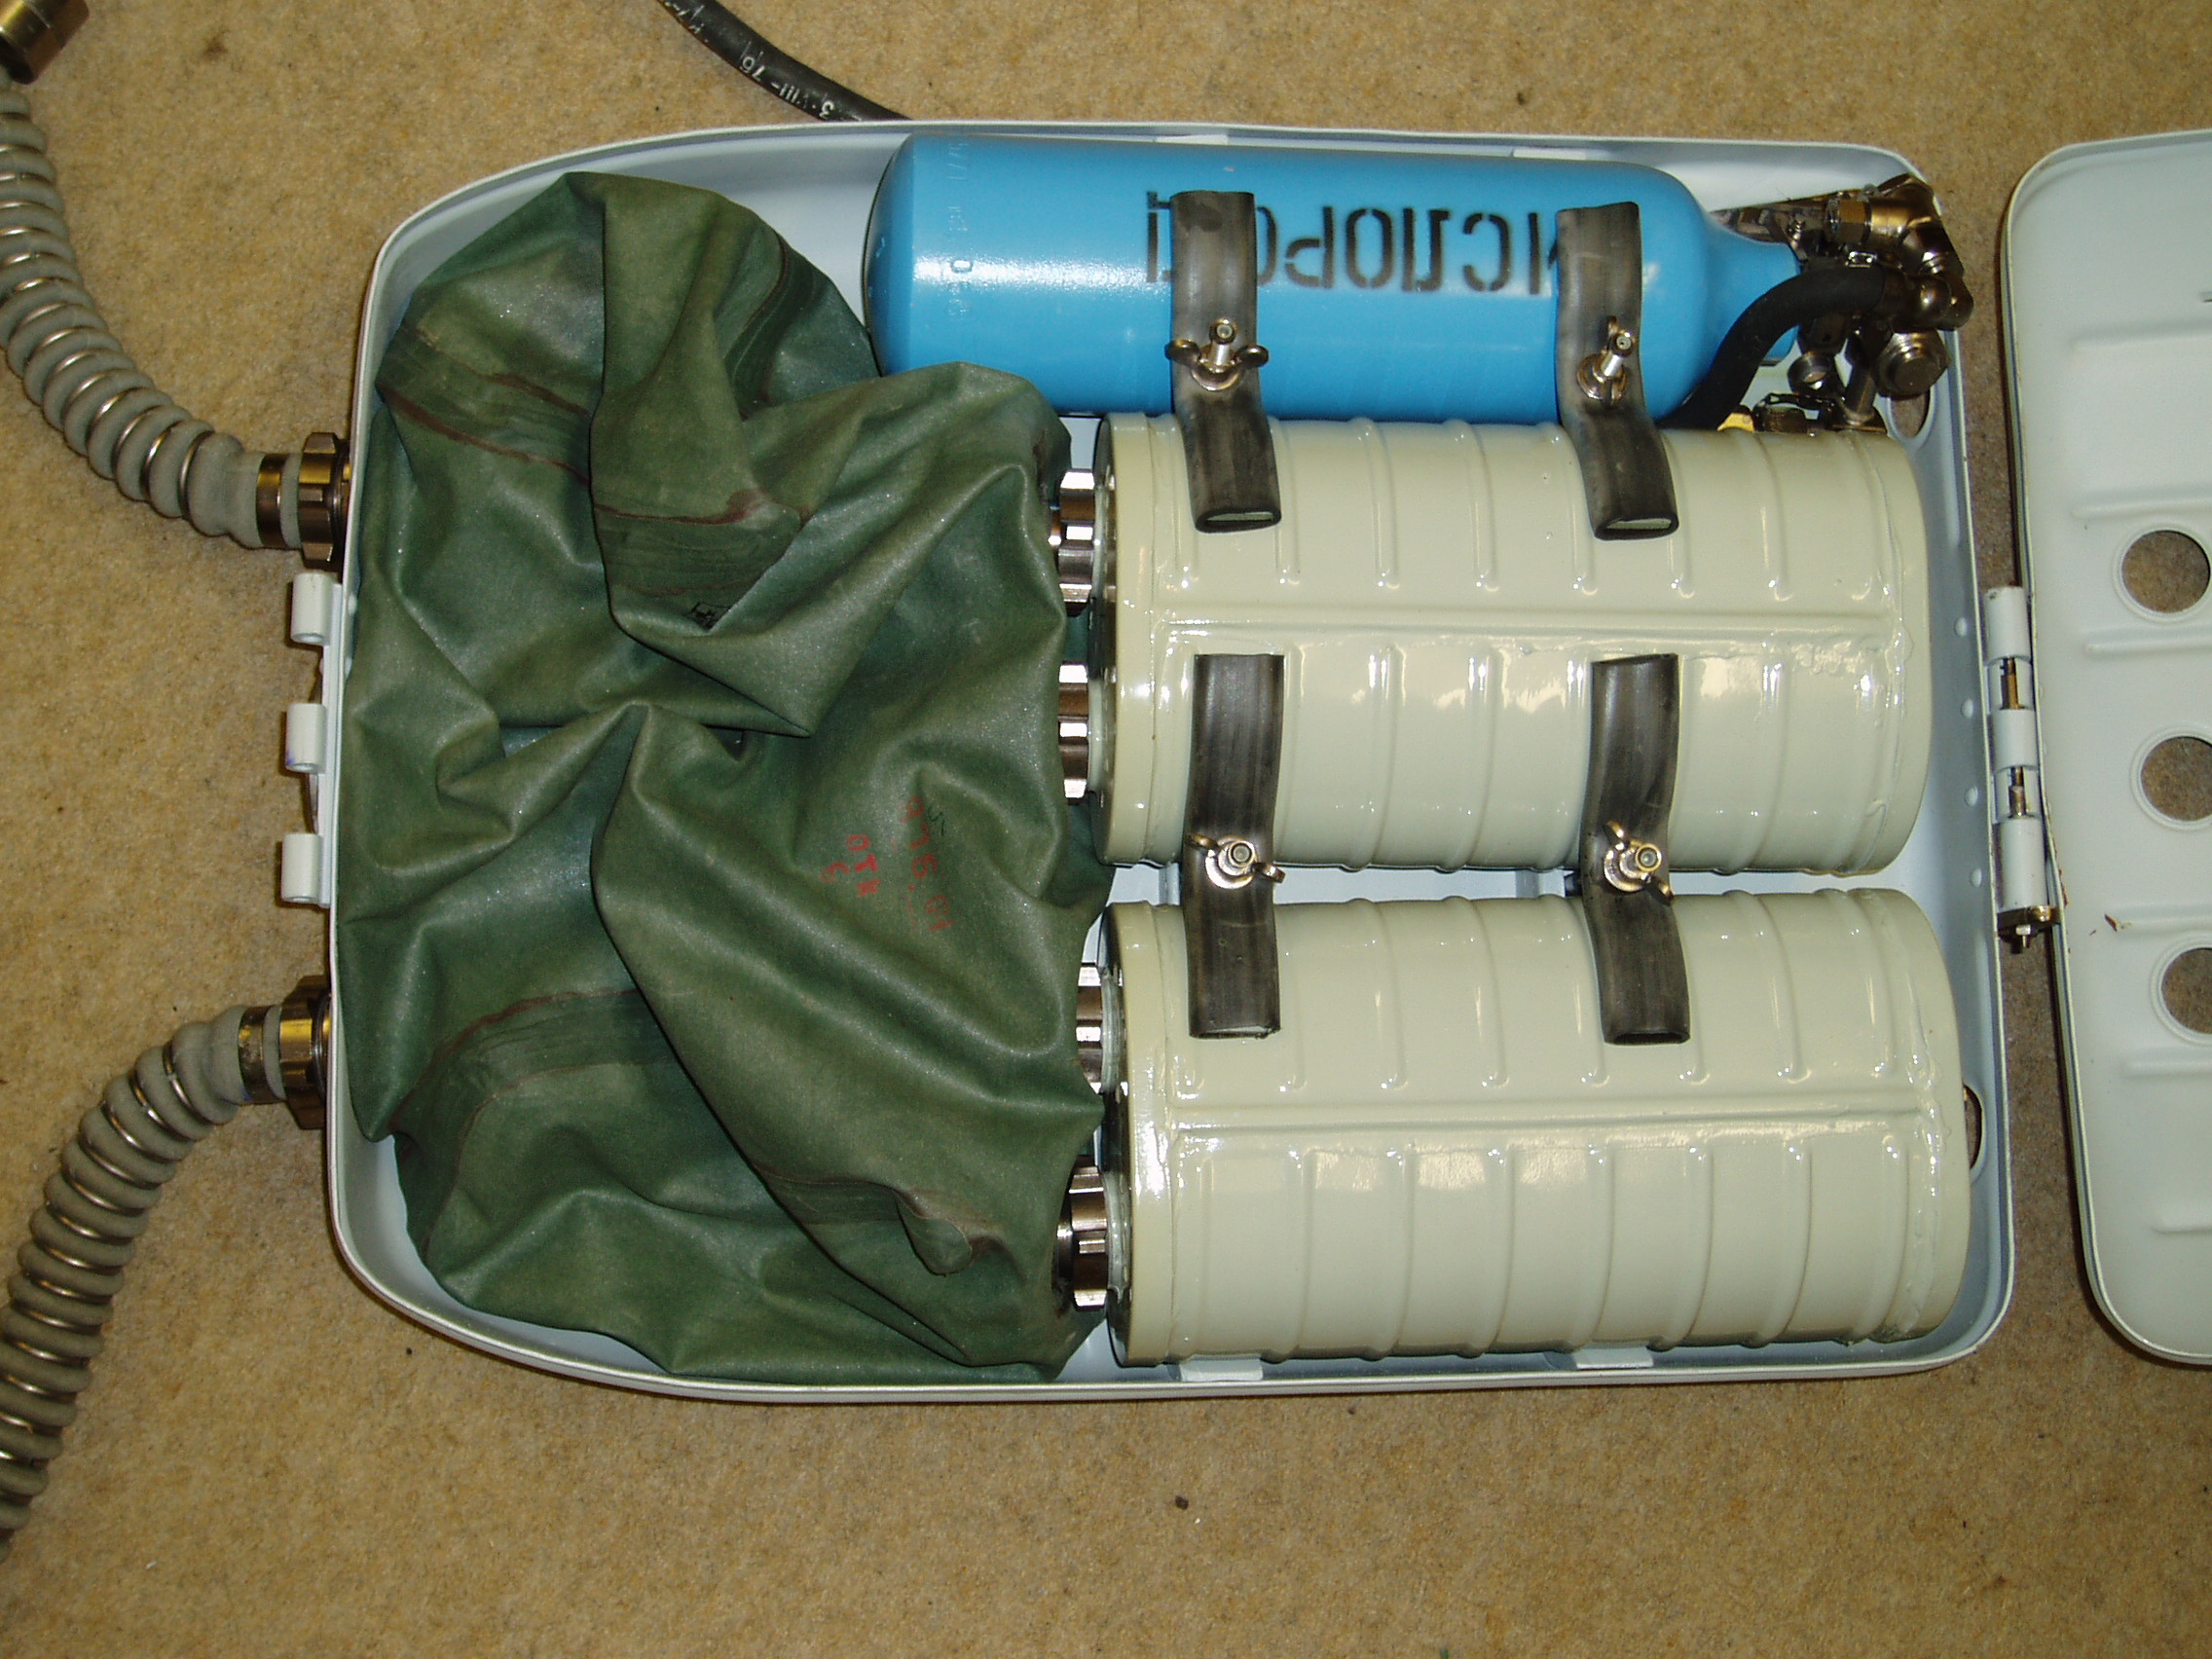
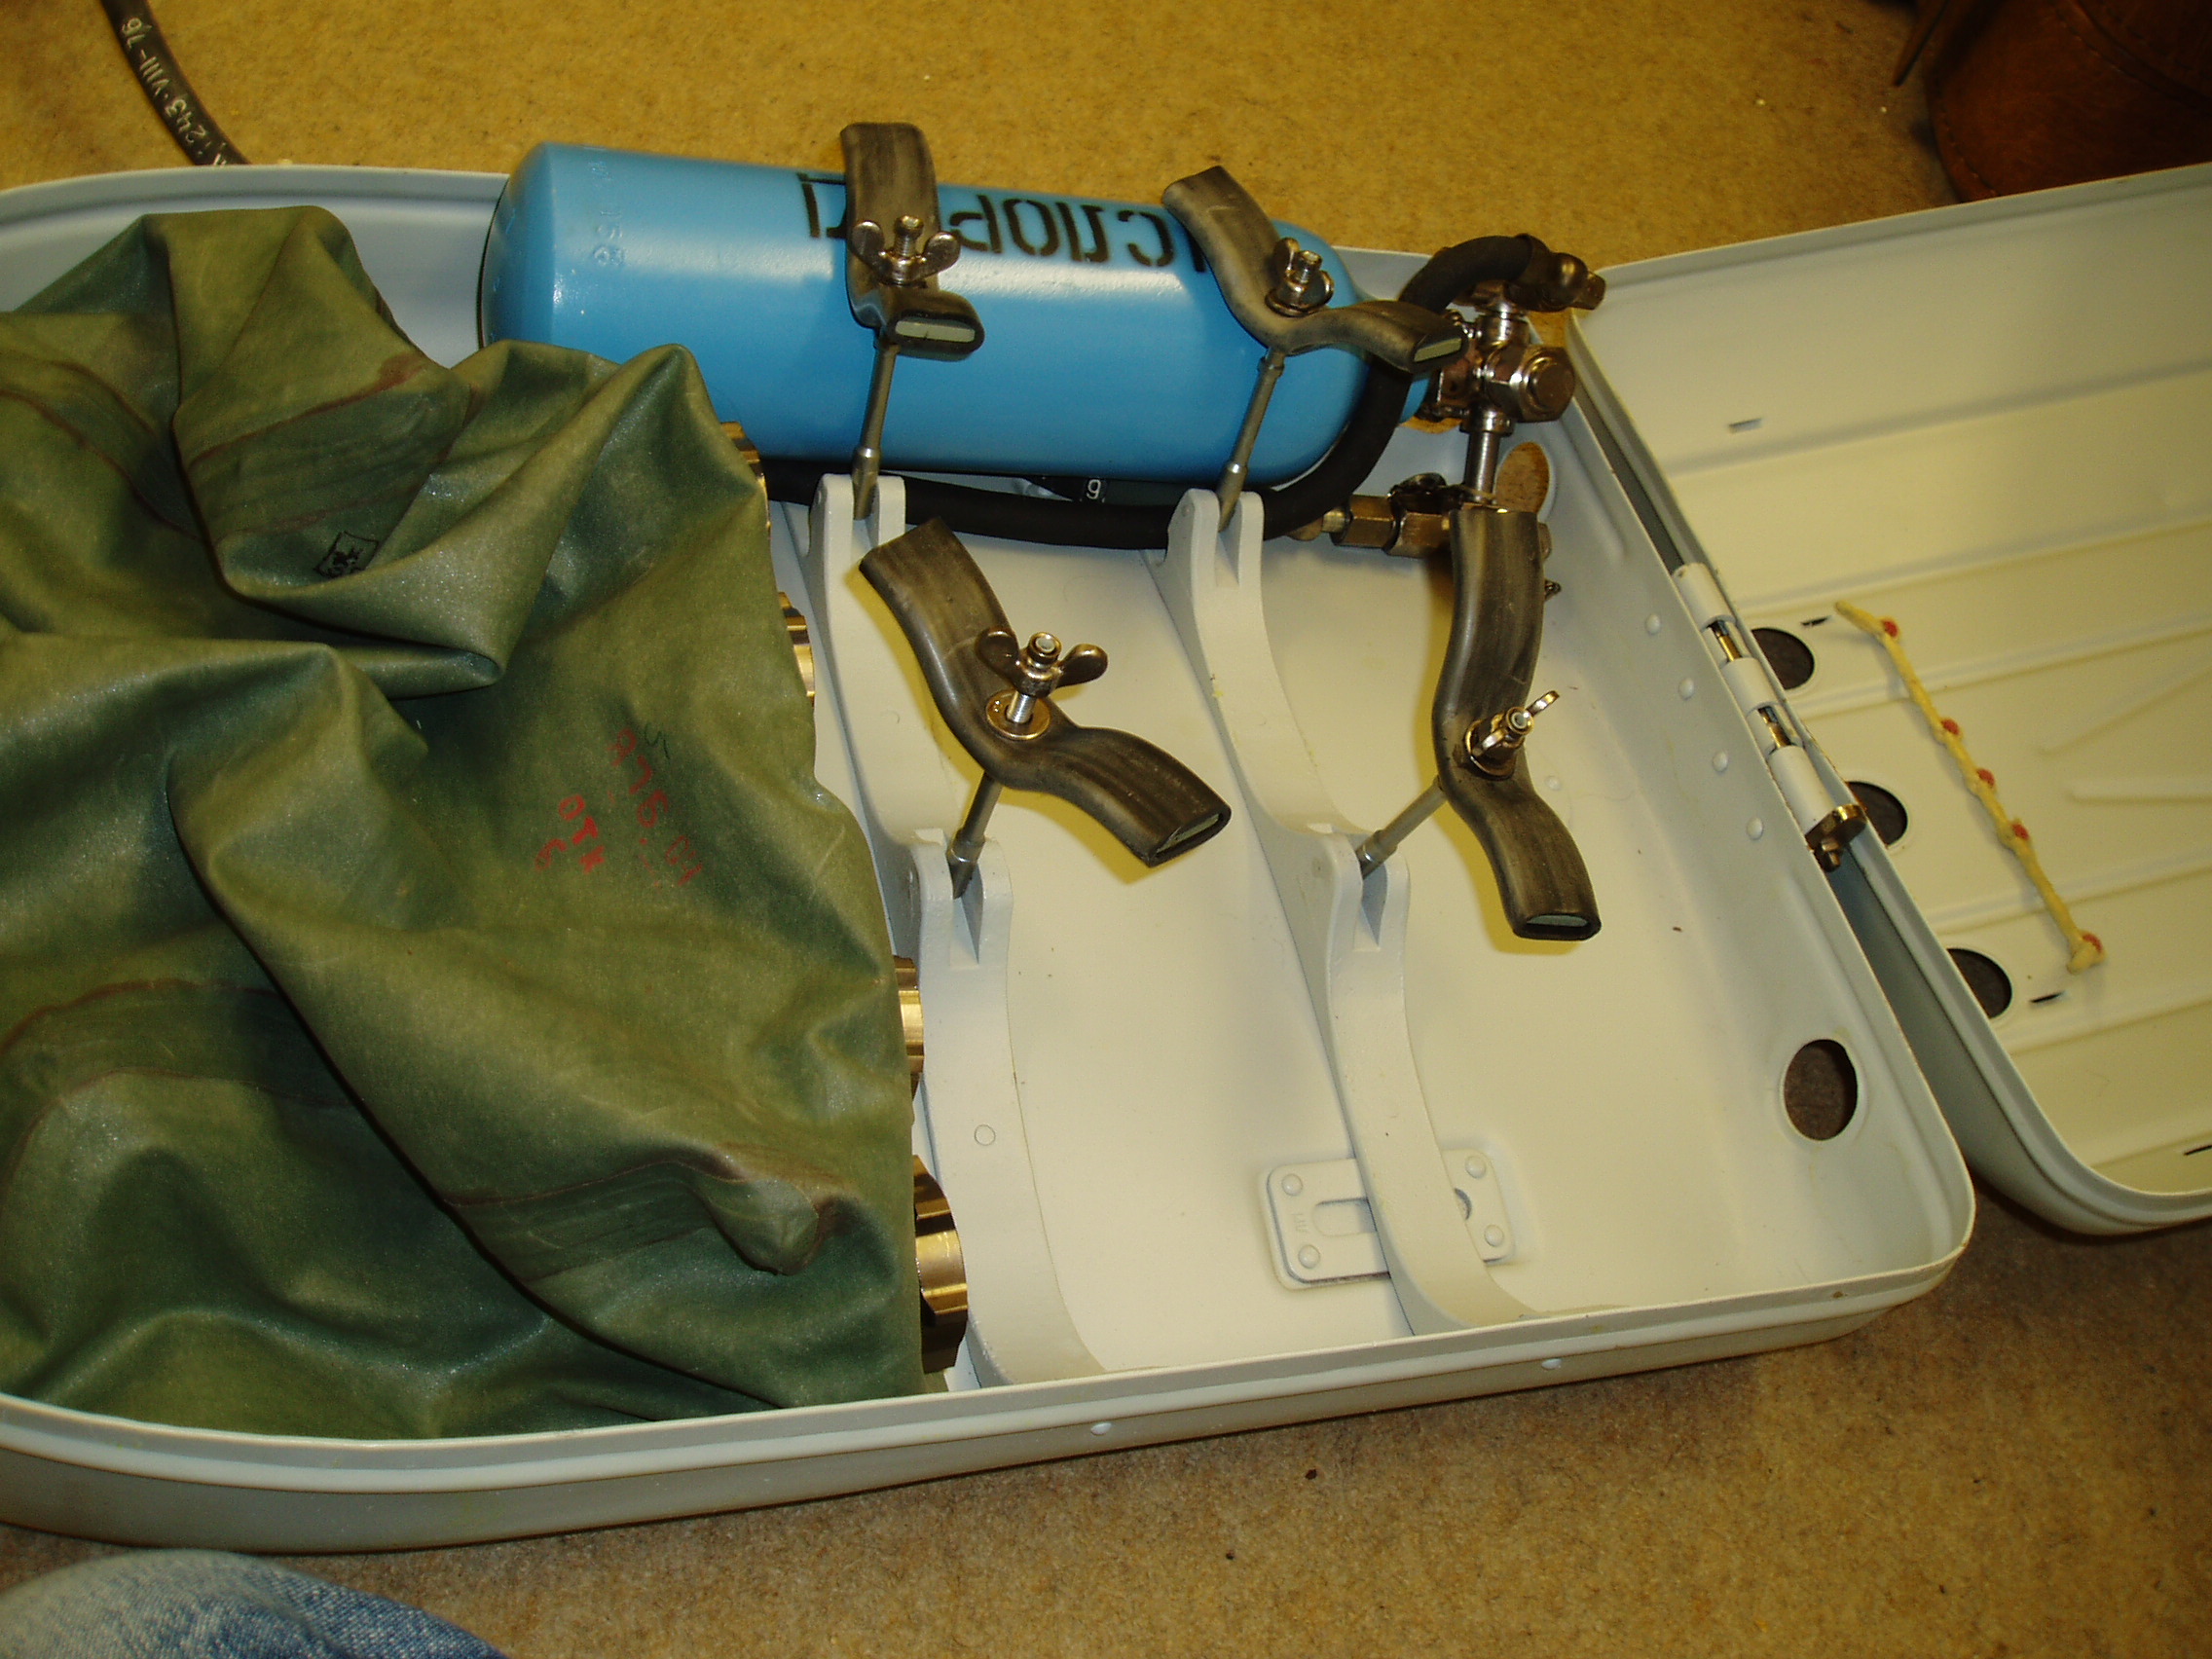
Underneath the rebreather are a spare pair of scrubber canisters and a second
oxygen tank complete with first stage, valve, contents gauge. There is also a
set of tools and a big pile of replacement parts.
The scrubbers and the tank in the box as seen here are the spares as there are
units already installed in the rebreather shell. Most parts of the system come
packed in paper and I removed some before I took these pictures. That is what
is stuffed at the right hand end of the case. I also unwrapped the spare parts
and seals and put them all in resealable plastic bags so I could keep
track.
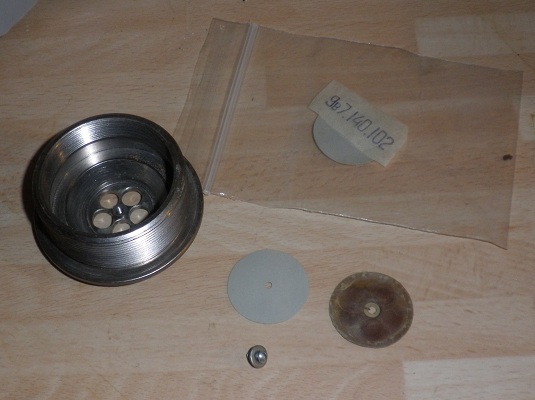
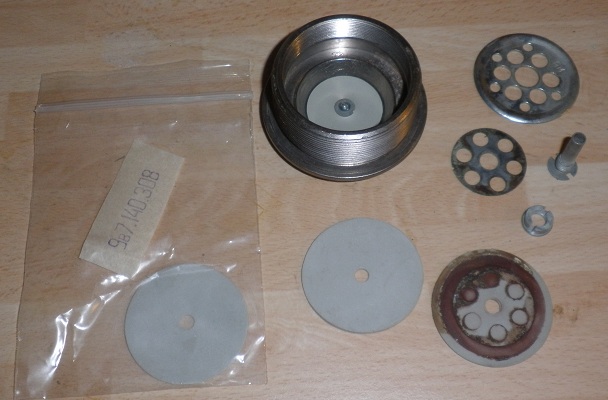
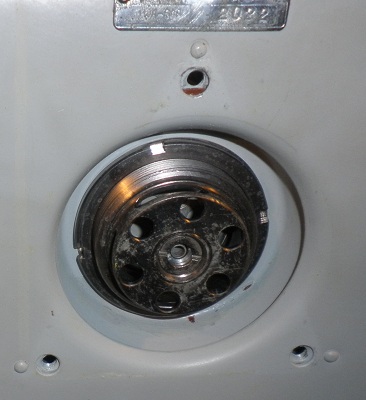
The scrubbers are axial flow units. They are filled through a screw plug at the
bottom and flow gas through the ports at the top. They are symmetrical so they
could be installed either way round but the two units when I received it were
mounted with the seam on the top so the exhale side feeds down to the bottom of
the stack and the scrubbed gas leaves from the top. This seems to contradict
the diagram. The words ВДОХ and
ВДЫОХ probably tell me that but four different
on-line translators convert them to English as 'Breath' and 'Vdyoh' but if
Vdyoh is English it's not any English I'm familiar with so far.
Anyway ВДЫОХ feeds into the top of the scrubber
and so is the inlet and hence 'seam on top' does not match the diagrams. The
counterlung sets the diagram as being seen from above when placed on a bench
with the back off.
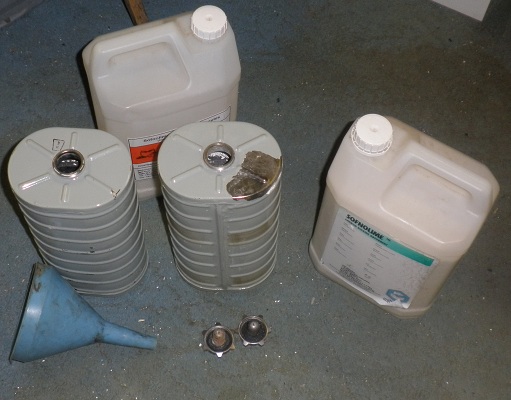
The Scrubbers weigh 1.6Kgs each and I managed to jiggle 1.95Kgs of 1.0 to 2.5mm
grade Inspiration Sofnolime into each of them. Since the Inspiration takes
about 3Kgs perhaps the quoted 4-8 hour duration isn't too far fetched. Getting
slightly soggy sofnolime out through the little hole in the bottom is possible
but takes a while.
The tanks have various stamps and appear to be Aluminium. Two values of 200Att
and 300Att I guess are working and test pressure, 1.73Kt probably its weight (I
will check this) and 1.02 perhaps its capacity. At 31cms end to end I could
believe more than one litre but it will do for a first guess.
КИСЛОРОД (Kaislorod), by the
way, just means Oxygen.
I'm never going to find anywhere mad enough to test these so obviously I'm
going to be home filling them. To say they are a little out of test might be
understating things but at least they must be clean. Nothing has touched them
in decades.
Incidentally I have not discovered anything yet, except the spanners in the
toolkit, that a magnet sticks too. Since it is made mostly of conductive
aluminium it is not undetectable to active magnetic sensors but to passive
systems it should be virtually invisible.
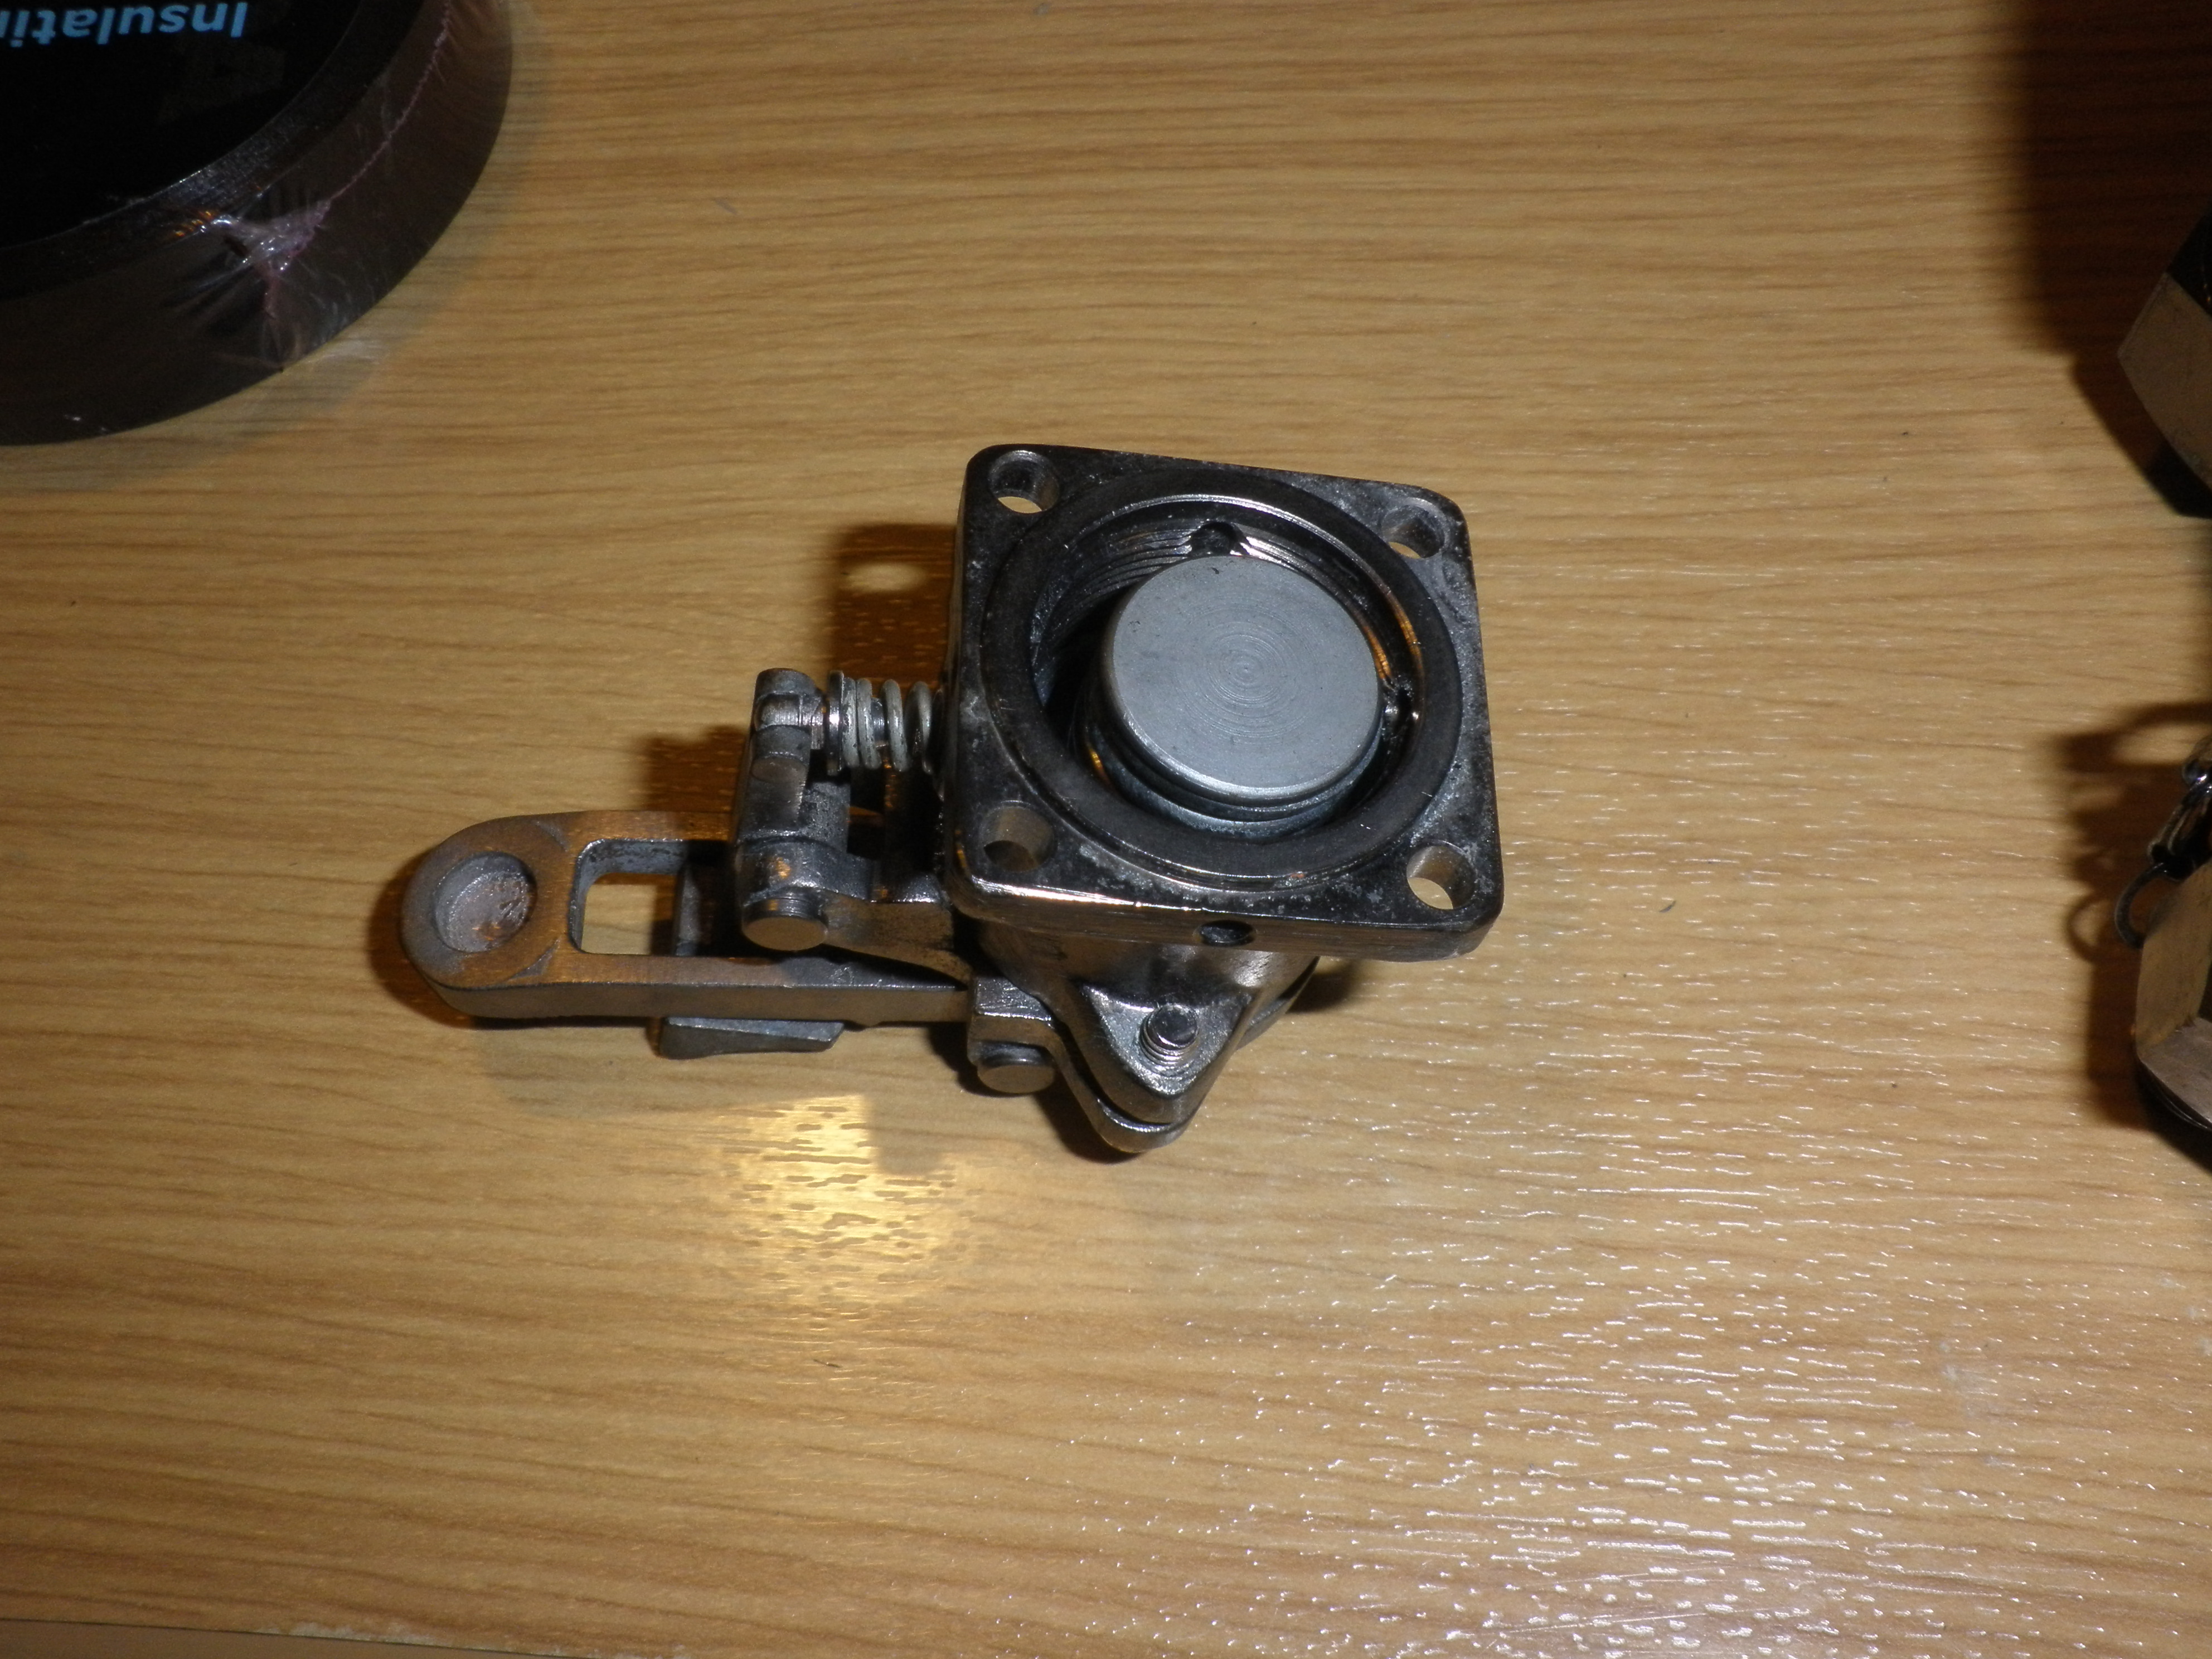
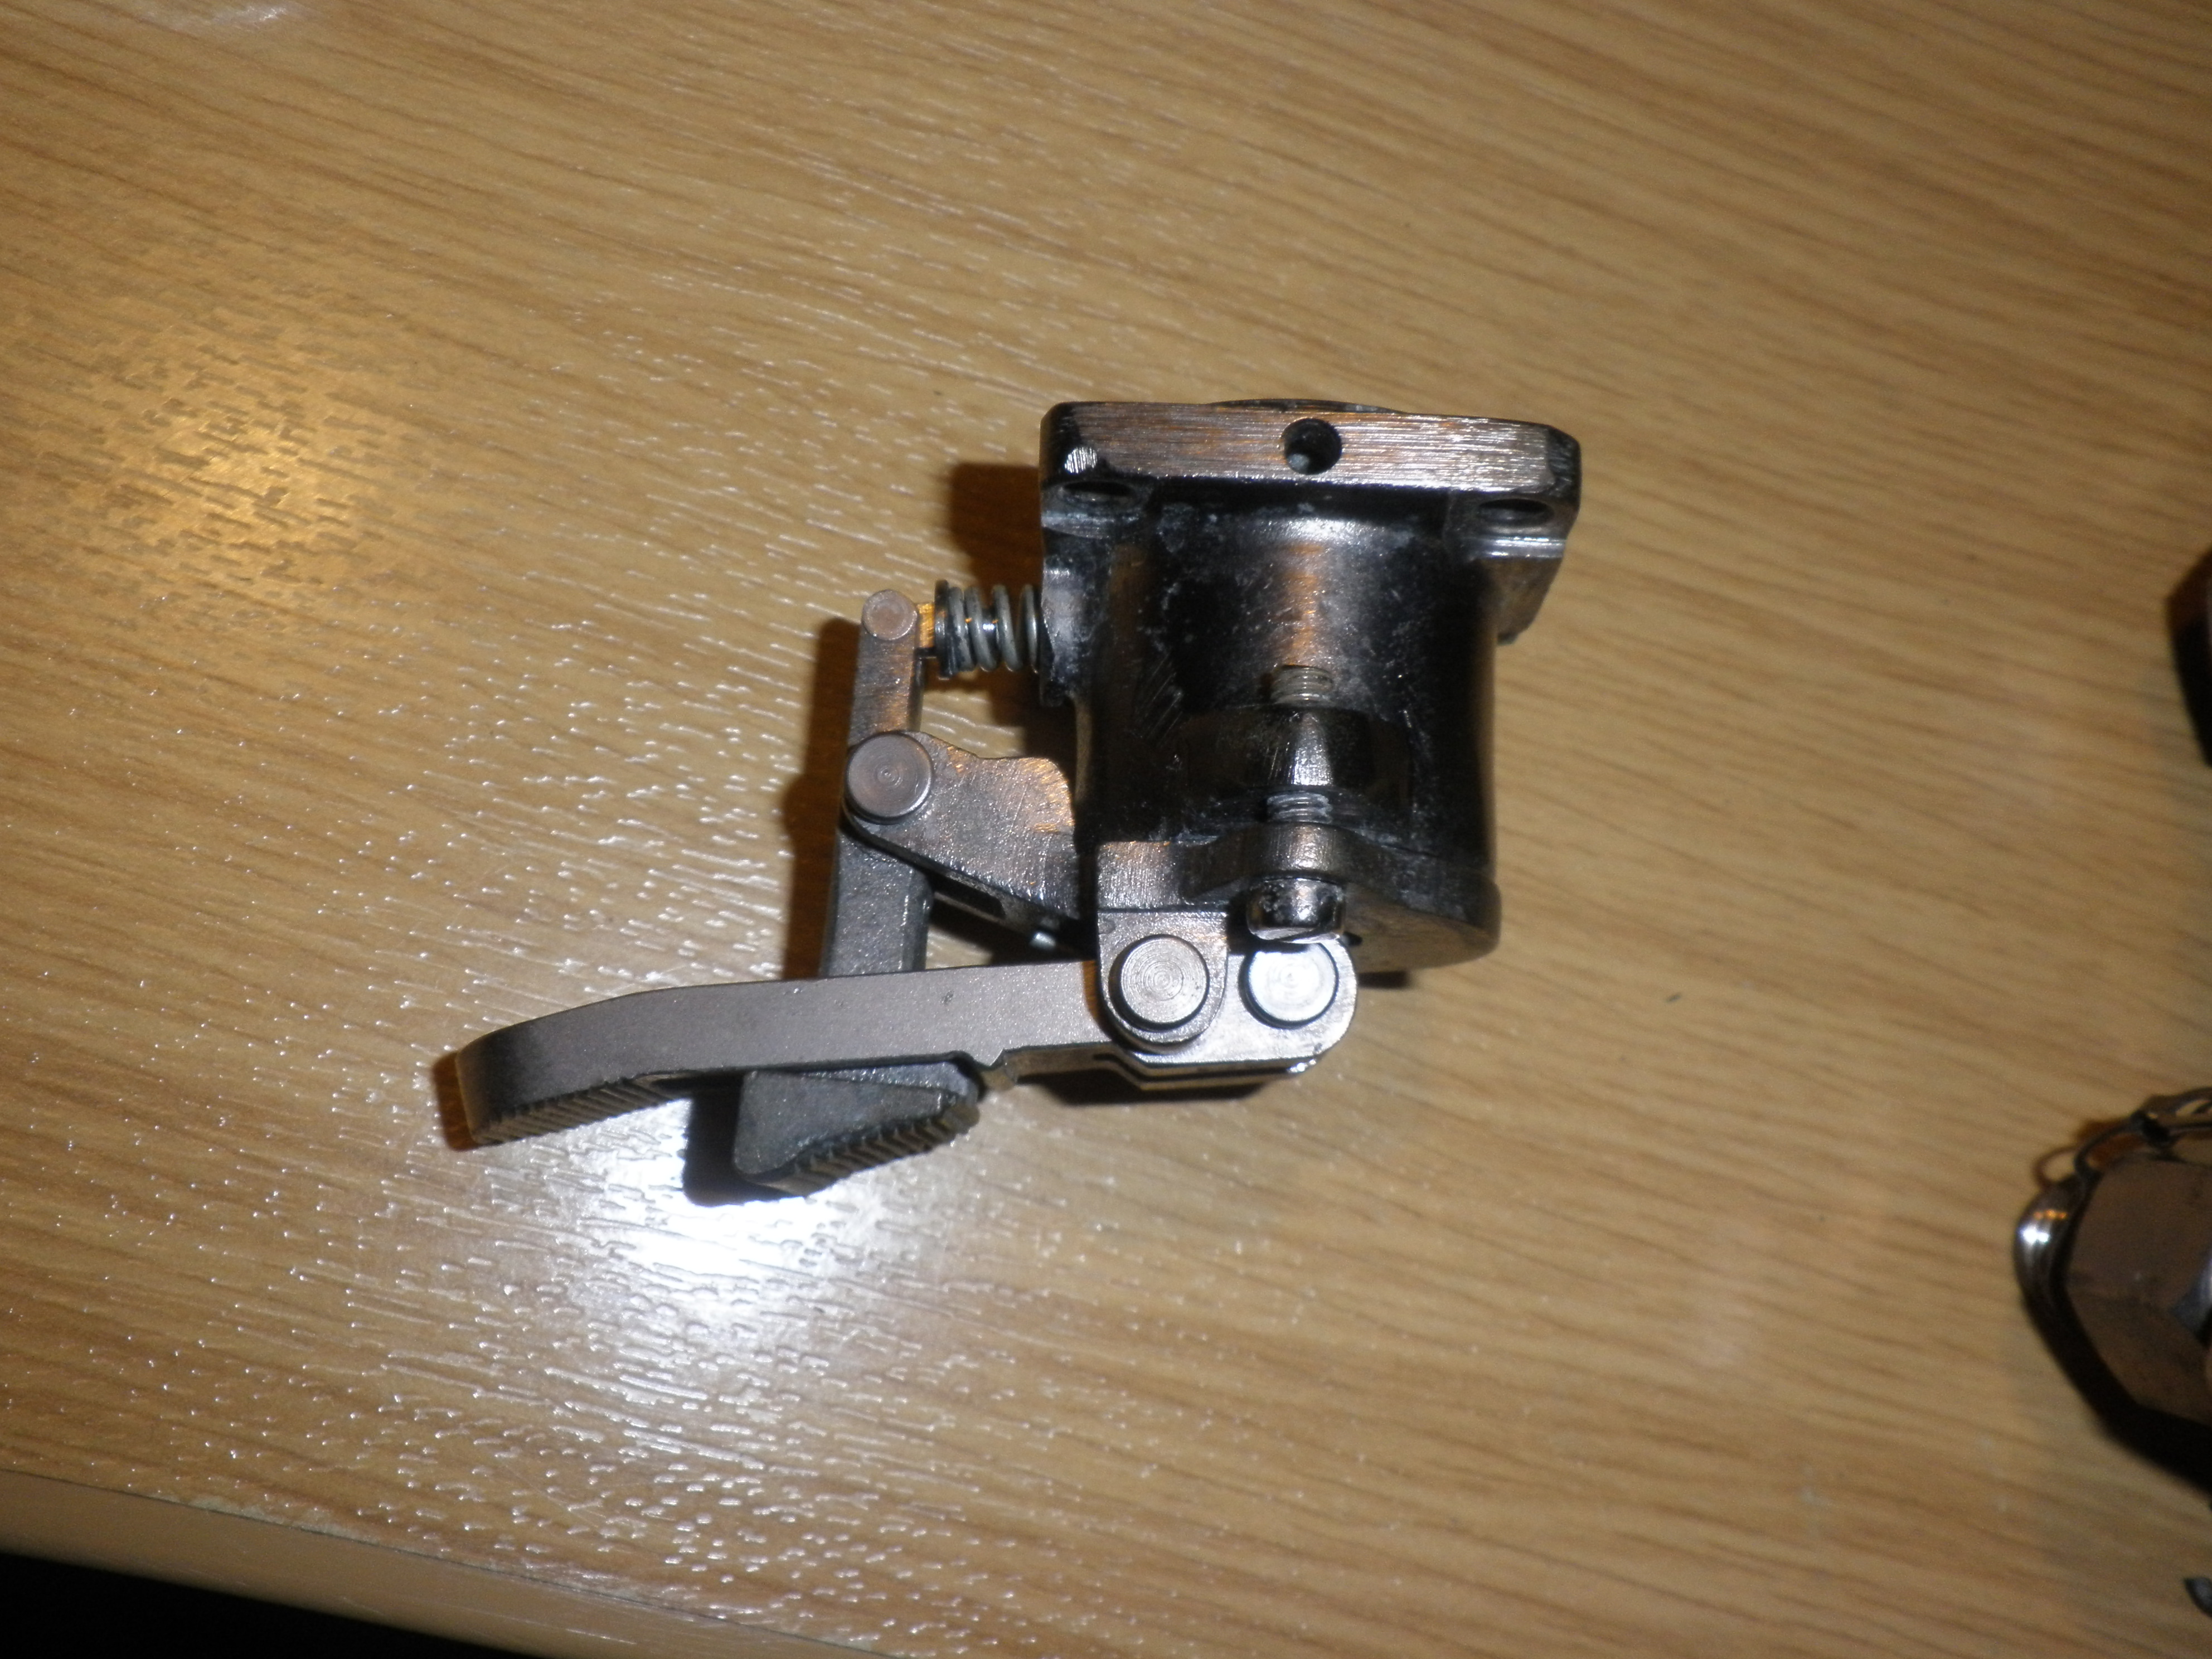
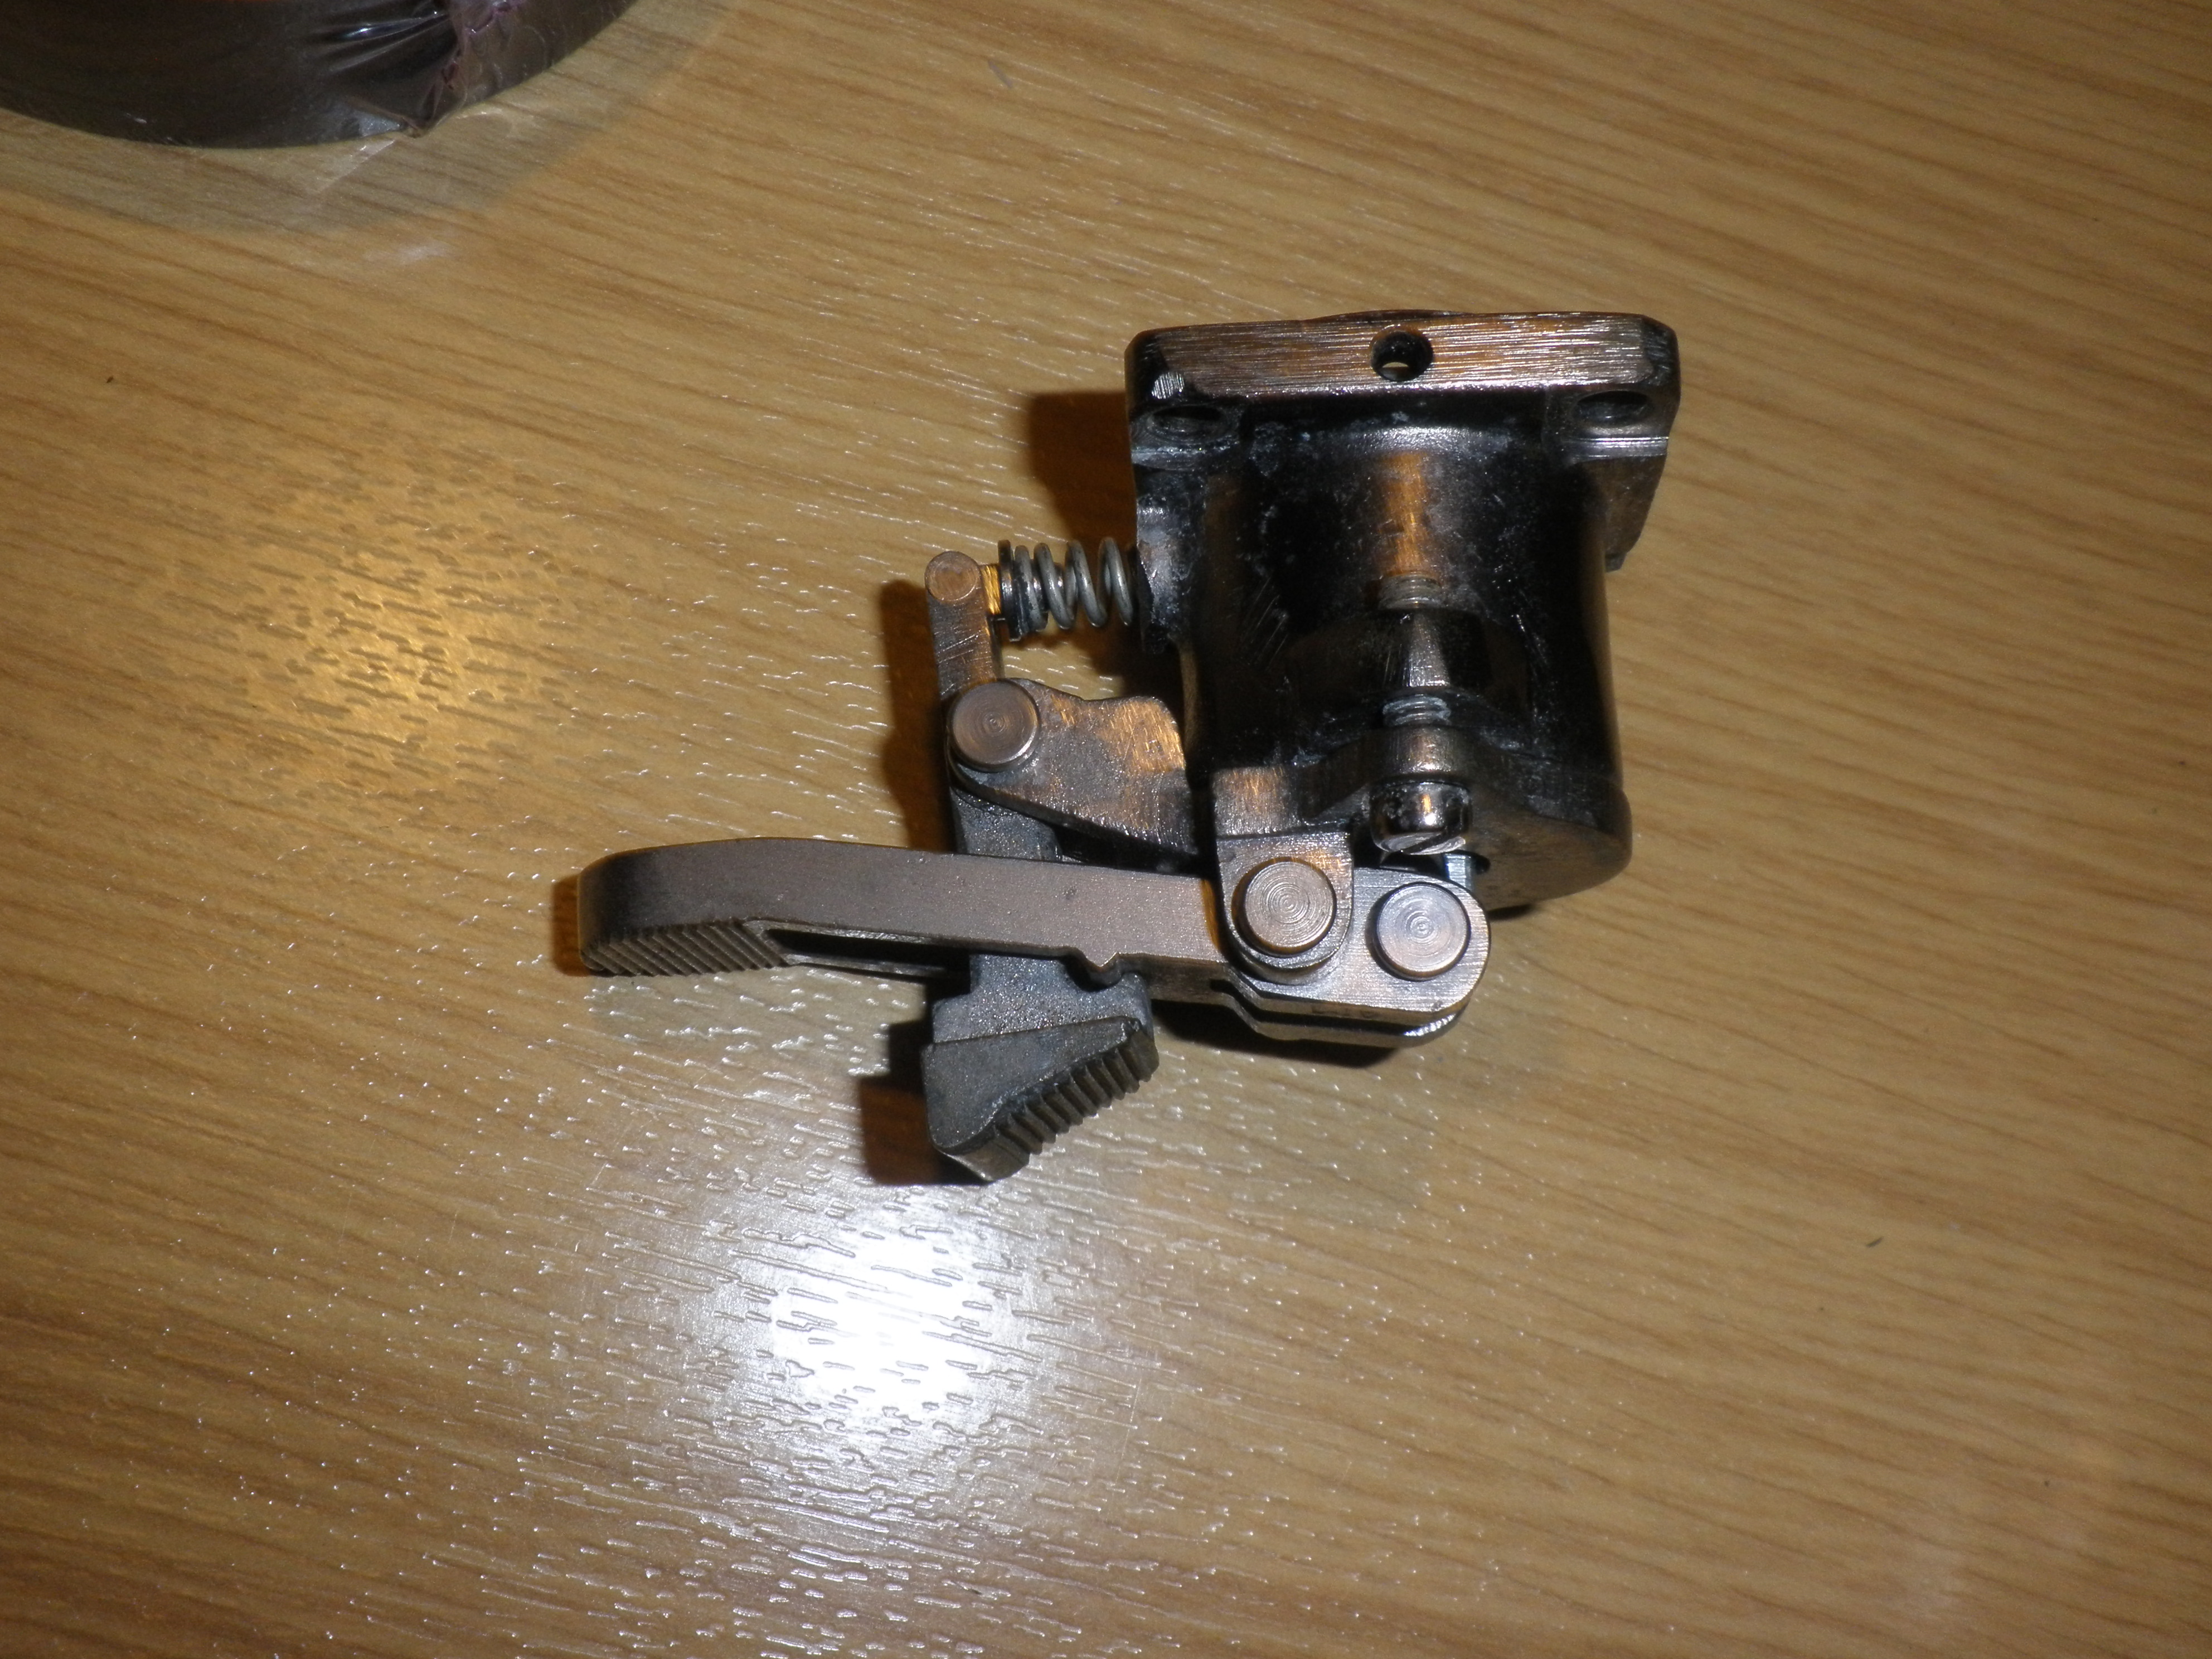
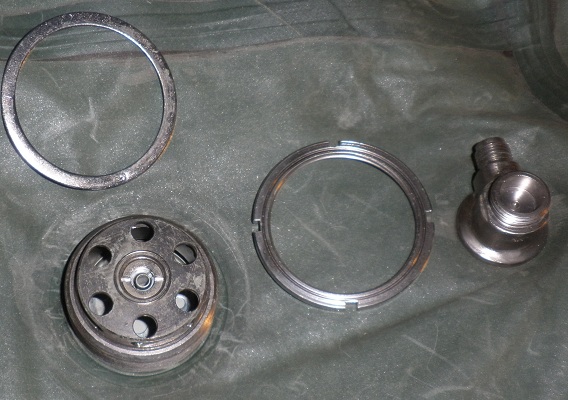
The valve is a combined first stage, over pressure valve, on/off switch and
fill adapter with a high pressure contents gauge take off. Incidentally it does
not come set up and ready to run. The installed valve seats gave in to the
unequal struggle years ago. It needs an overhaul before you fill it.
Push the lever down to switch off and the little thumb plate clicks forward. To
turn on press the lever to release the thumb plate, hold the plate back while
releasing the lever. It takes a very deliberate, but still one handed
operation to turn things on.
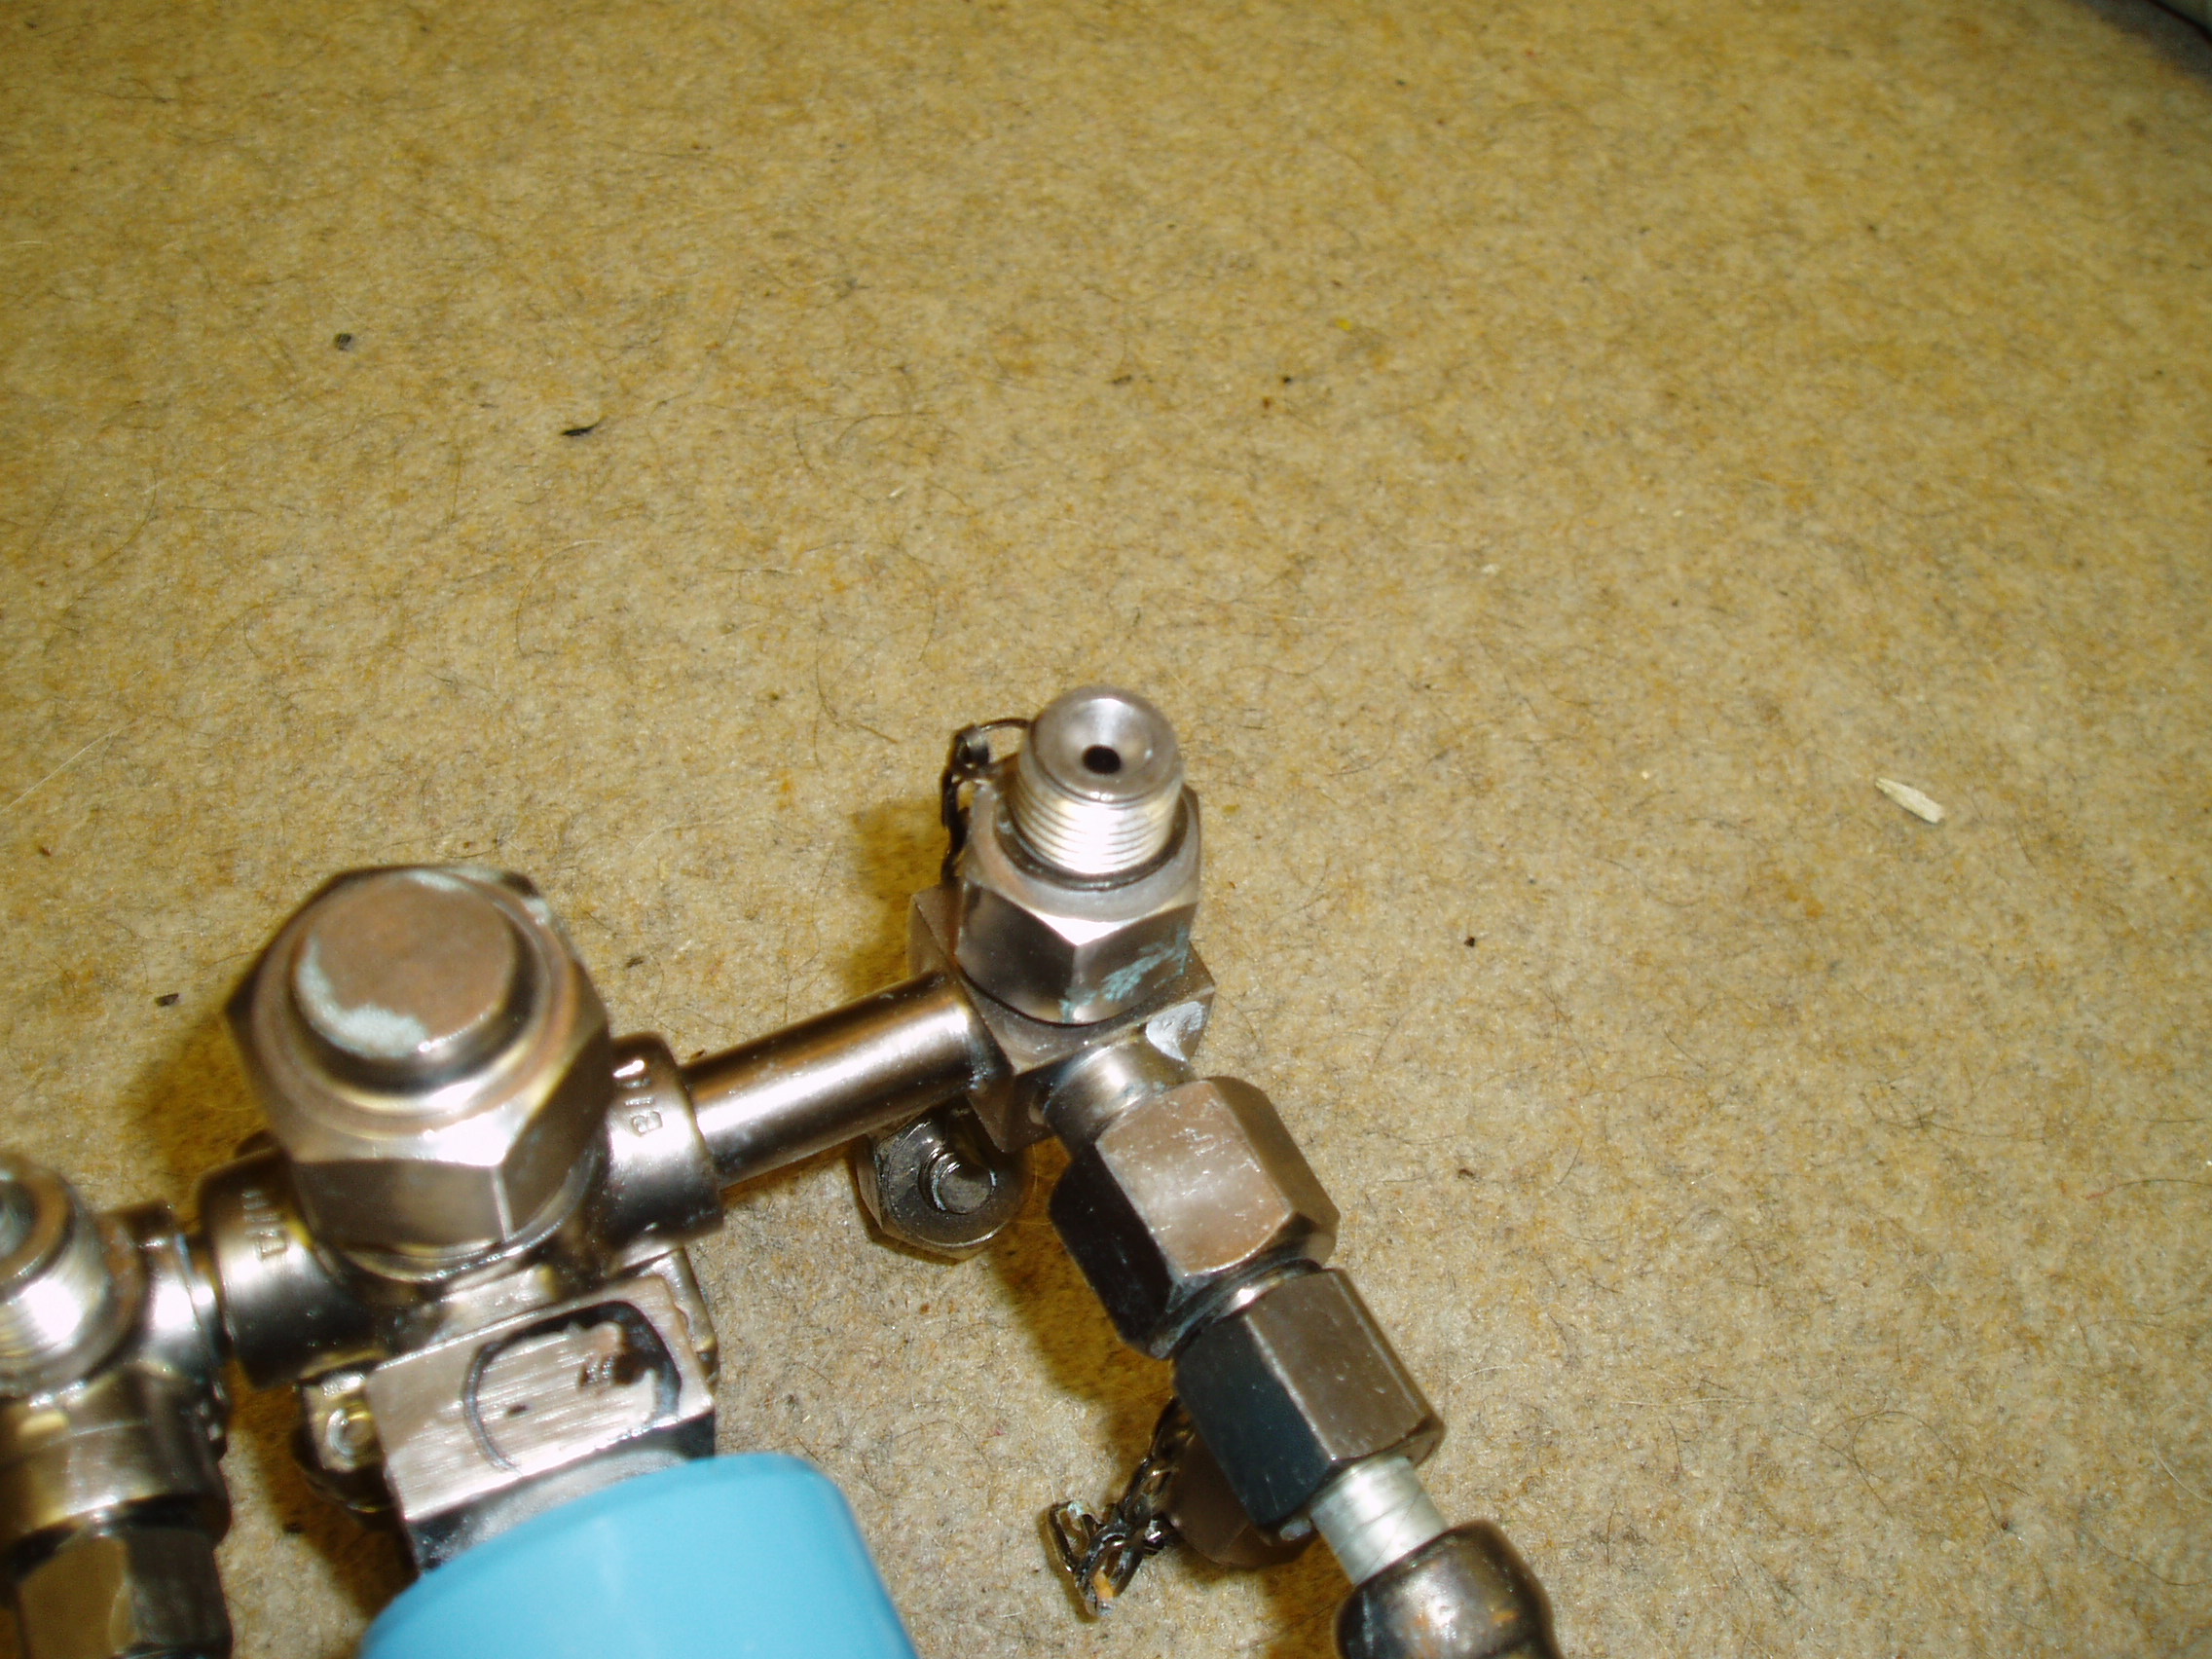
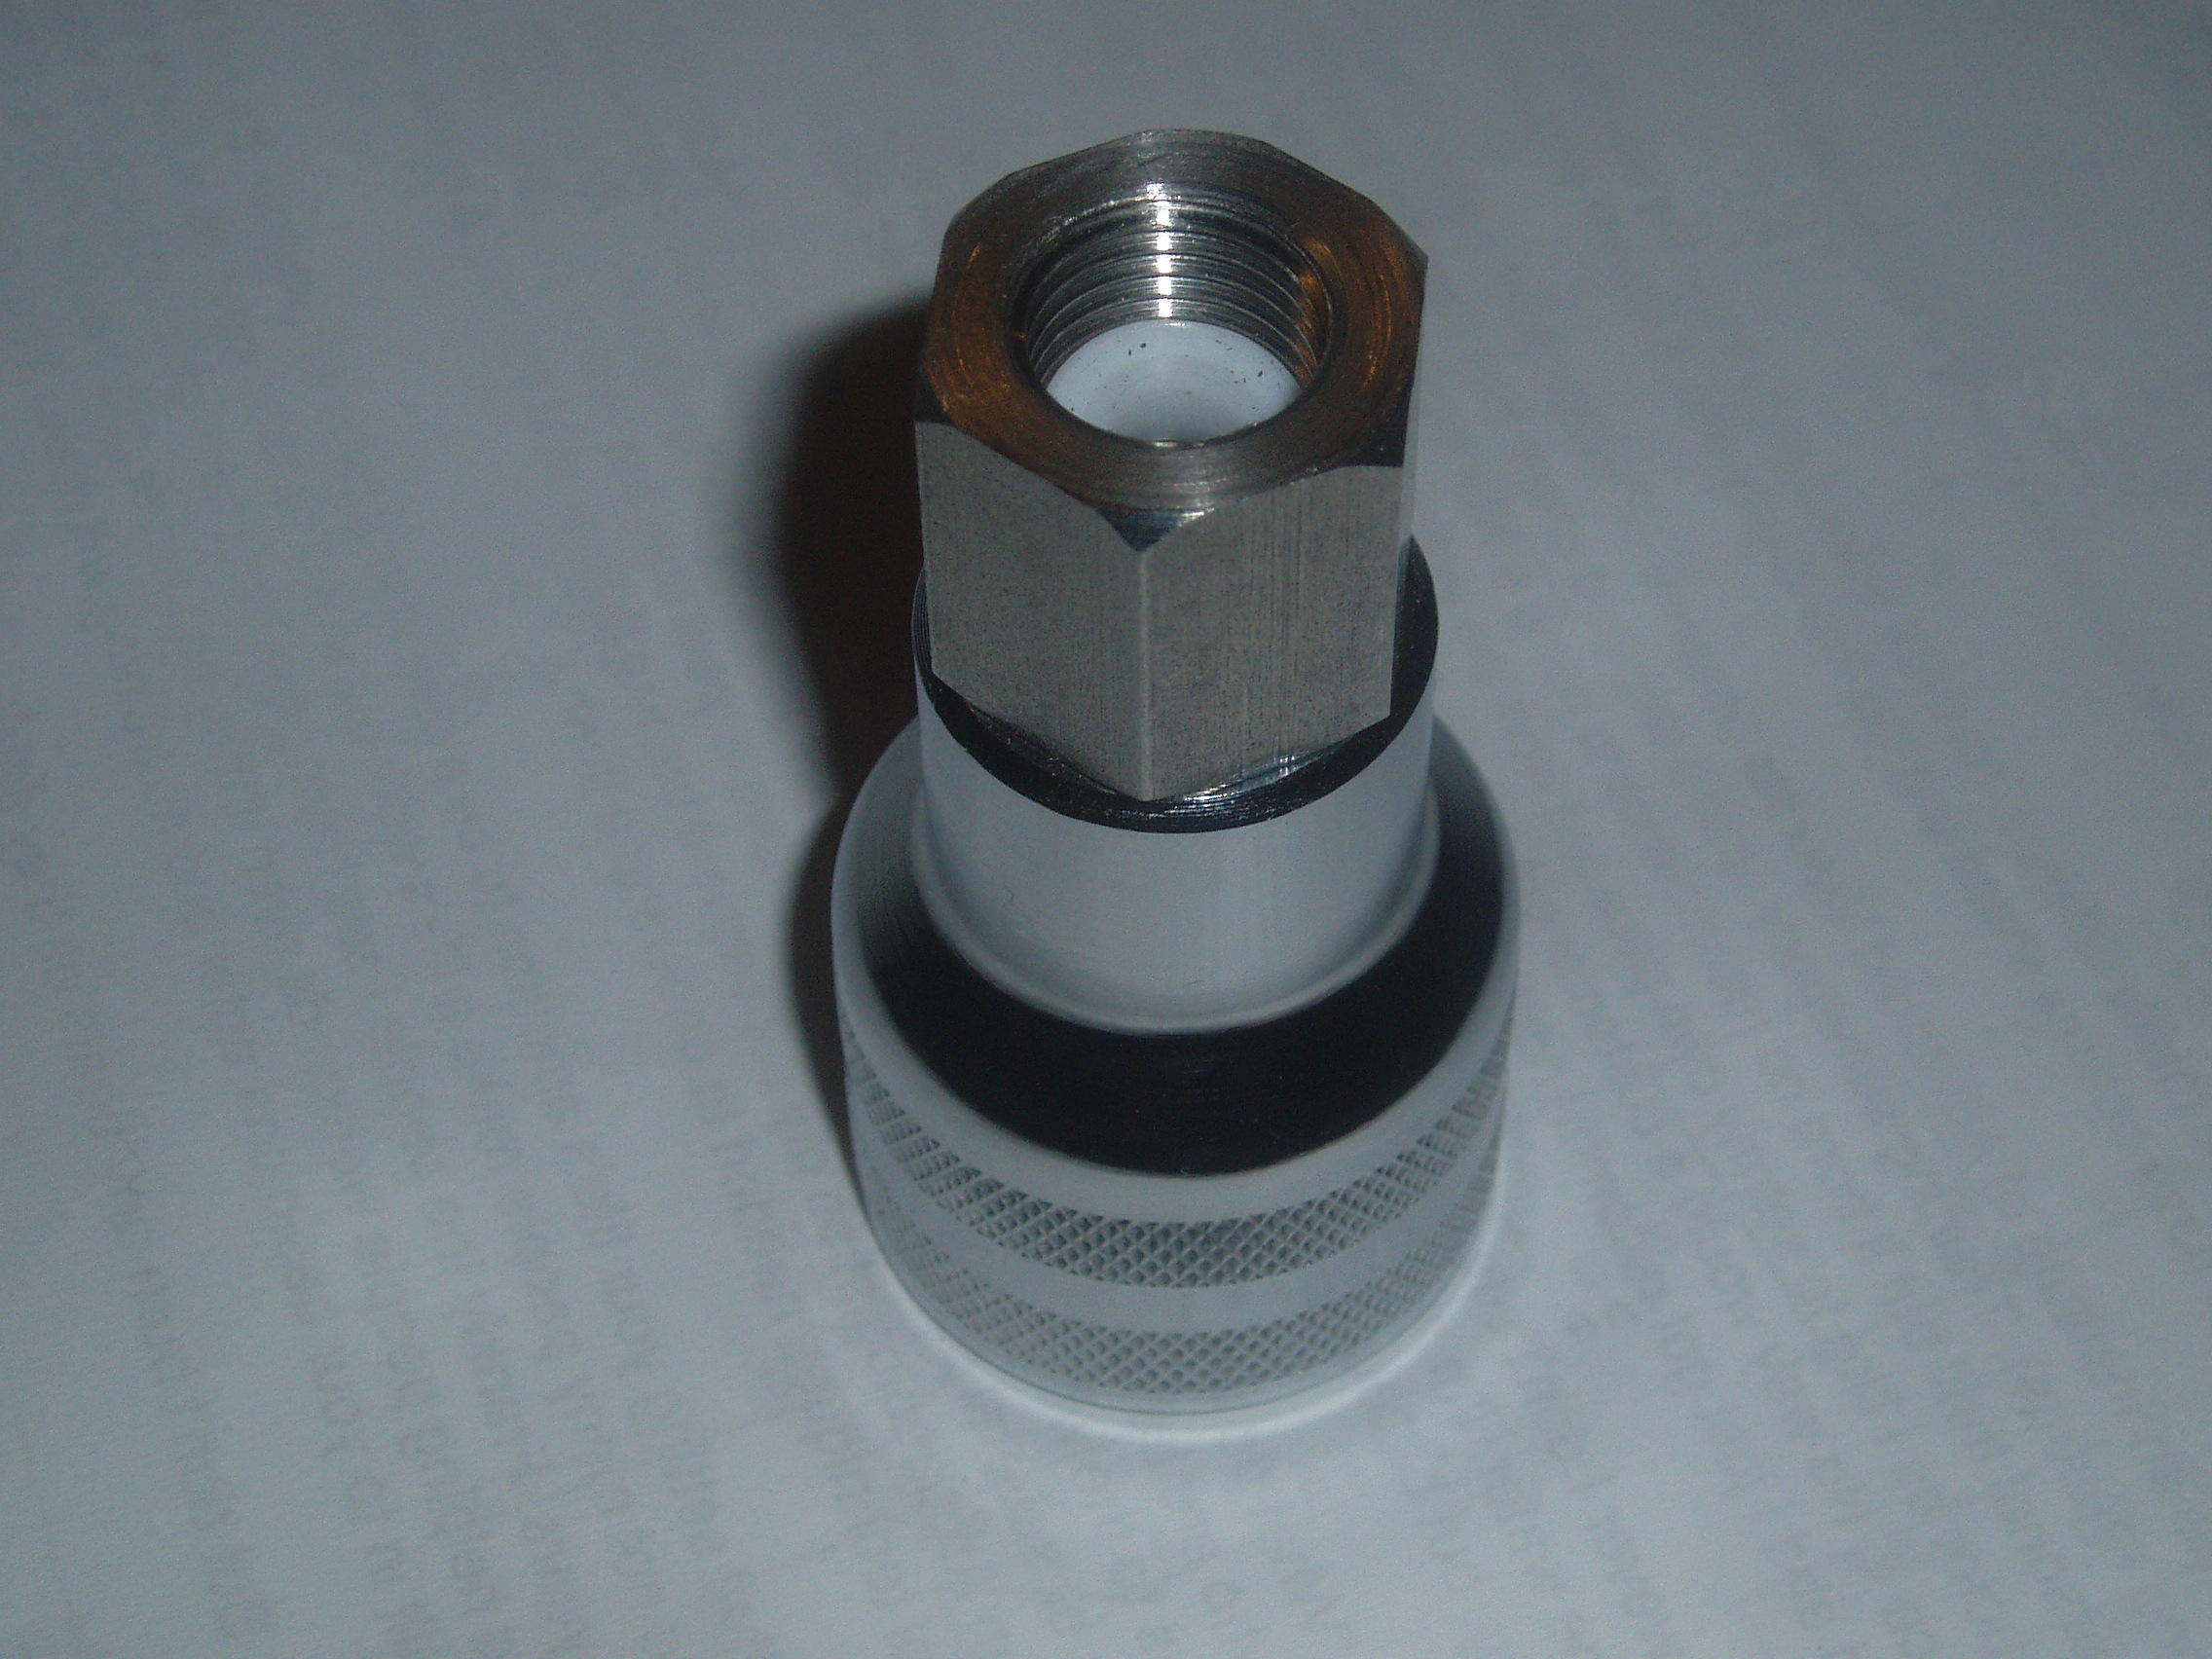
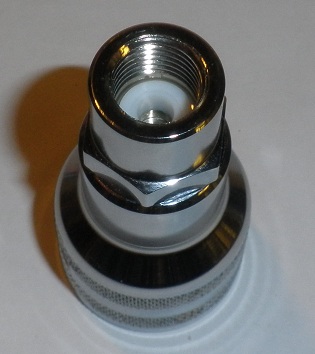
This is the filling point. It is a quarter inch BSP thread like so much scuba
gear world wide but not a standard shape. I sent one of the bits from the
spares kit to Subaqua Products
and, as usual, they fixed it for me. This is a 300bar DIN female, to match my
filing whips, with a quarter inch BSP female with a set of custom cut PTFE
washers down the bottom. They made me several washers.
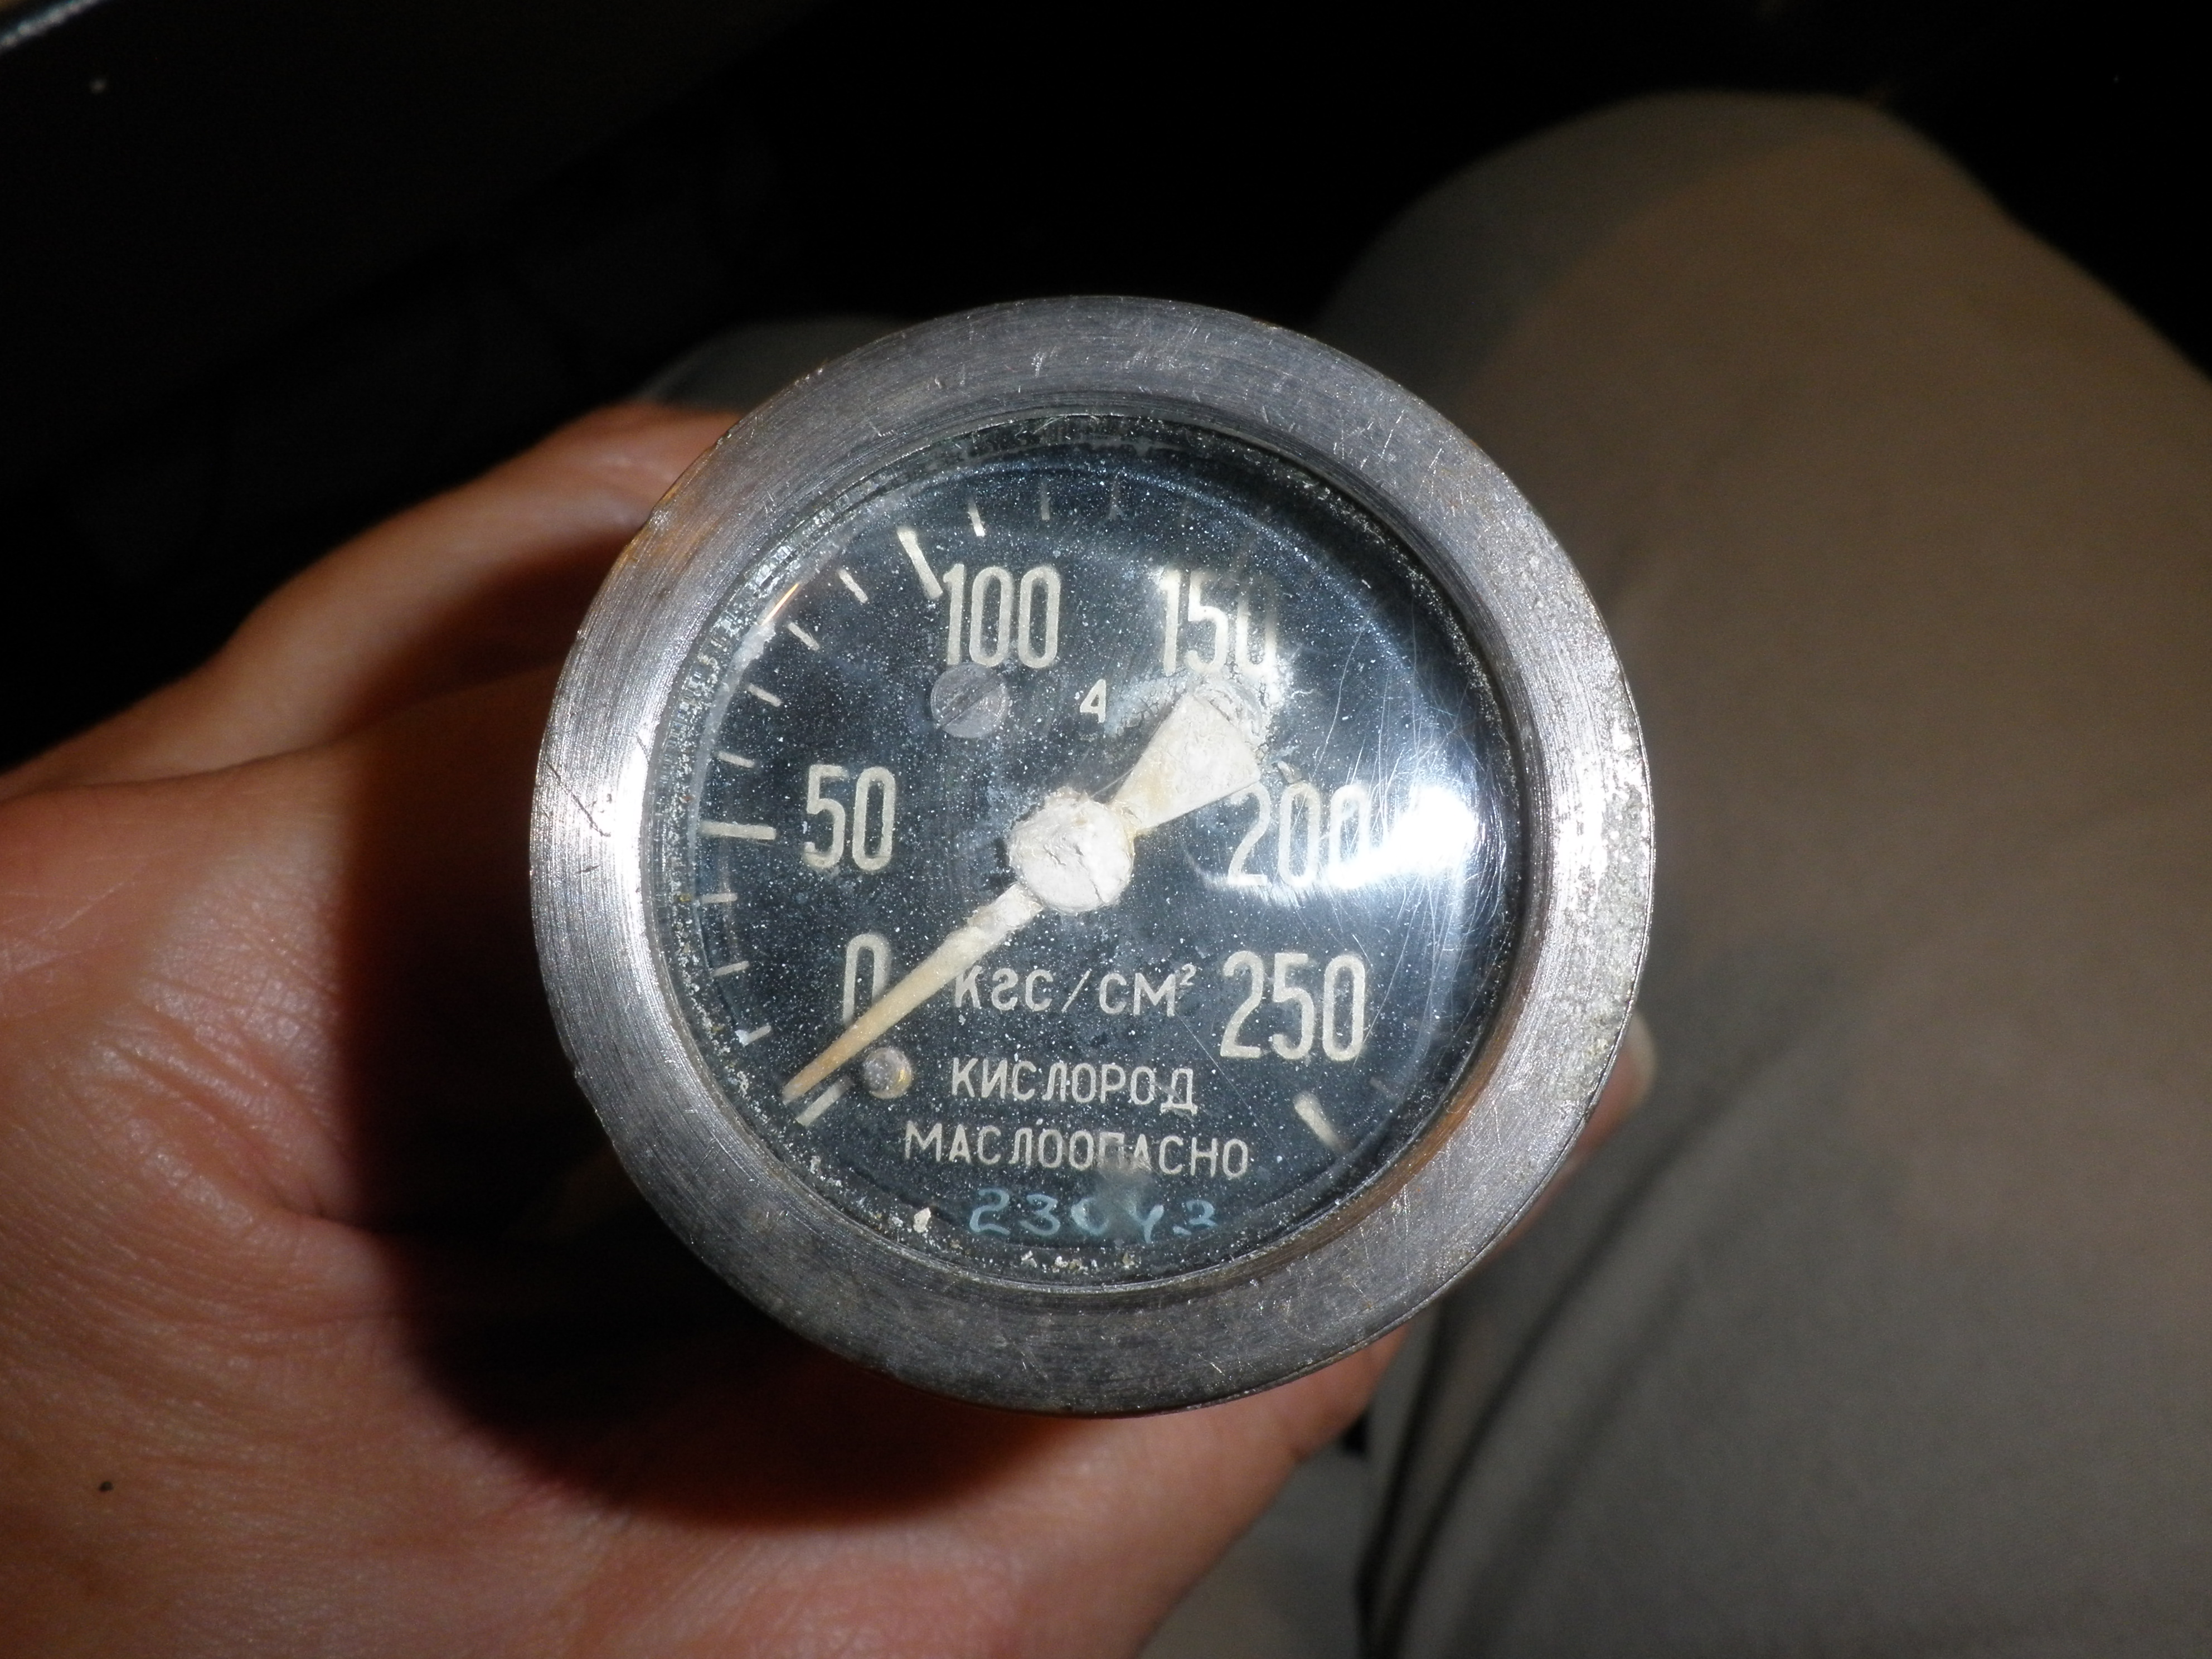
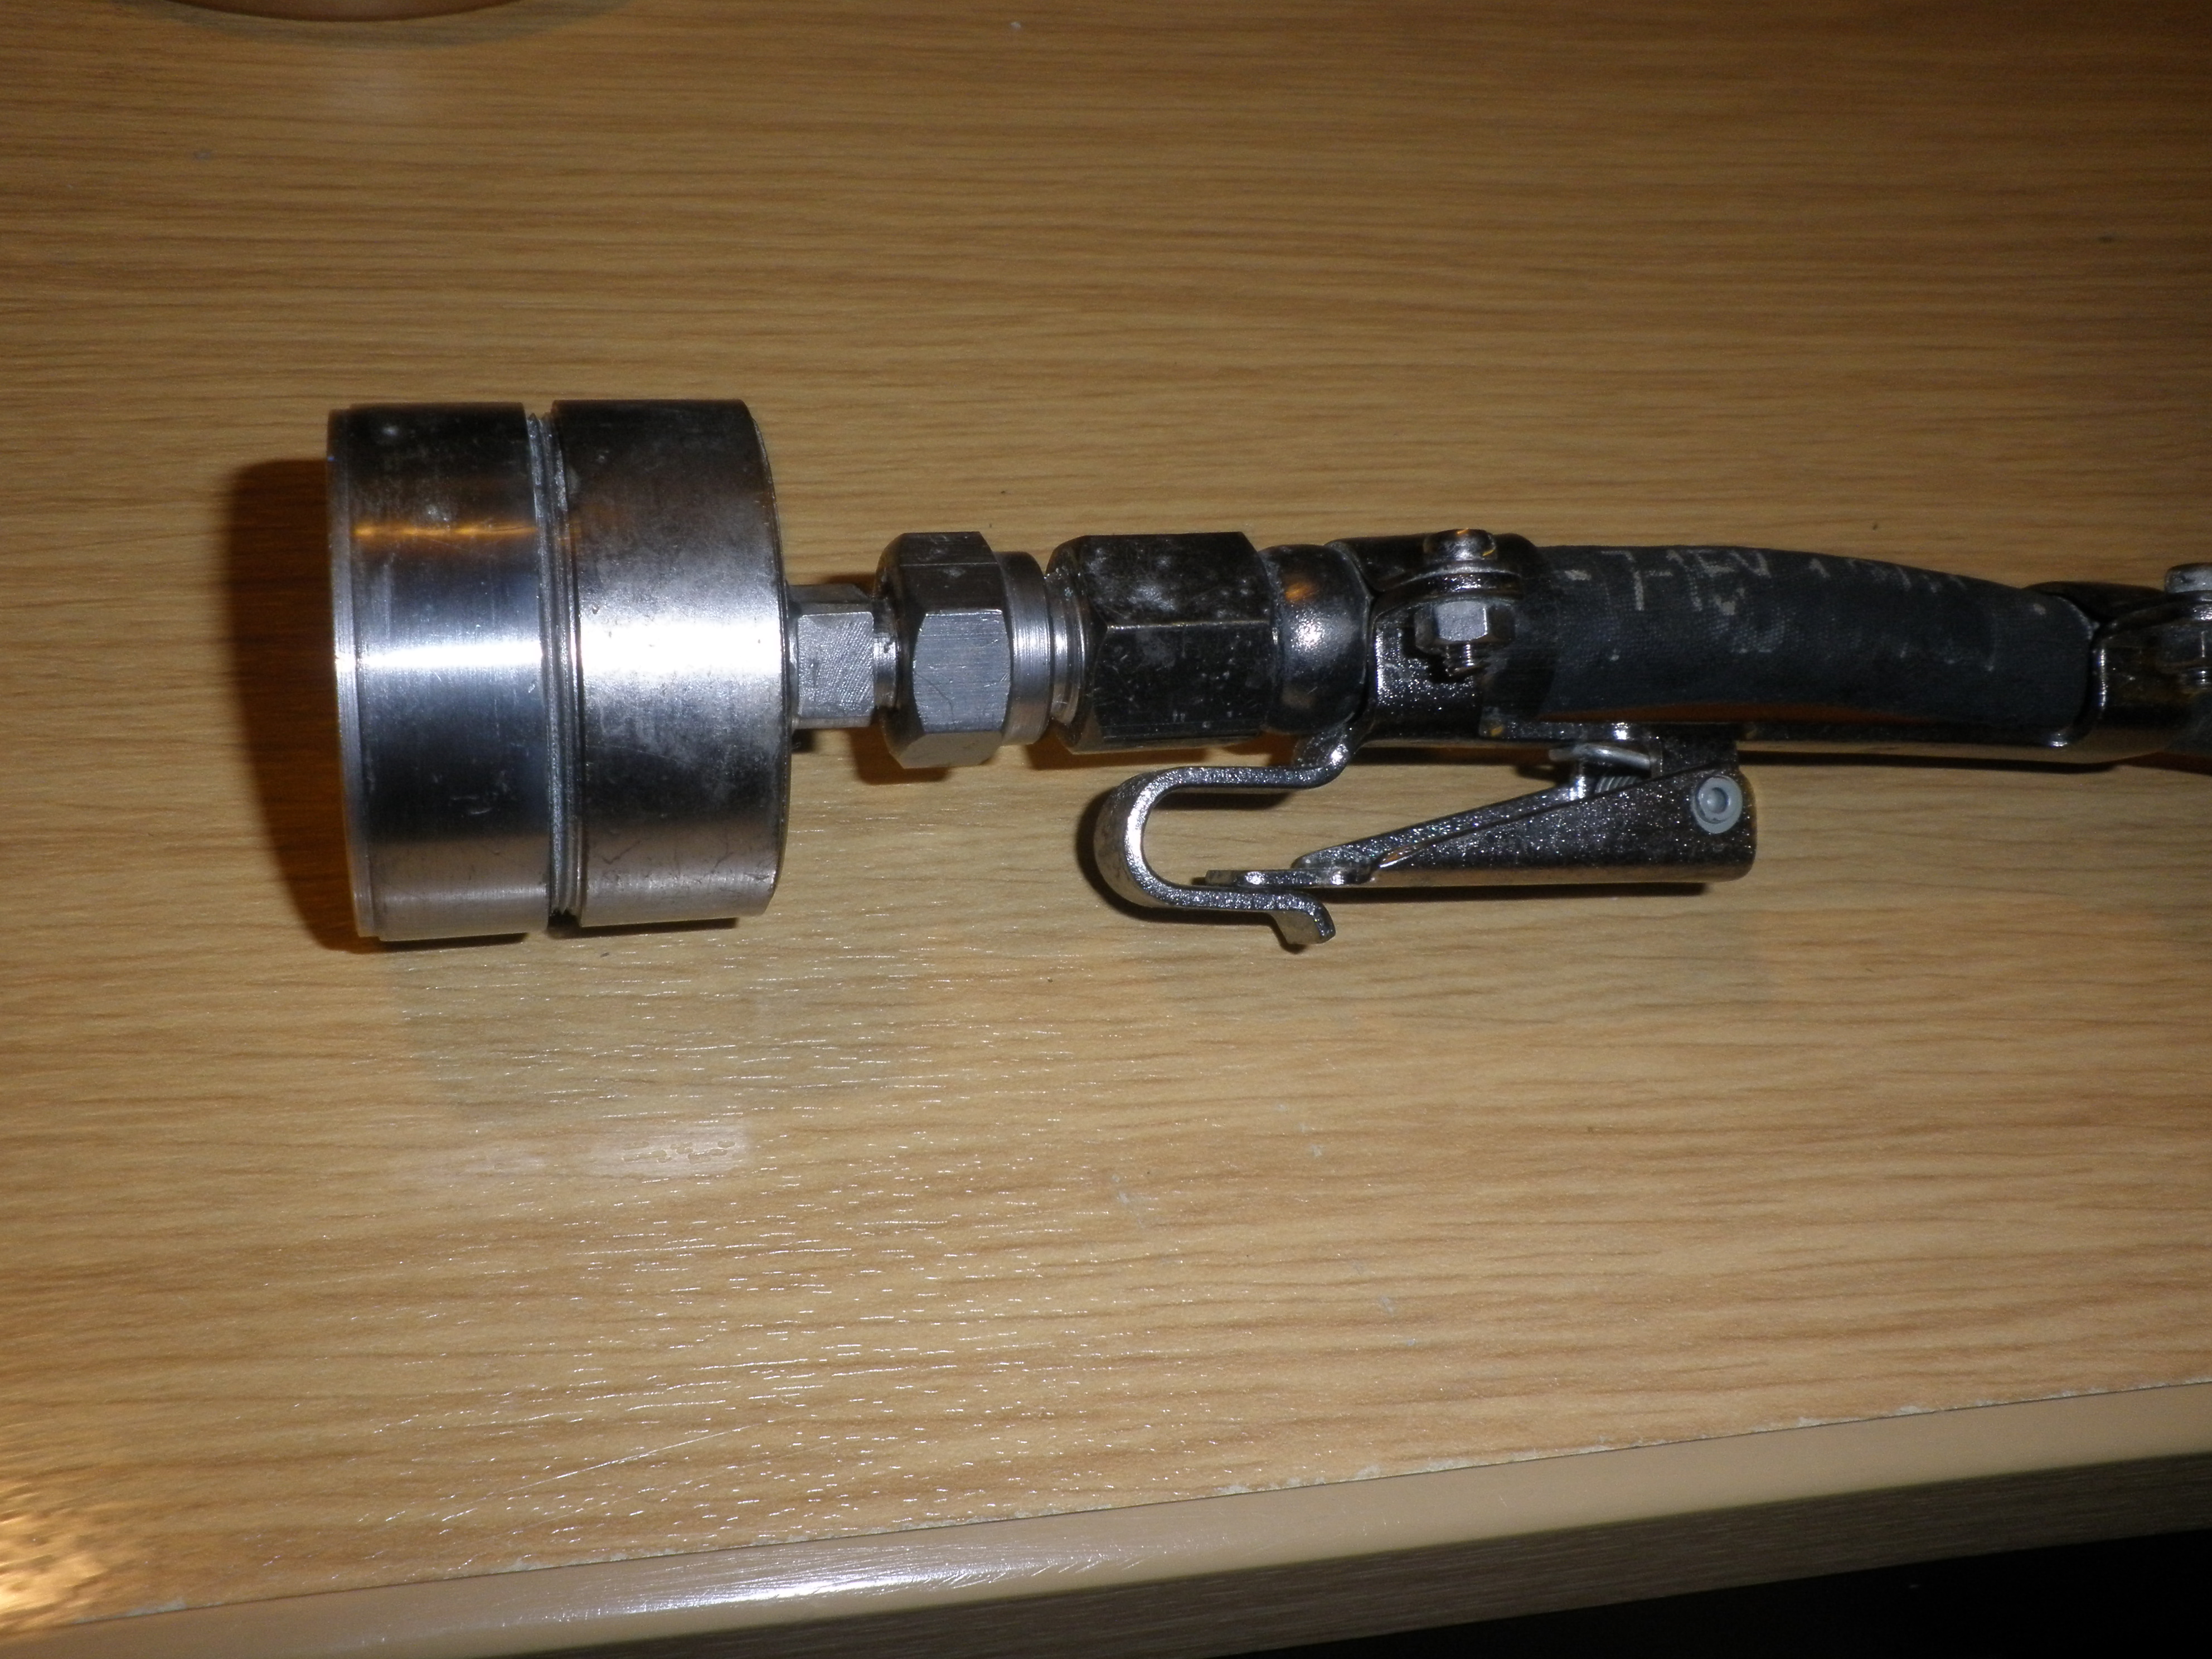
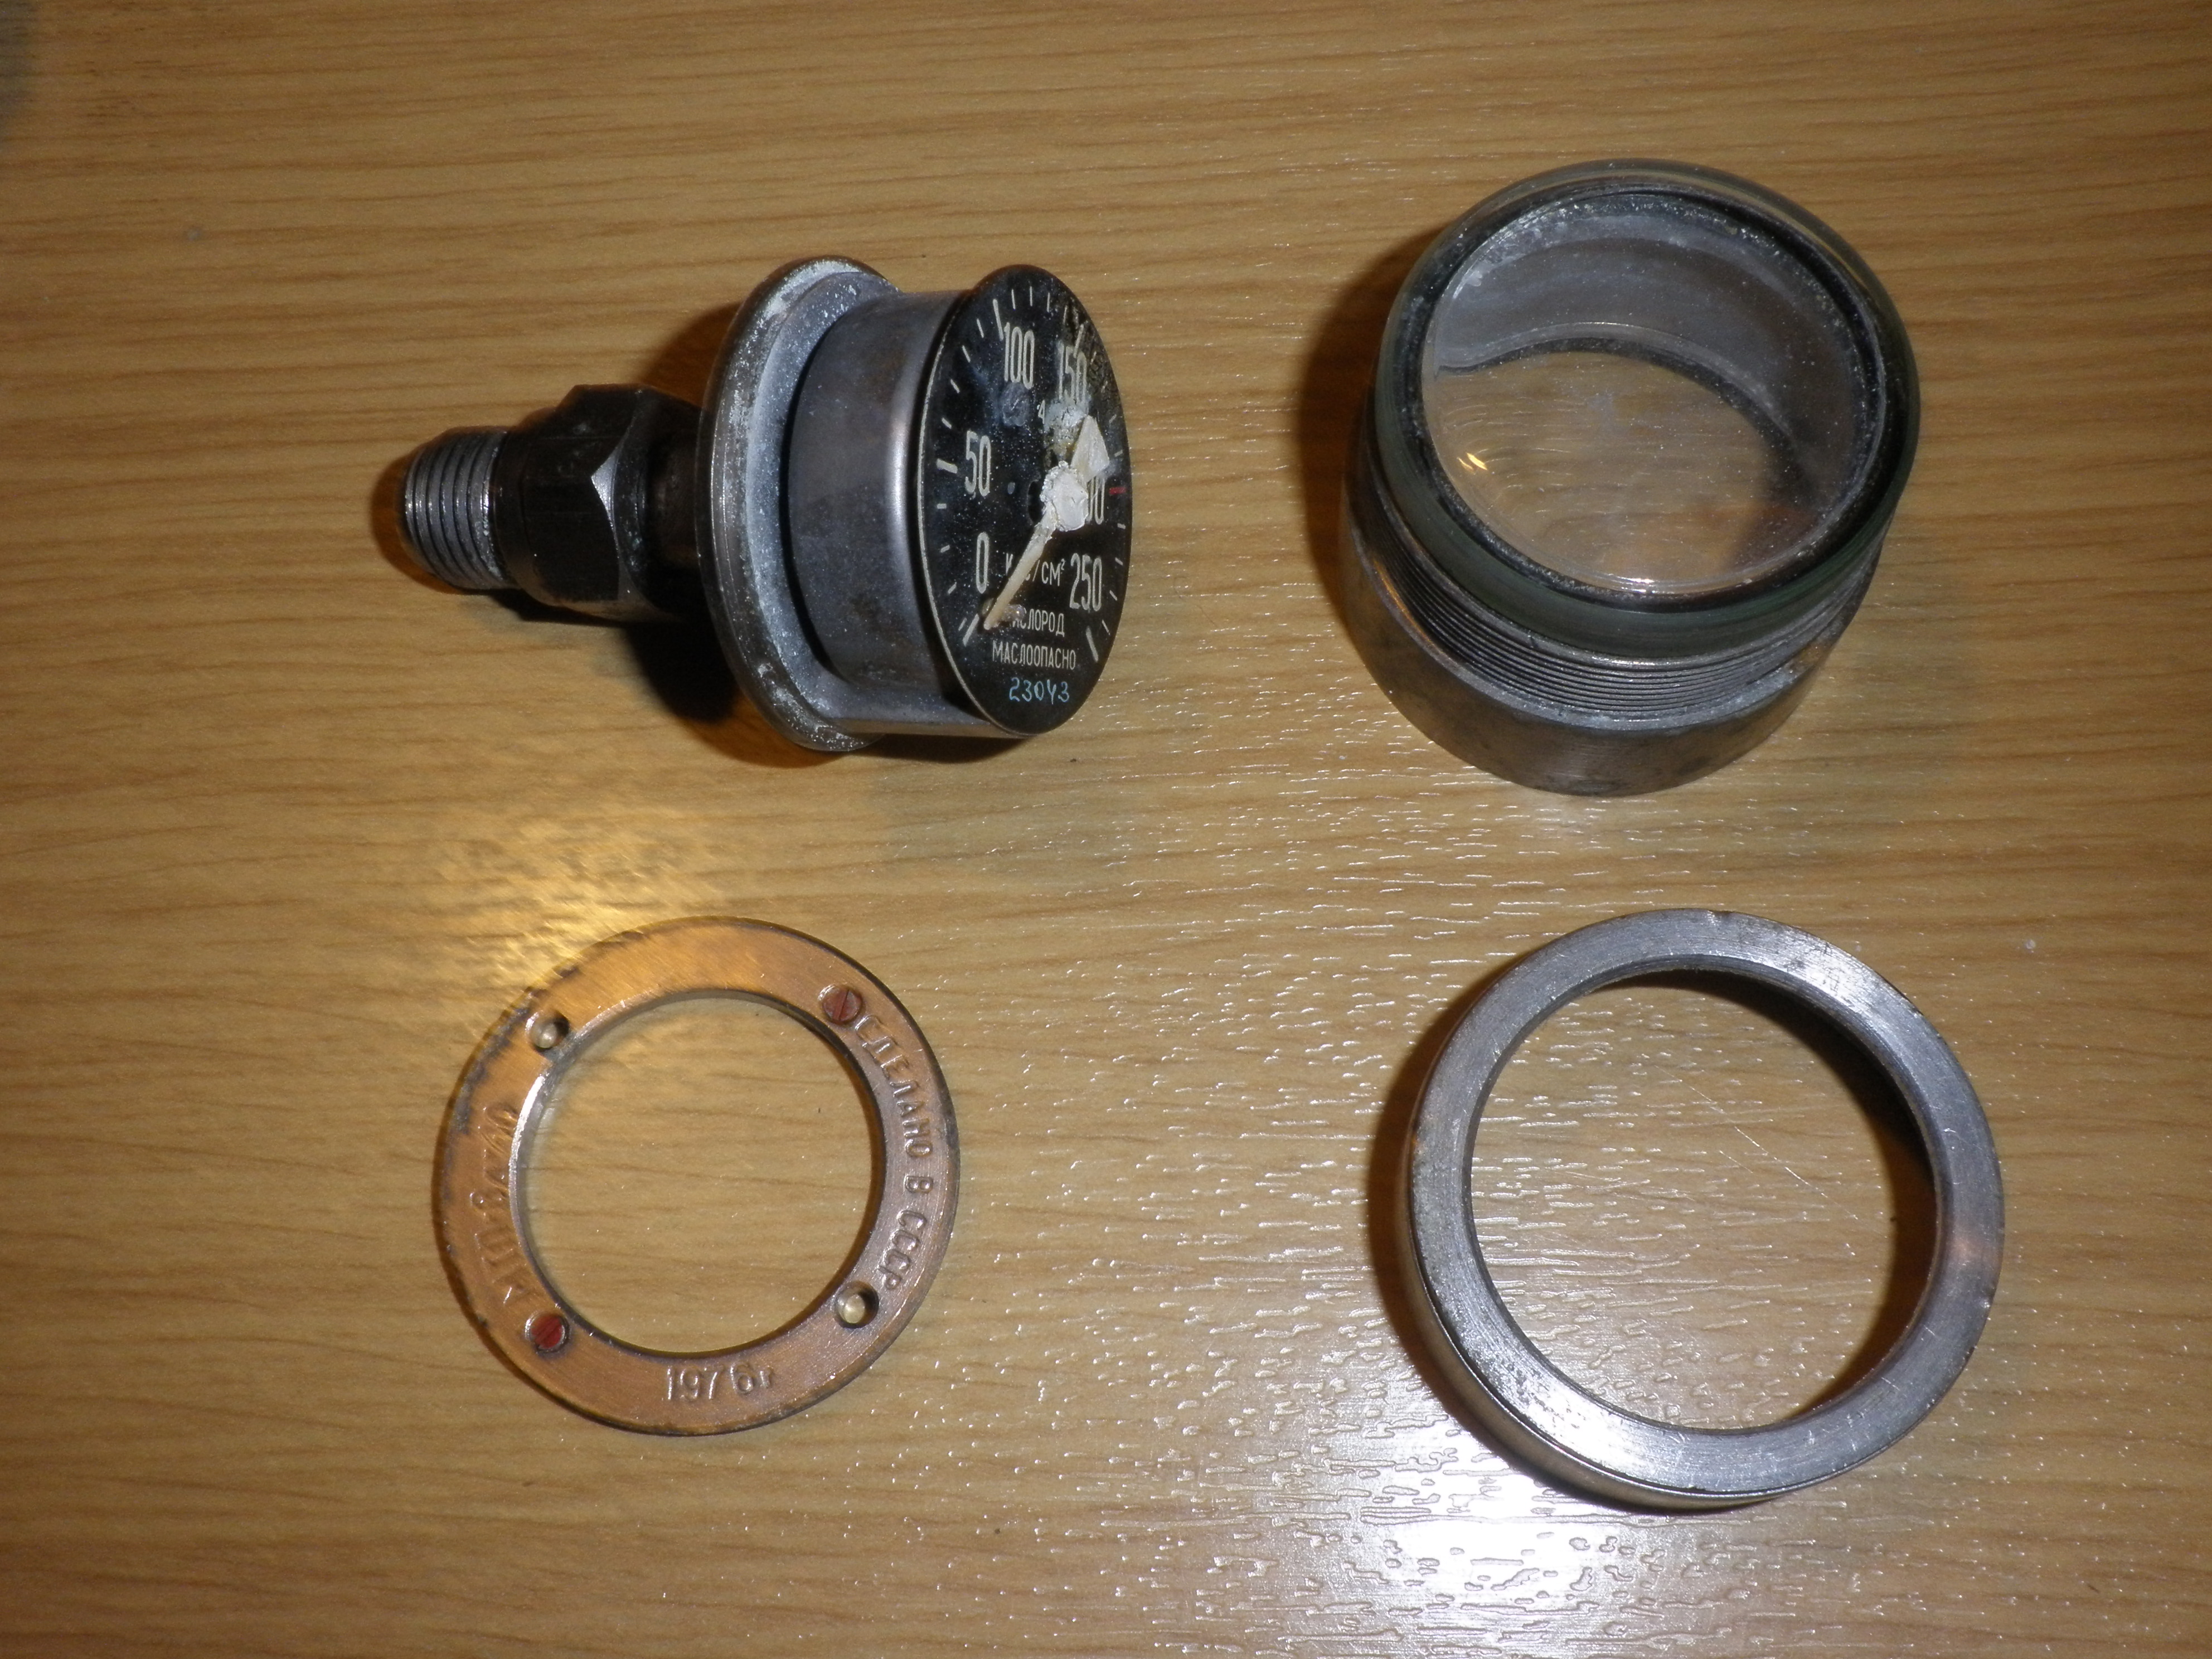
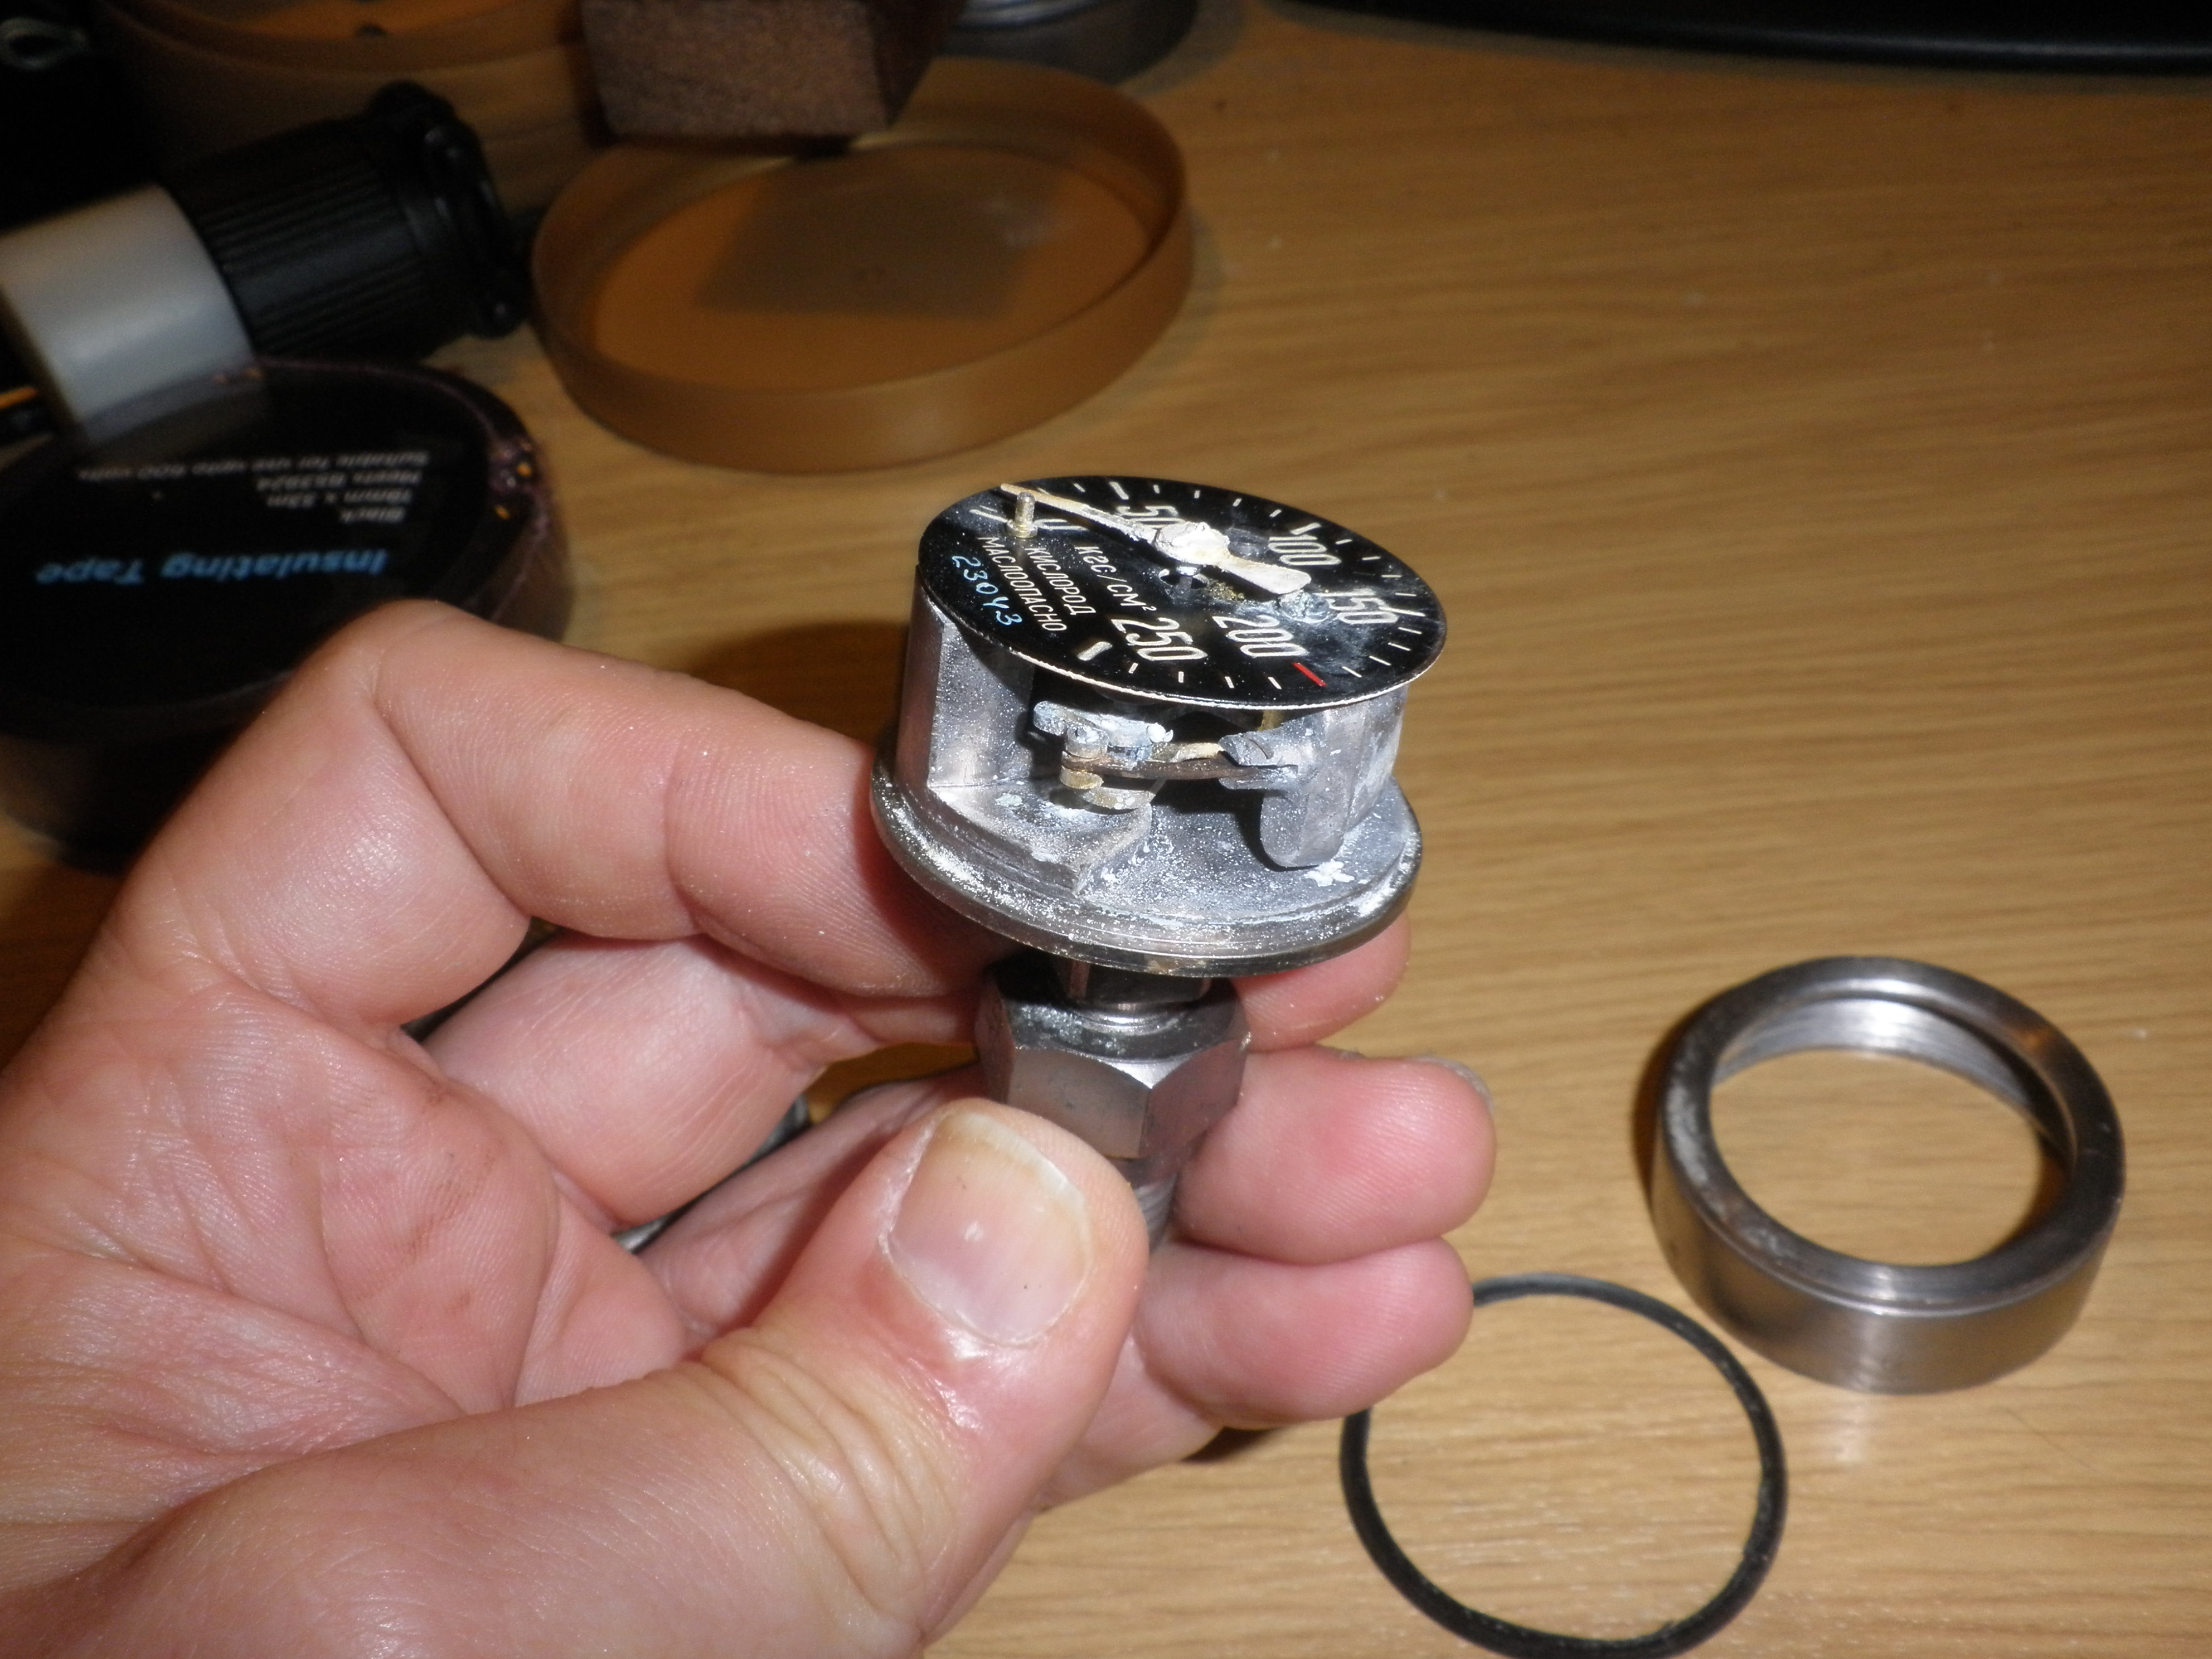
The contents gauge is only 4cms in diameter and clips to the chest of the
system. Beware. It comes to pieces and like much of this kit is supplied
loose and the O-ring was history.
Here is the main case. No I haven't worked out what the red elastic
is for but it is attached in several places. You couldn't reach anything
there...
The lid has two clips/hinges. The one at the top is a big pin that pushes
through the hinge and the one at the other end pulls out a bit to release the
cover. Neither of them work well as hinges as the case wants to go together
straight but I can't see why they are different.
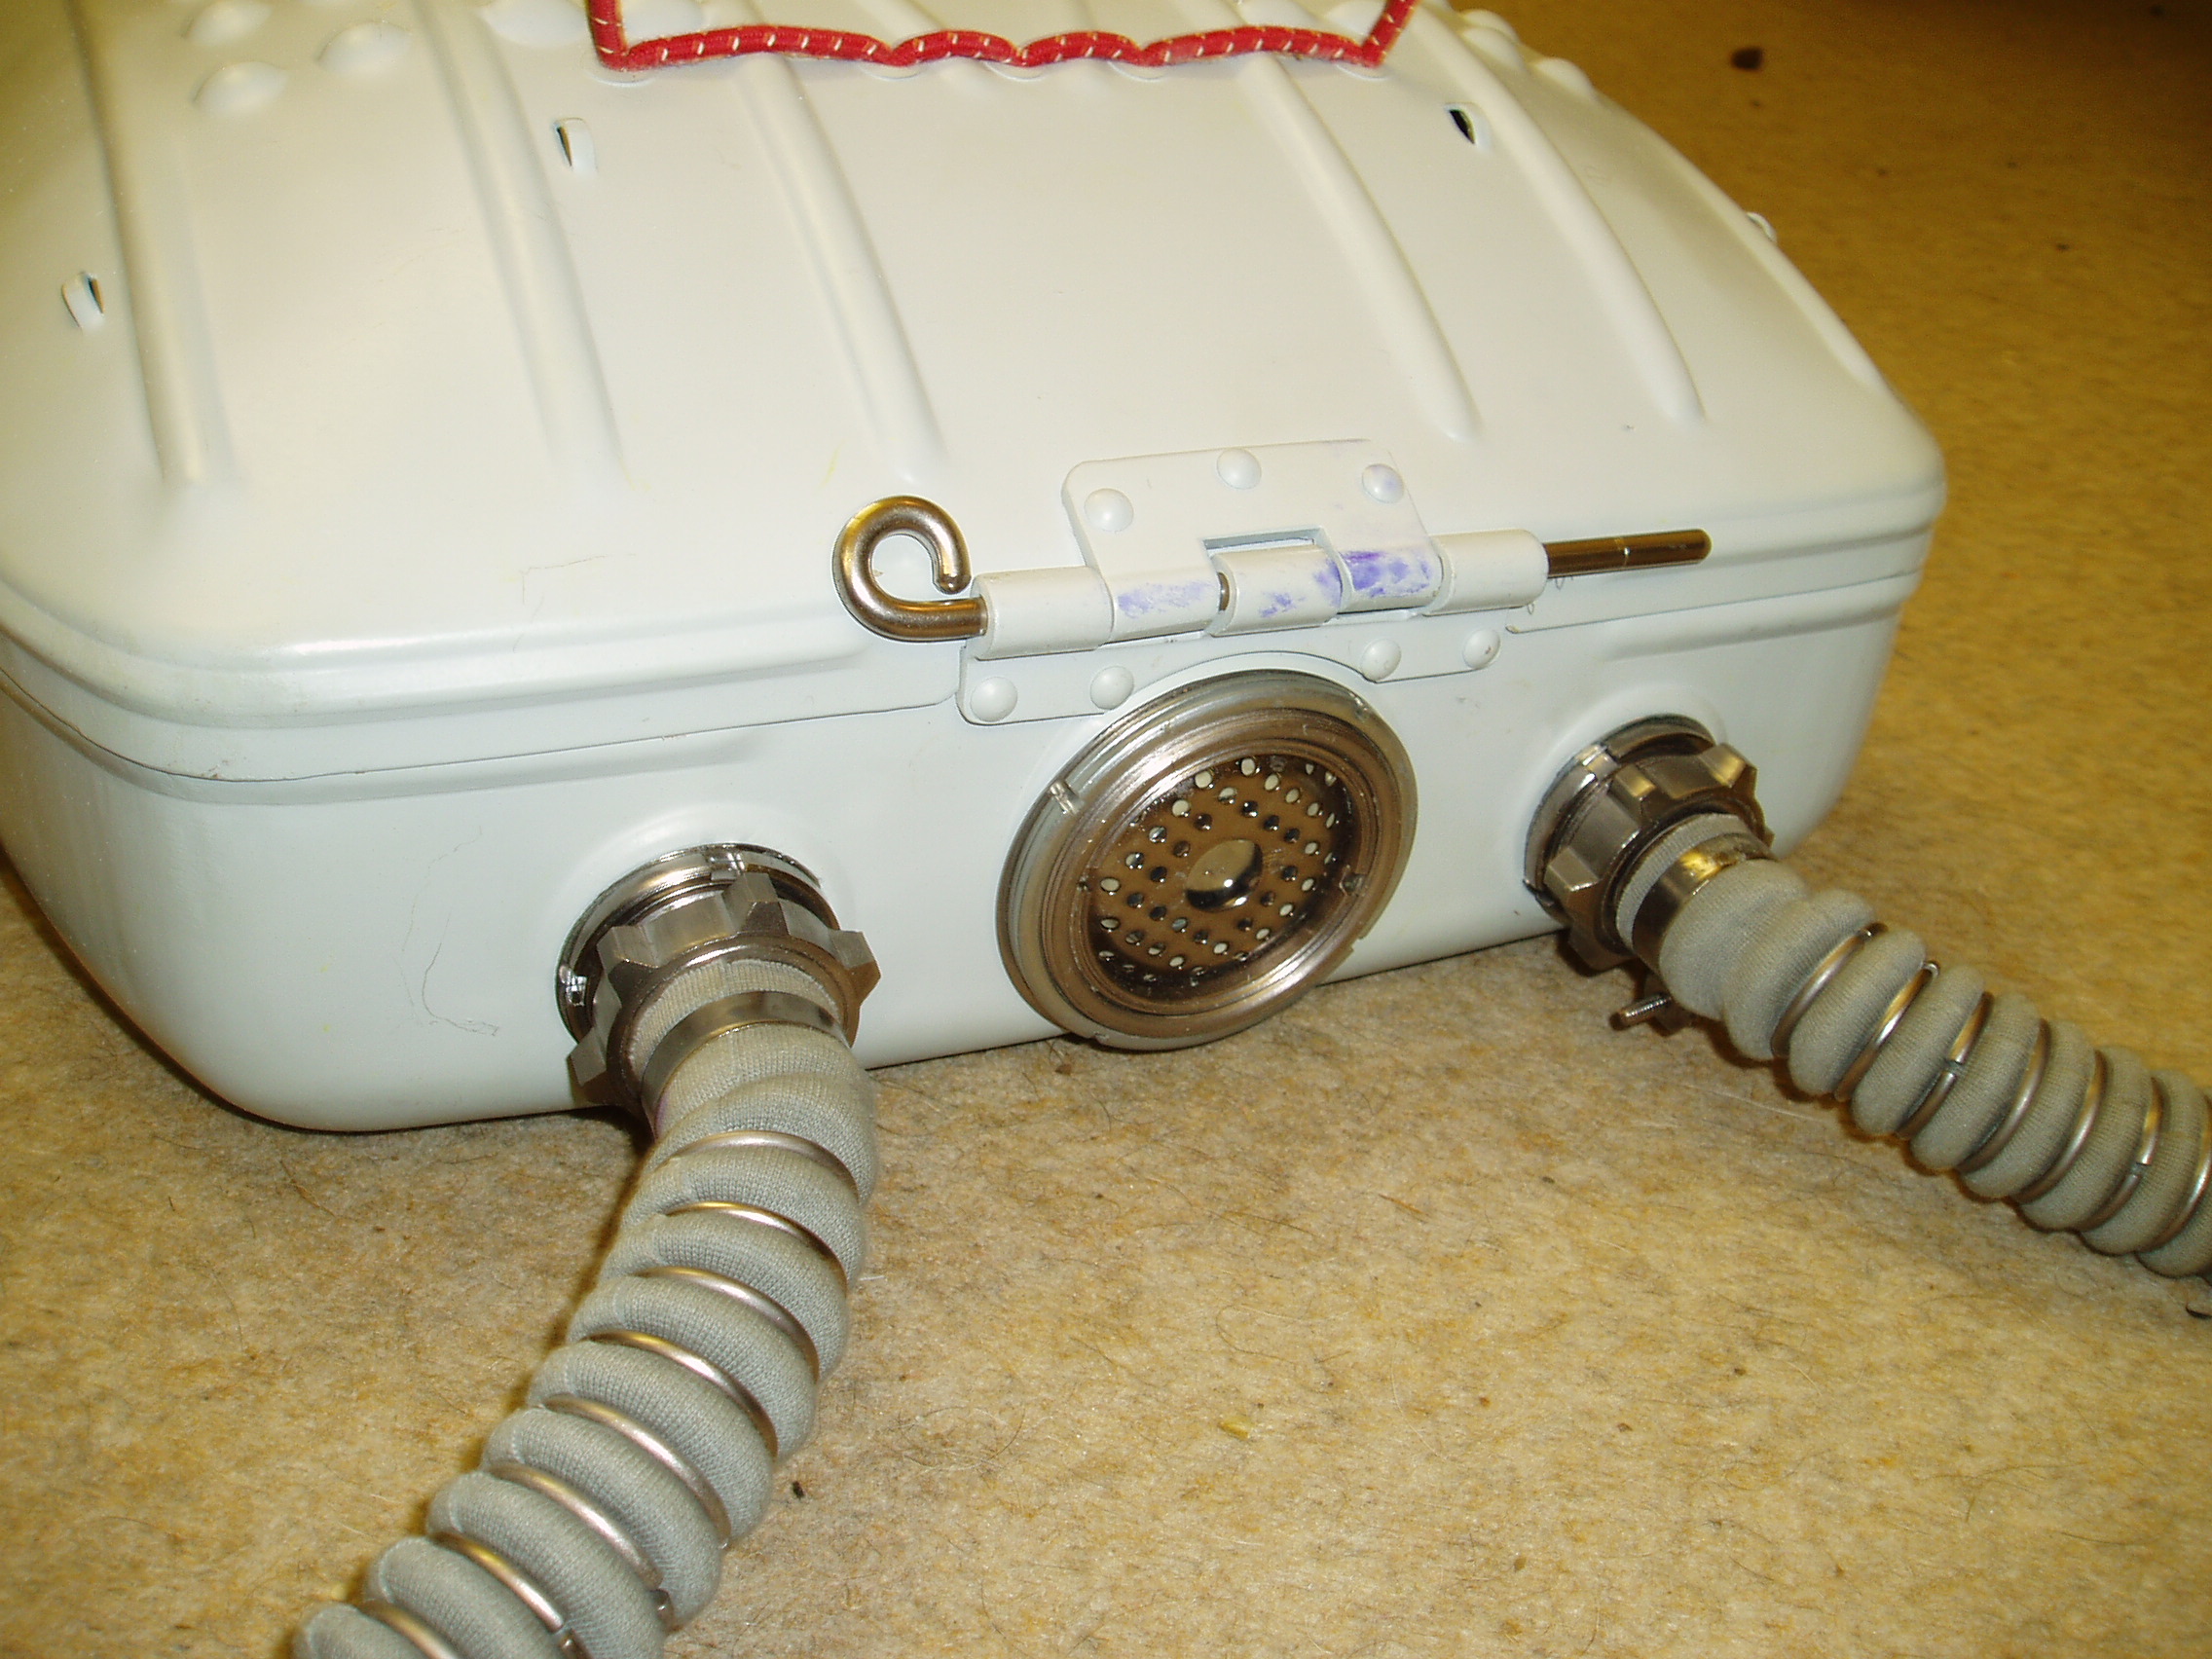
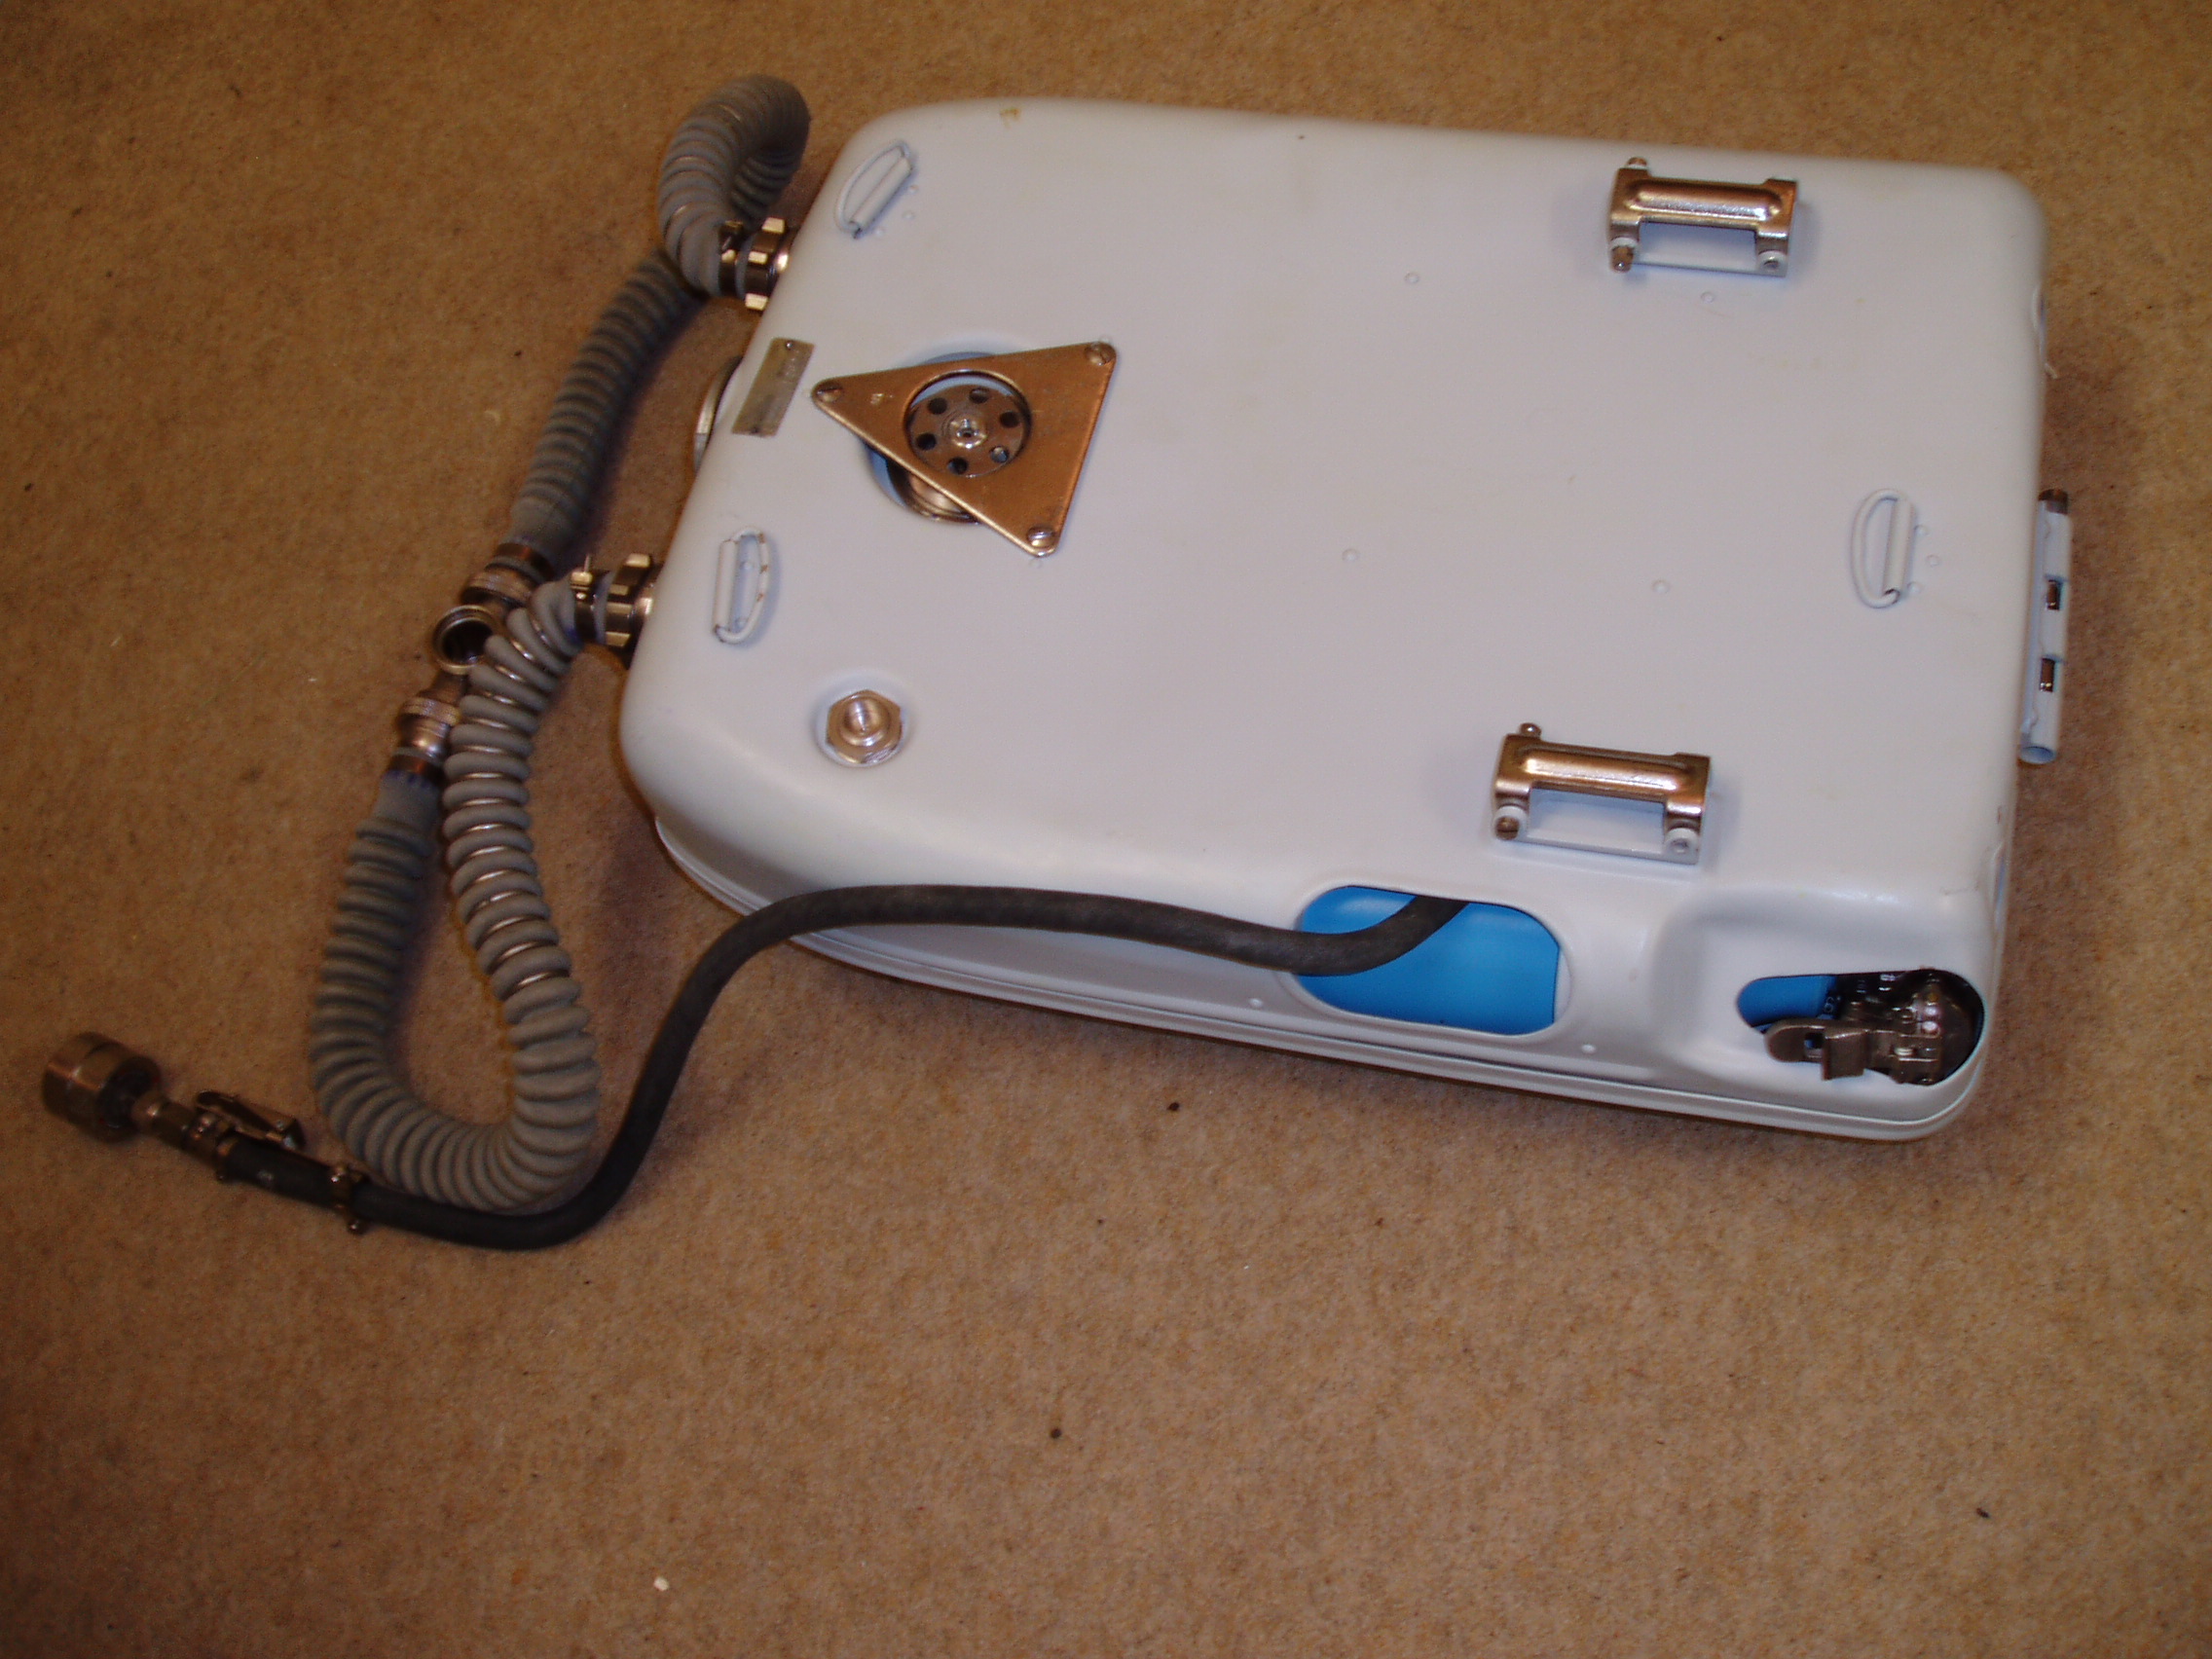
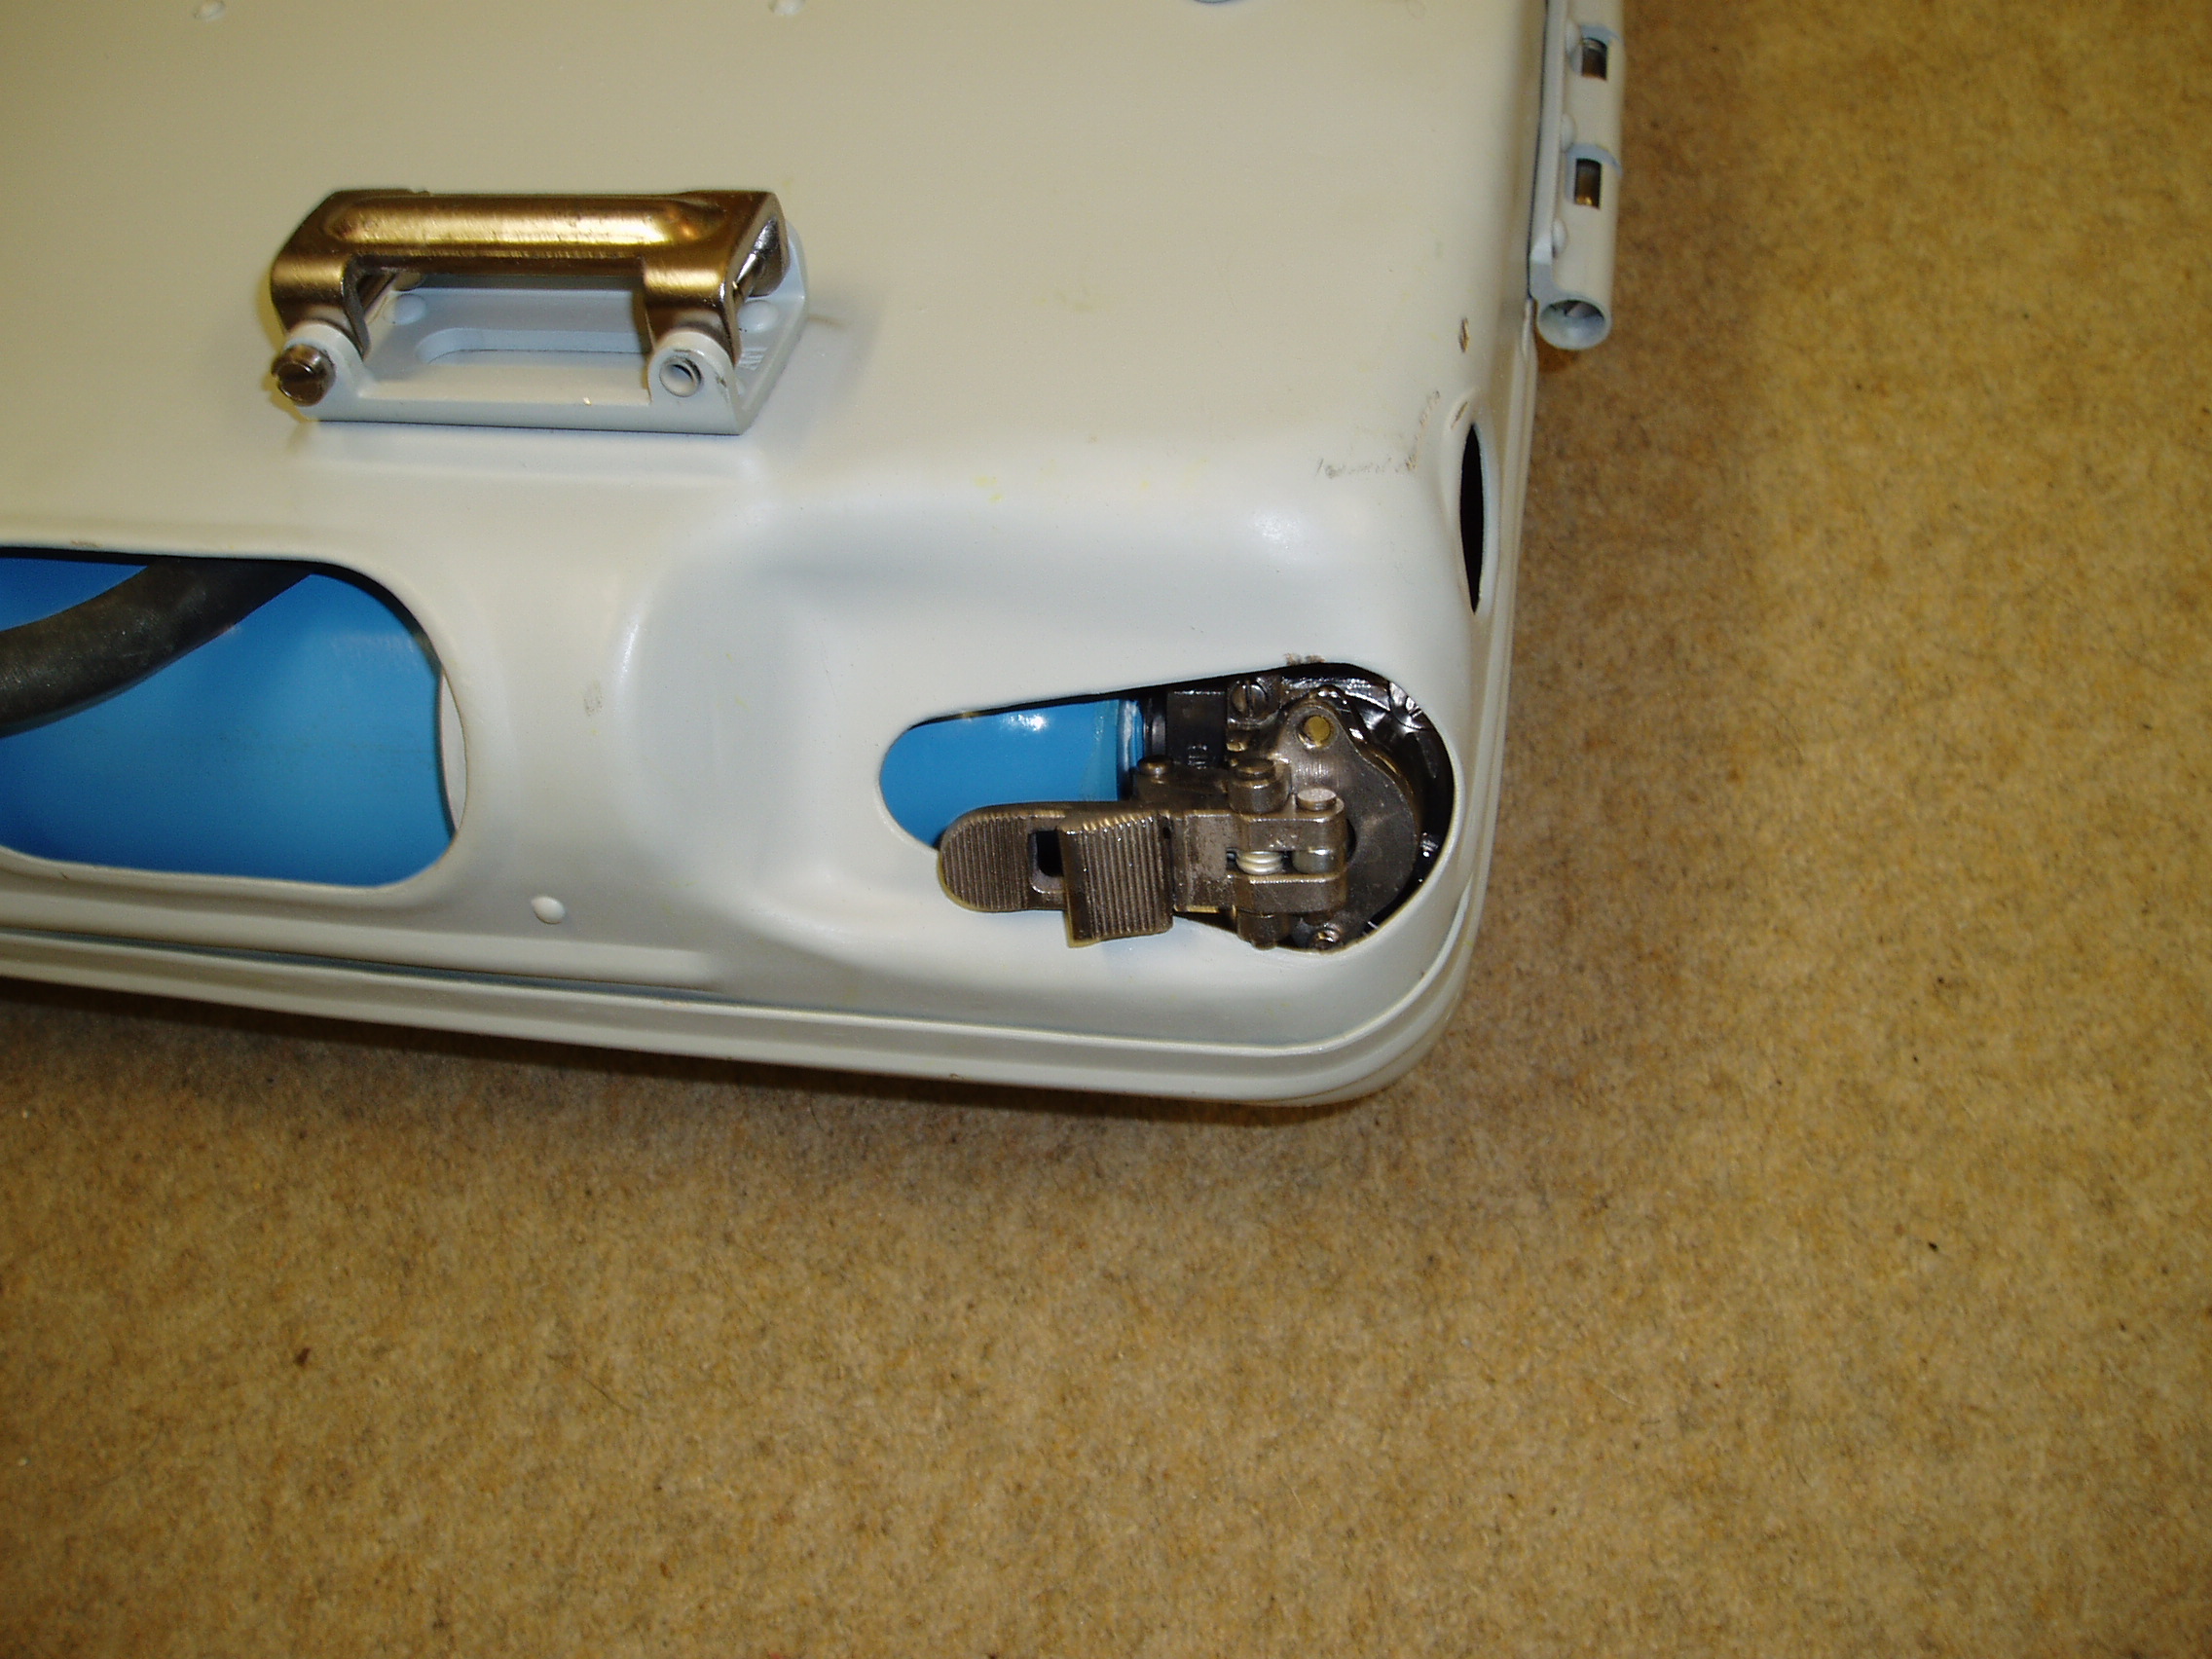
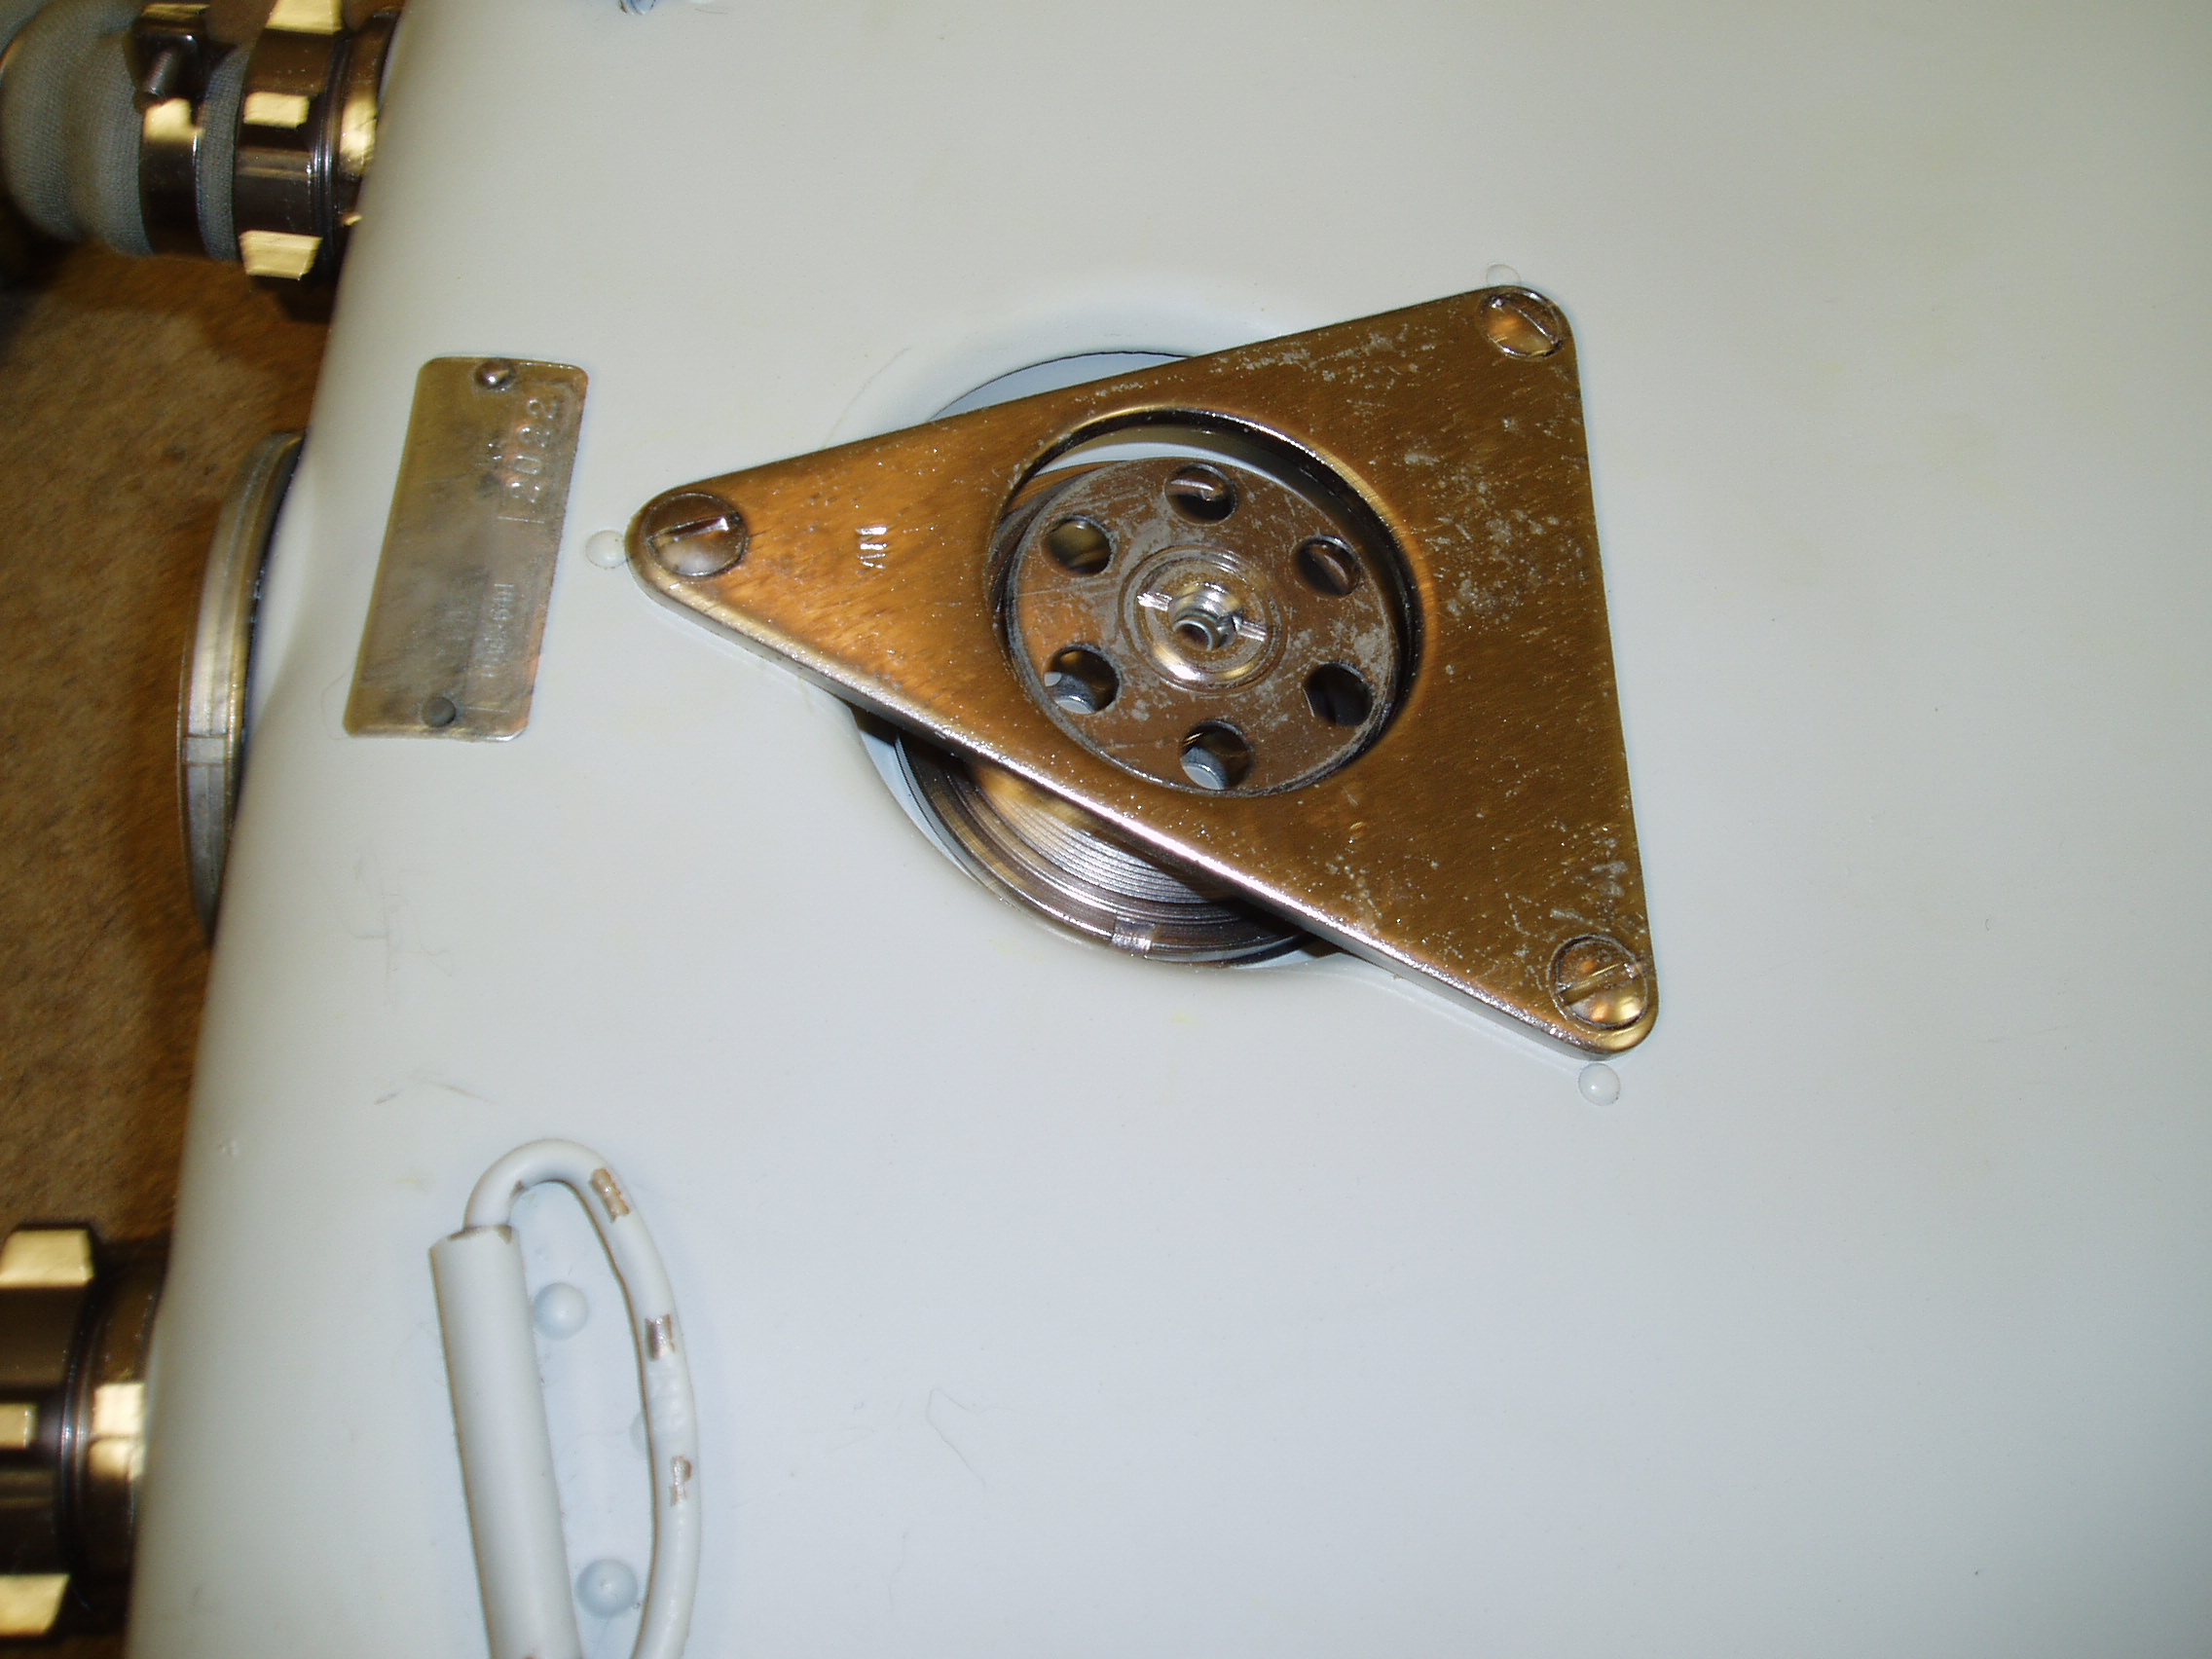
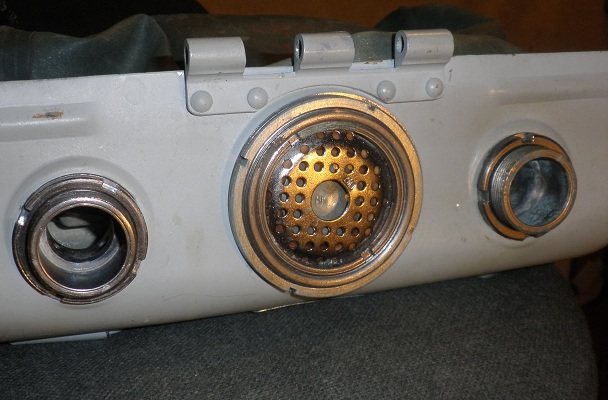
The back of the case shows the OPV, the over pressure valve, that dumps
oxygen from the loop as you ascend. Since this is conventionally used with full
face masks the old trick of dumping round your mouth-piece doesn't work. You
can also see the valve control that ends up down by the diver's right
hip.
Here are close-ups of the OPV and the demand valve.
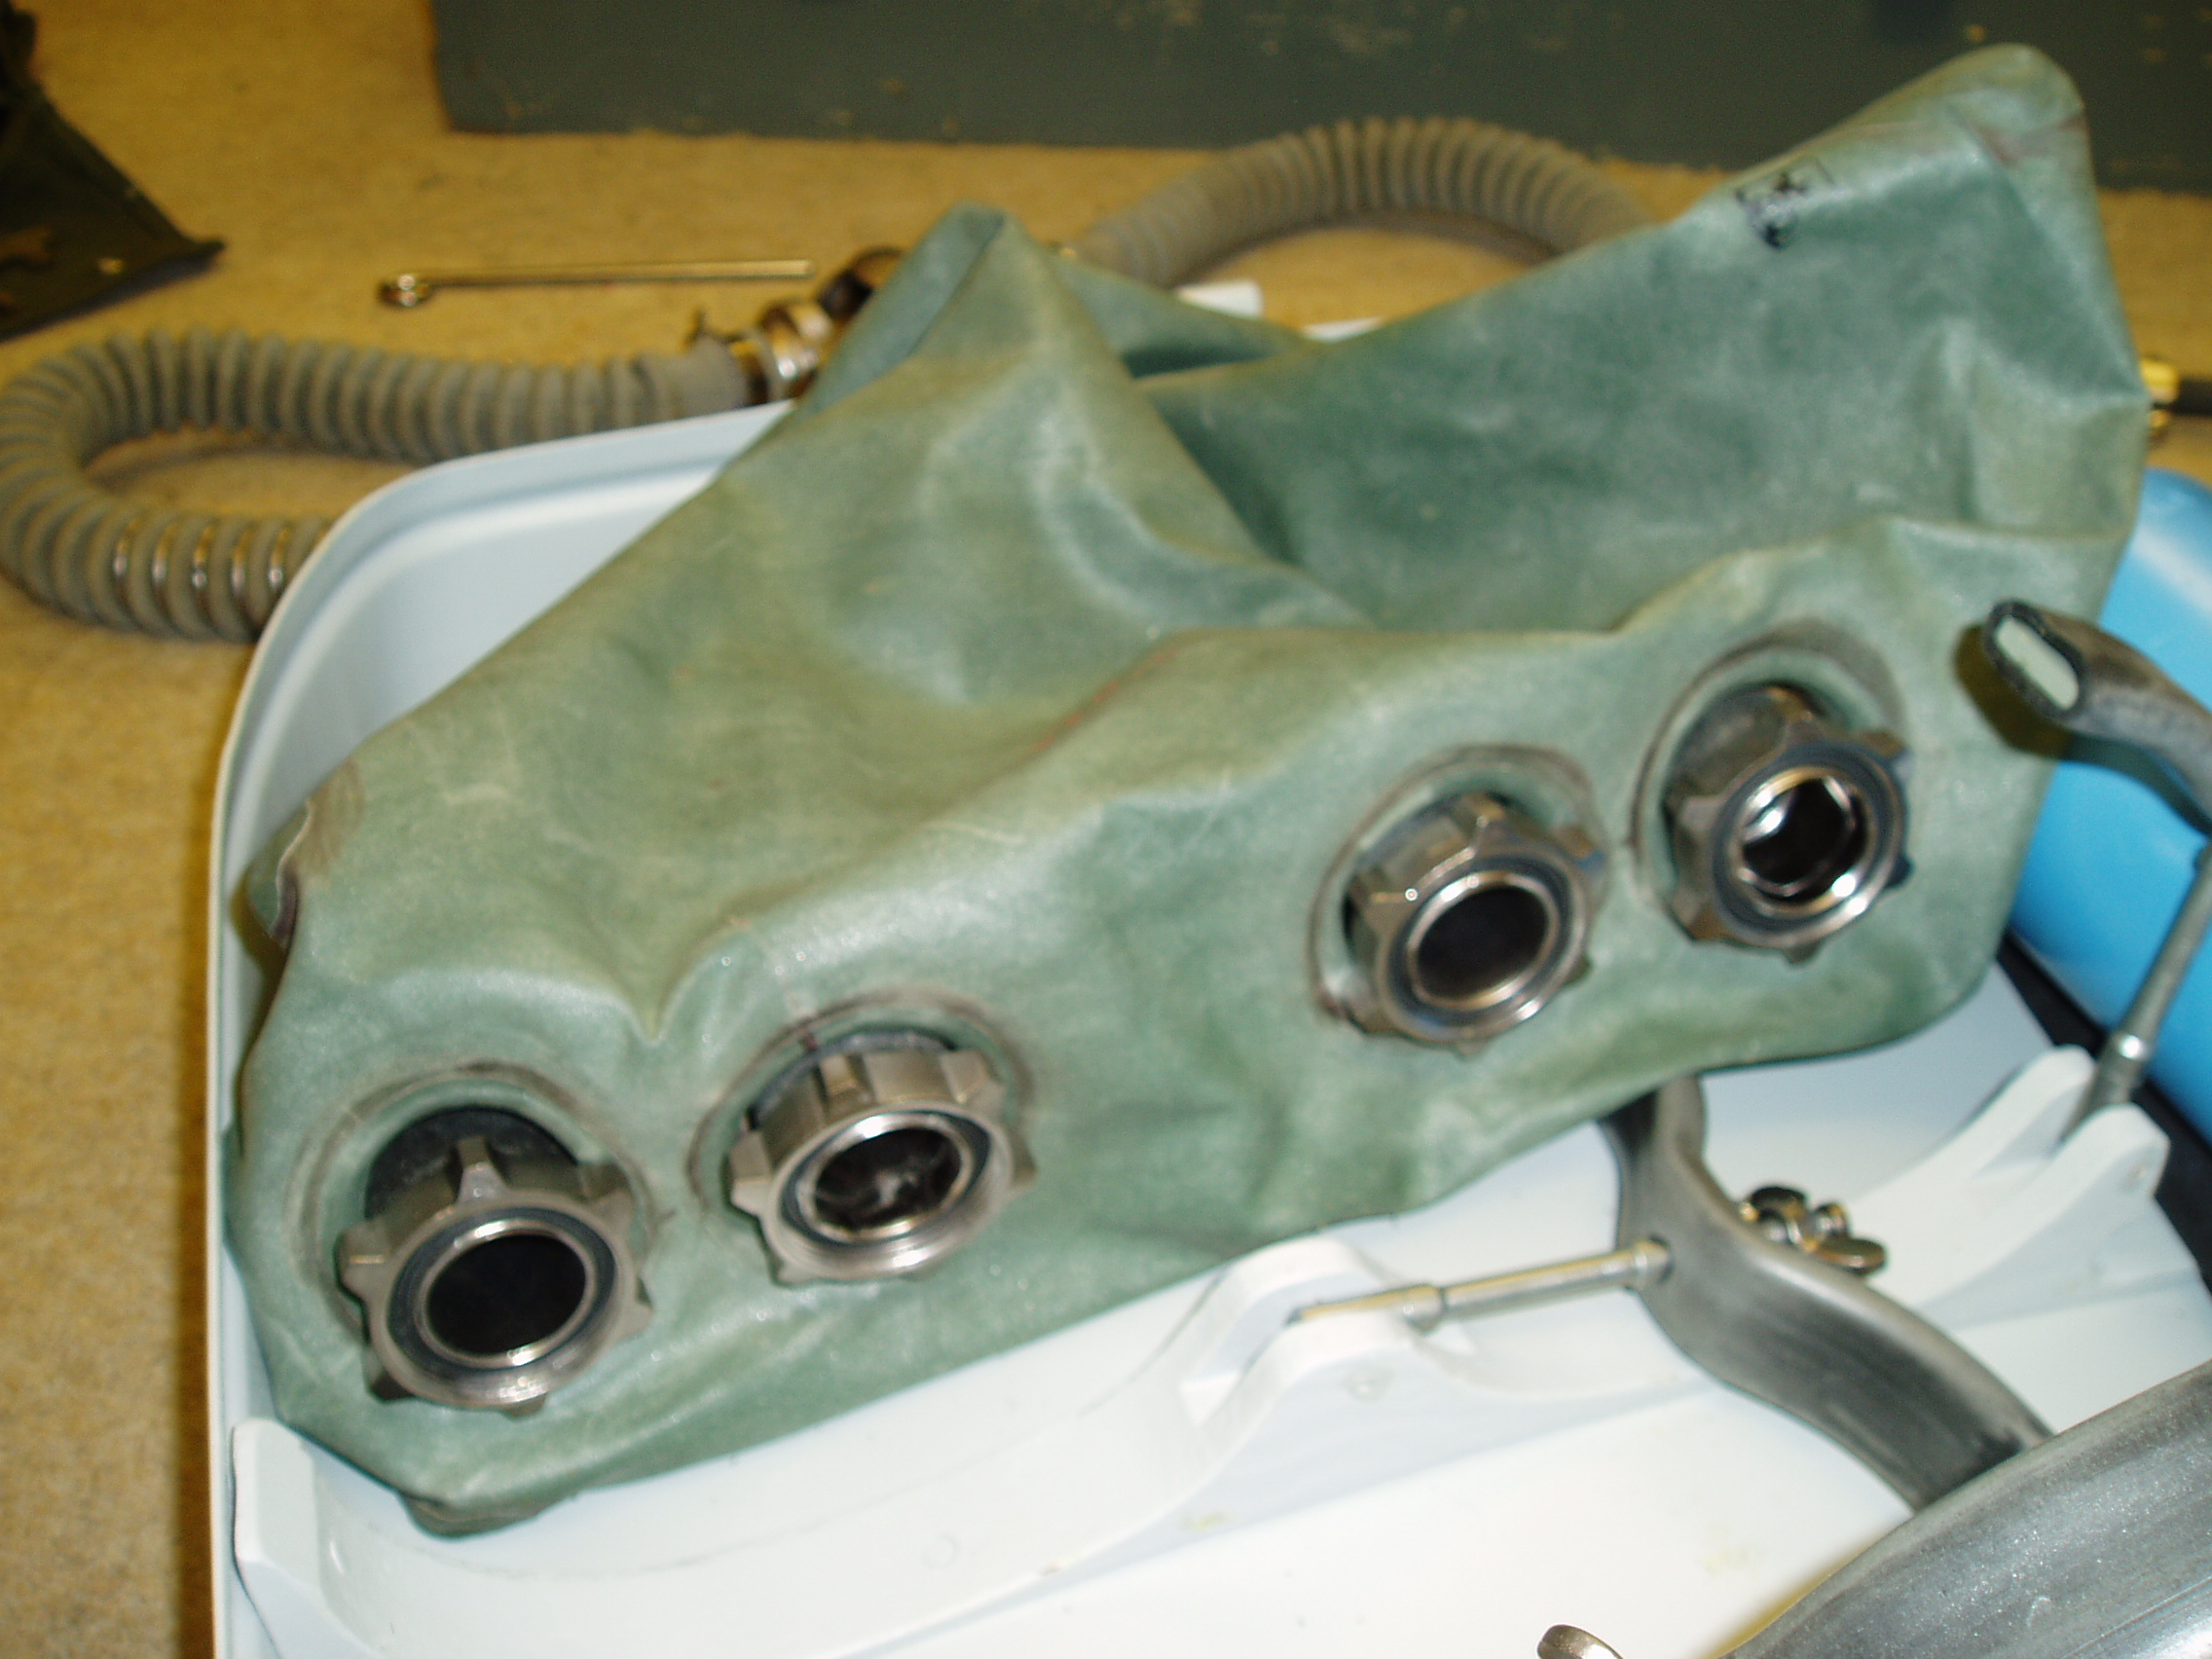
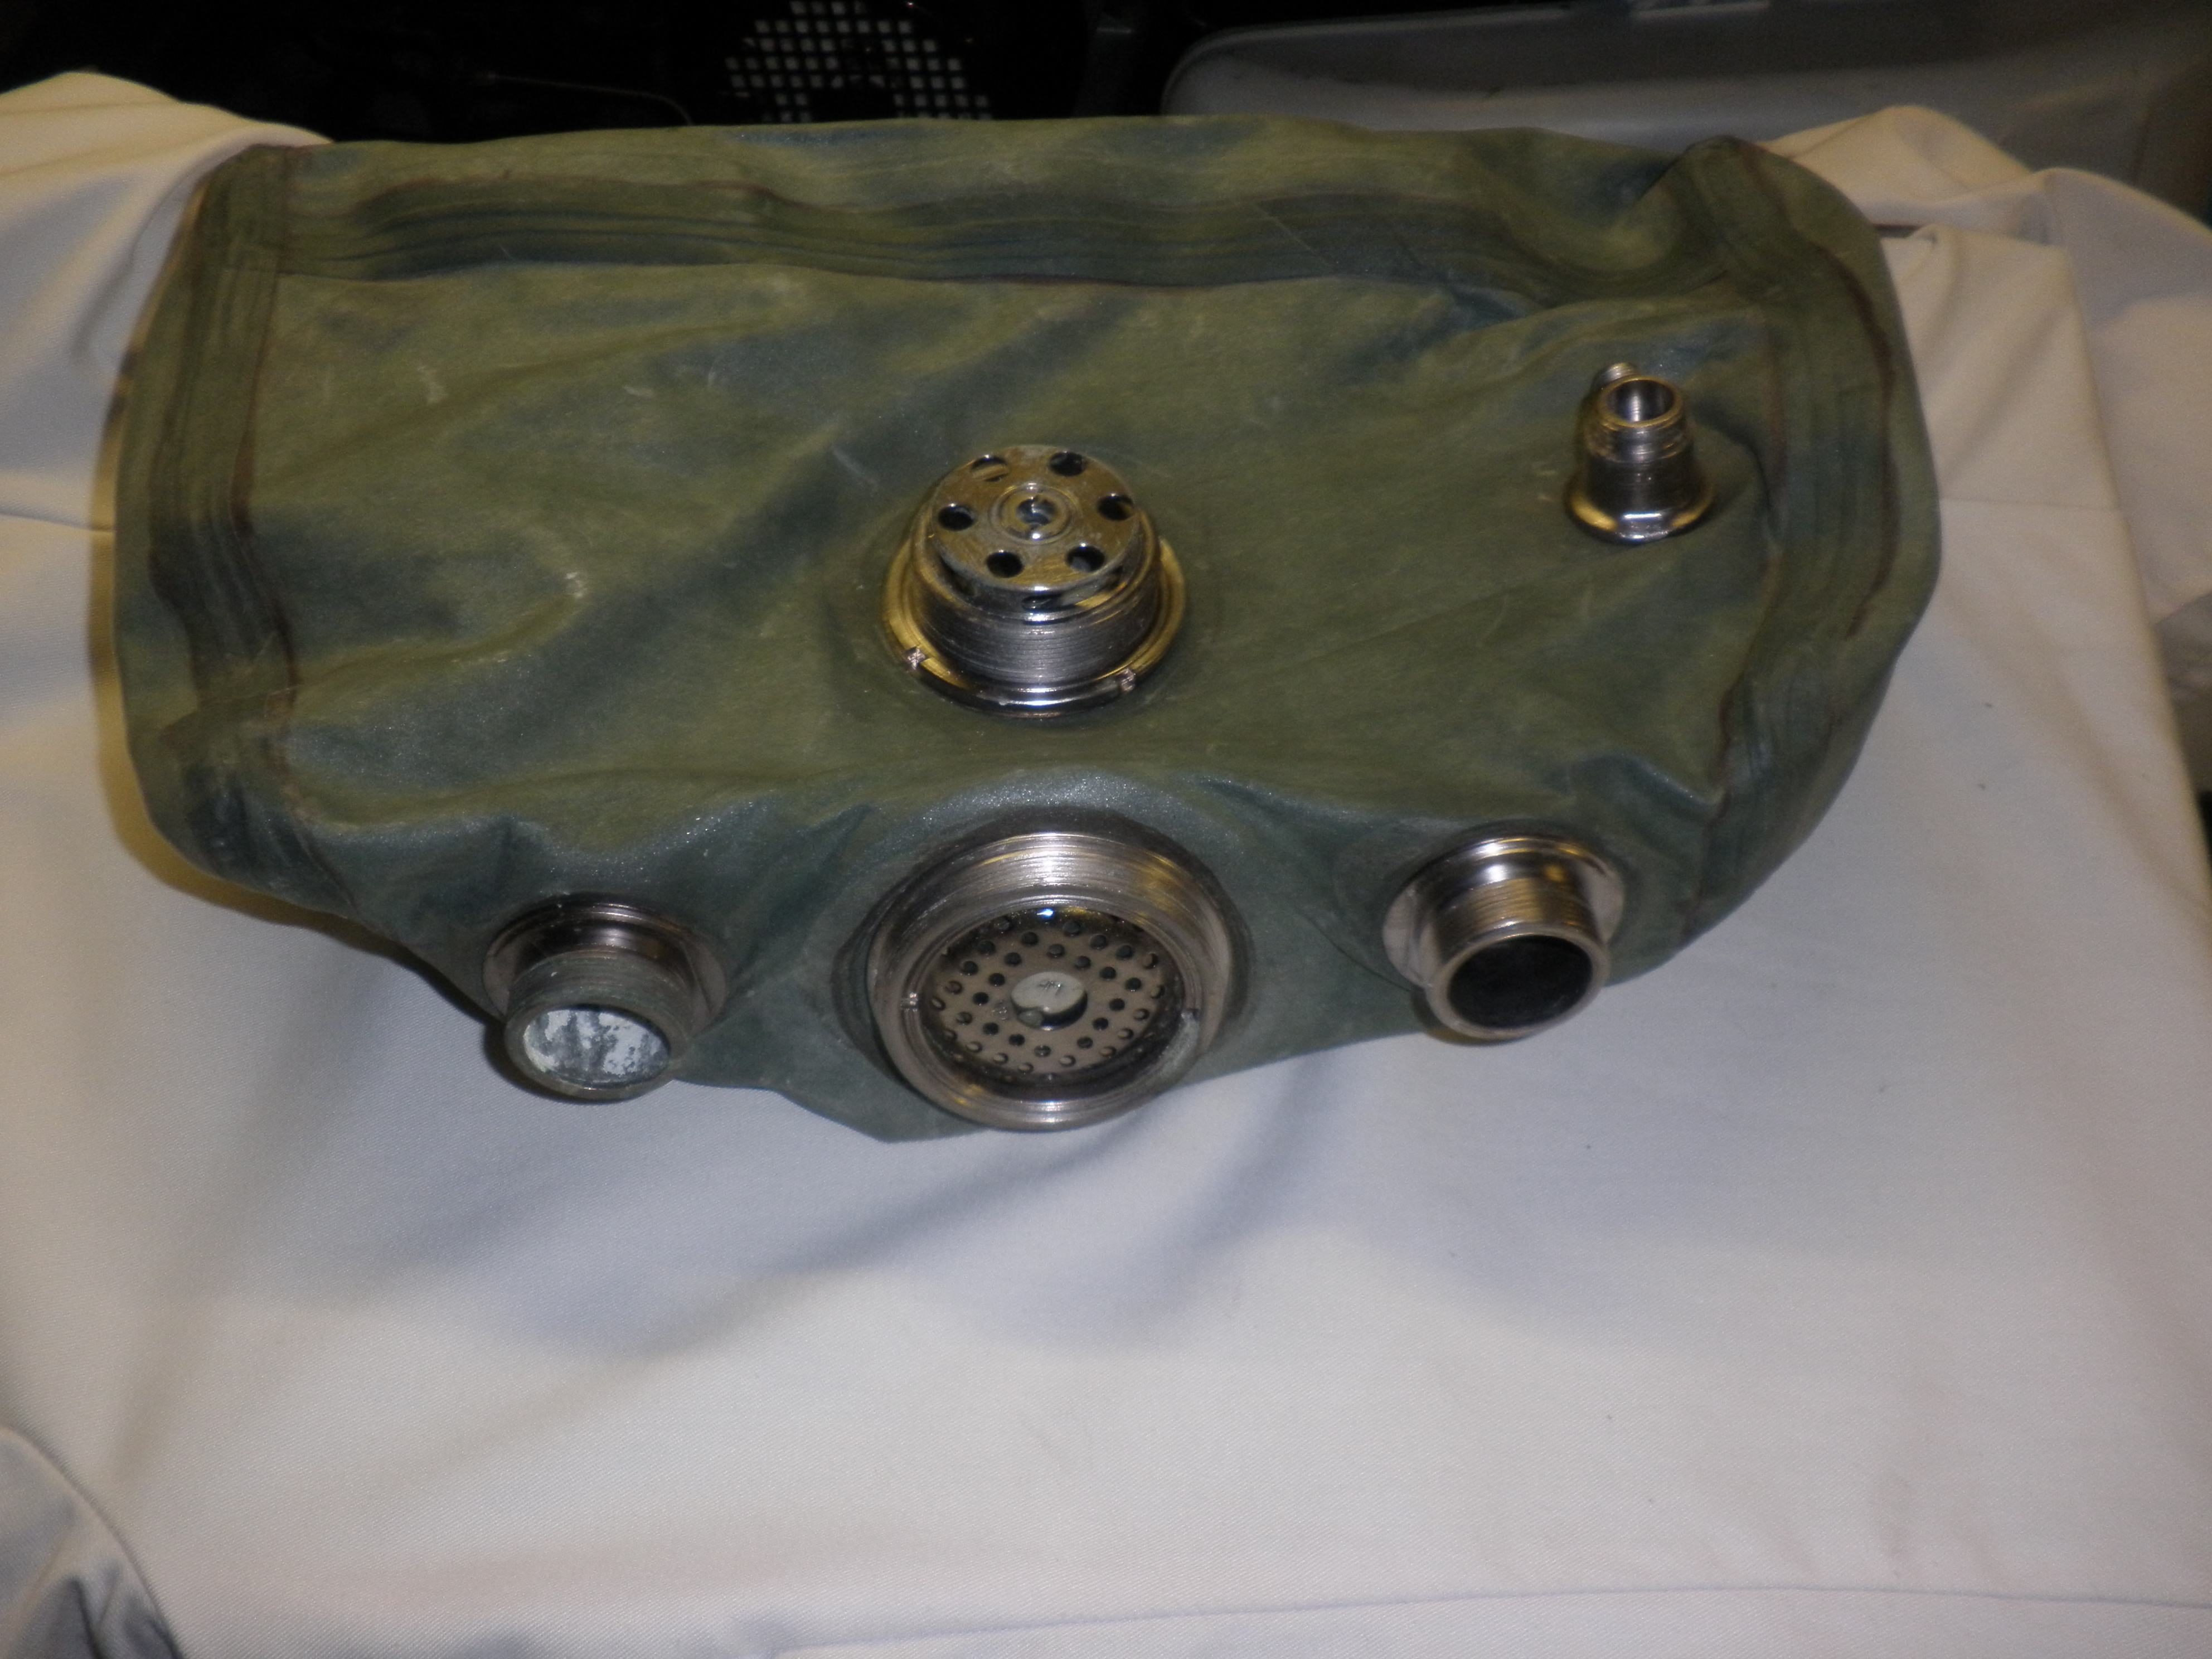
| This is the counterlung. The documents say it is 7 litres and only on the
inhale side. The exhale feed actually passes through pipes inside the bag to
the two scrubbers (in parallel). The scrubber outlets go into the flexible bag
which is also connected to the OPV and the demand valve.
One of the most important checks on the whole system is to block the exhale
outputs and blow in at the top as a leak here short circuits the
scrubber.
The shots from inside the counterlung aren't well focused as my endoscope was
bought for other jobs and doesn't do things this big very well but it enabled
me to get a flavour of the insides. I decided I was prepared to dive it a
couple of times at least provided it passed the "inhale and exhale are
separate" test.
Longer term I'll have to do something as under that tape is, apparently, string
and that's 1975 string at best.
Some shots of the case.
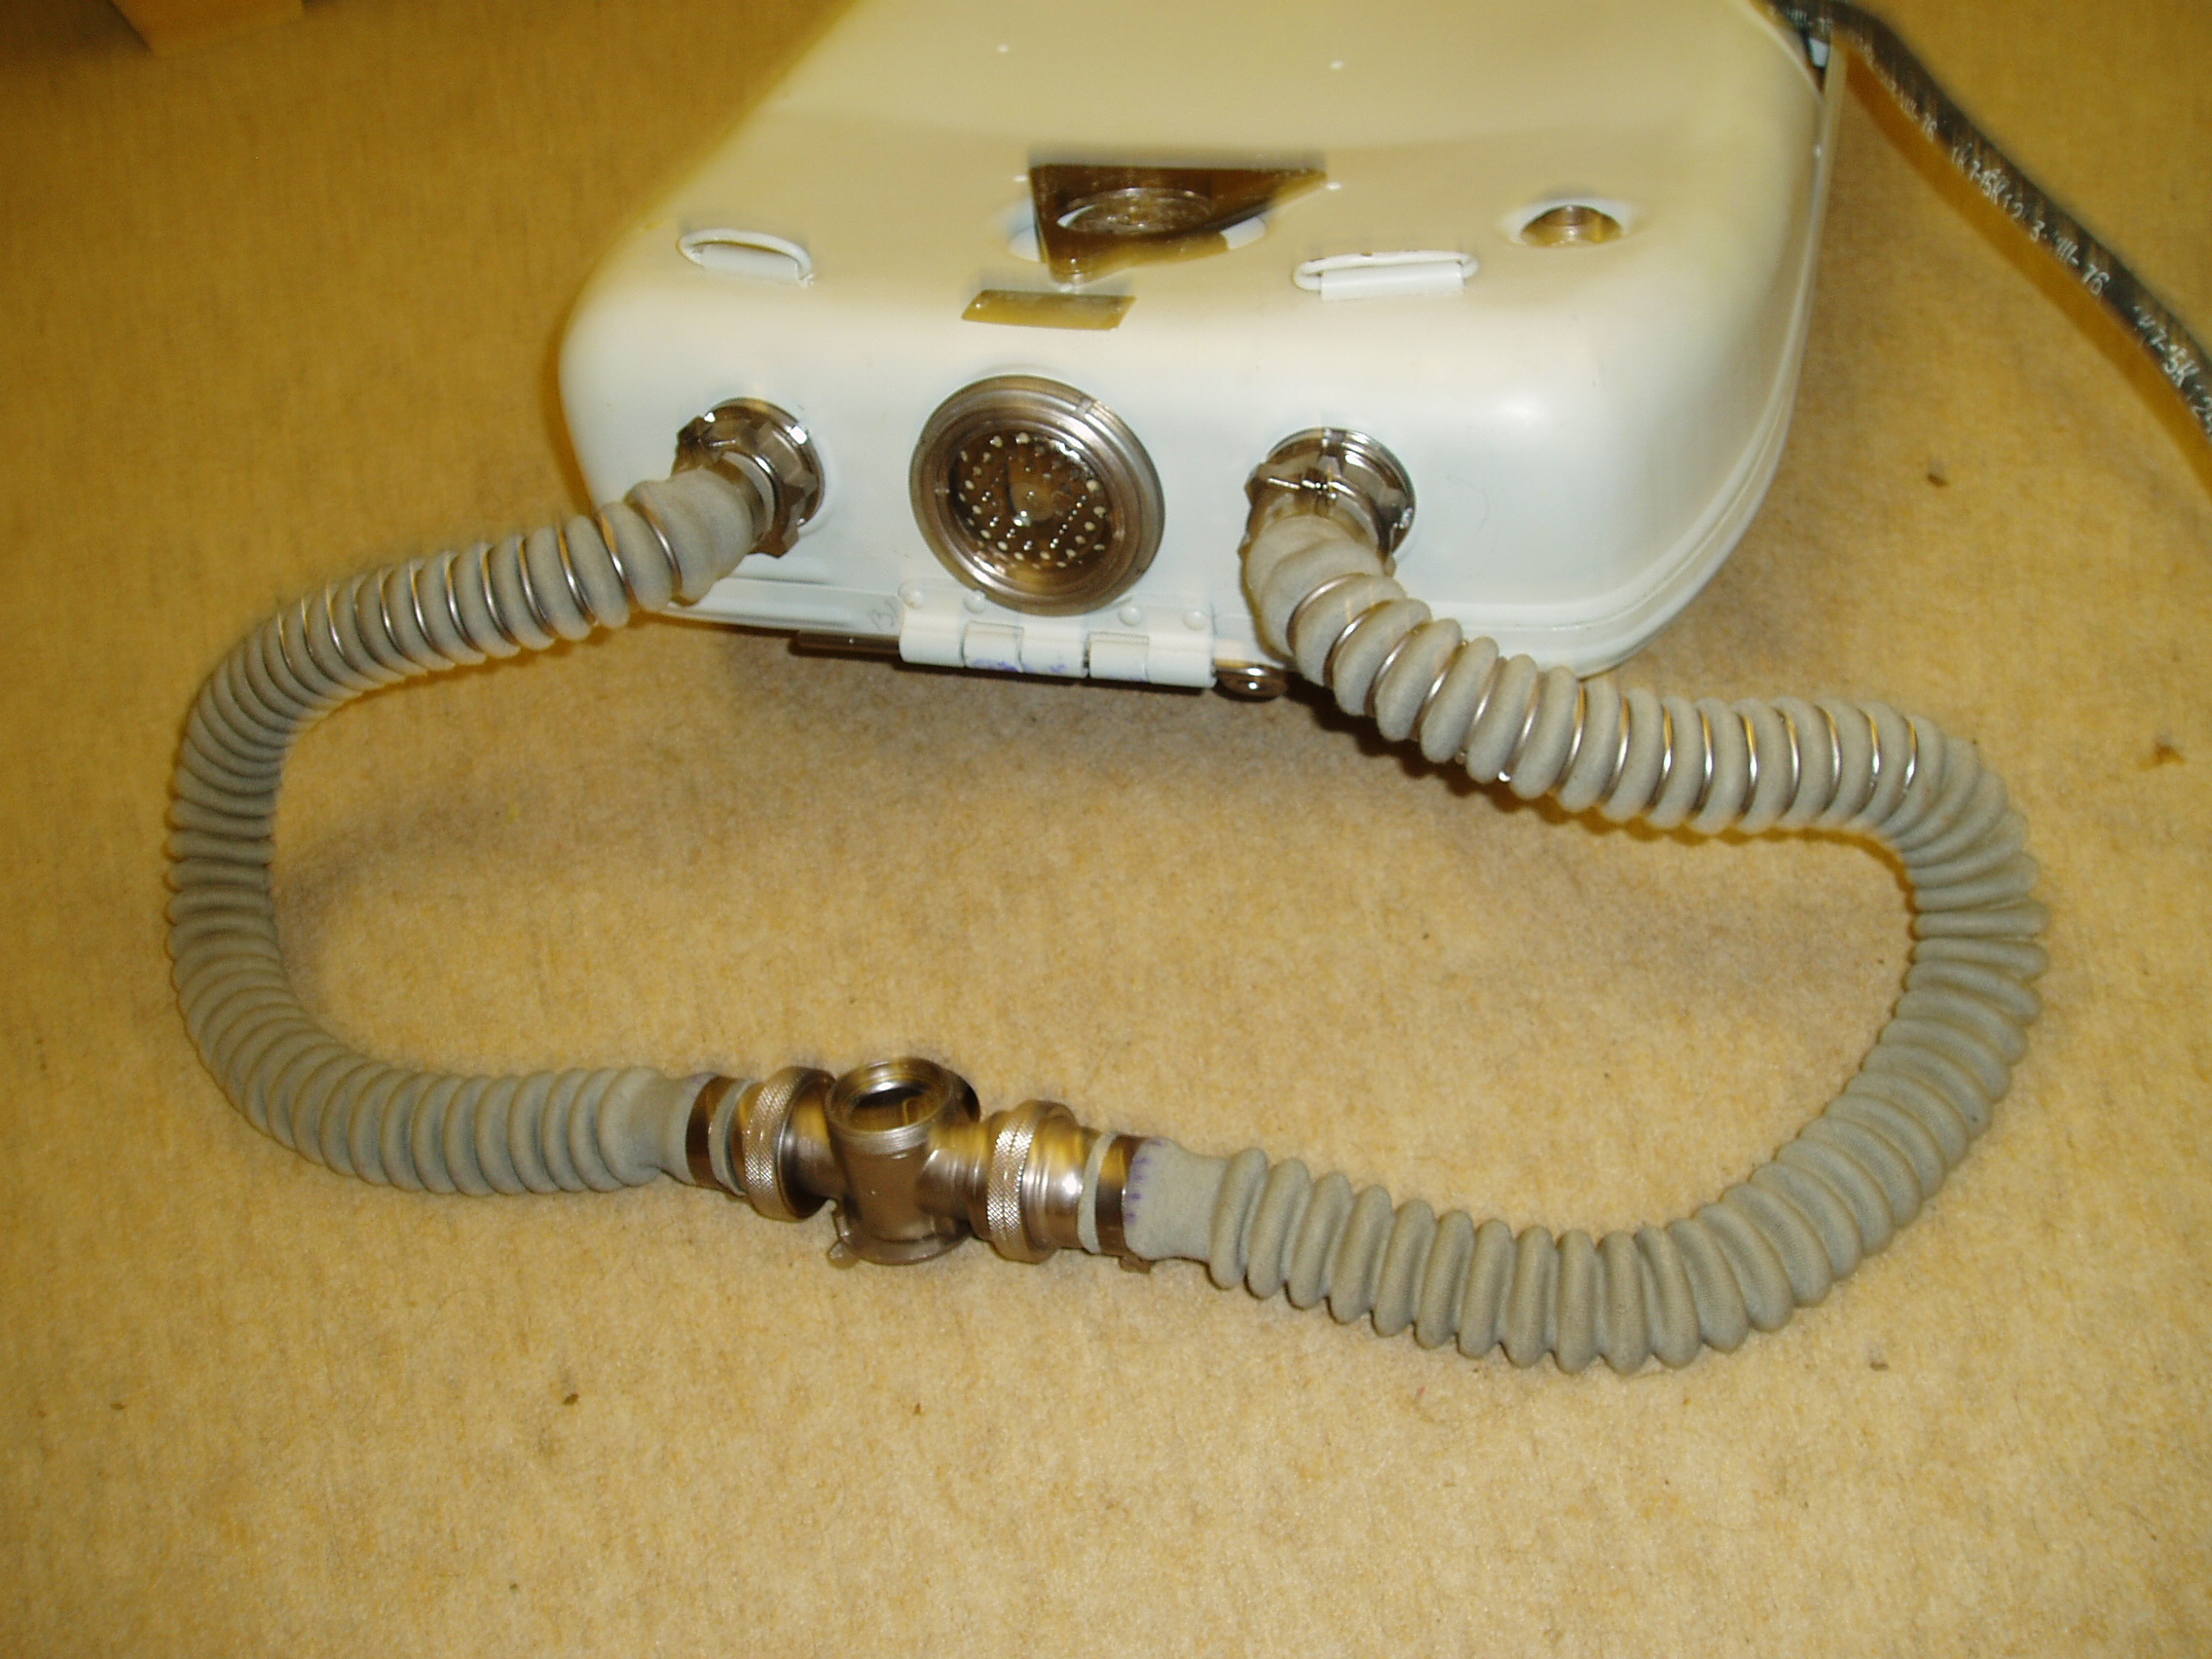
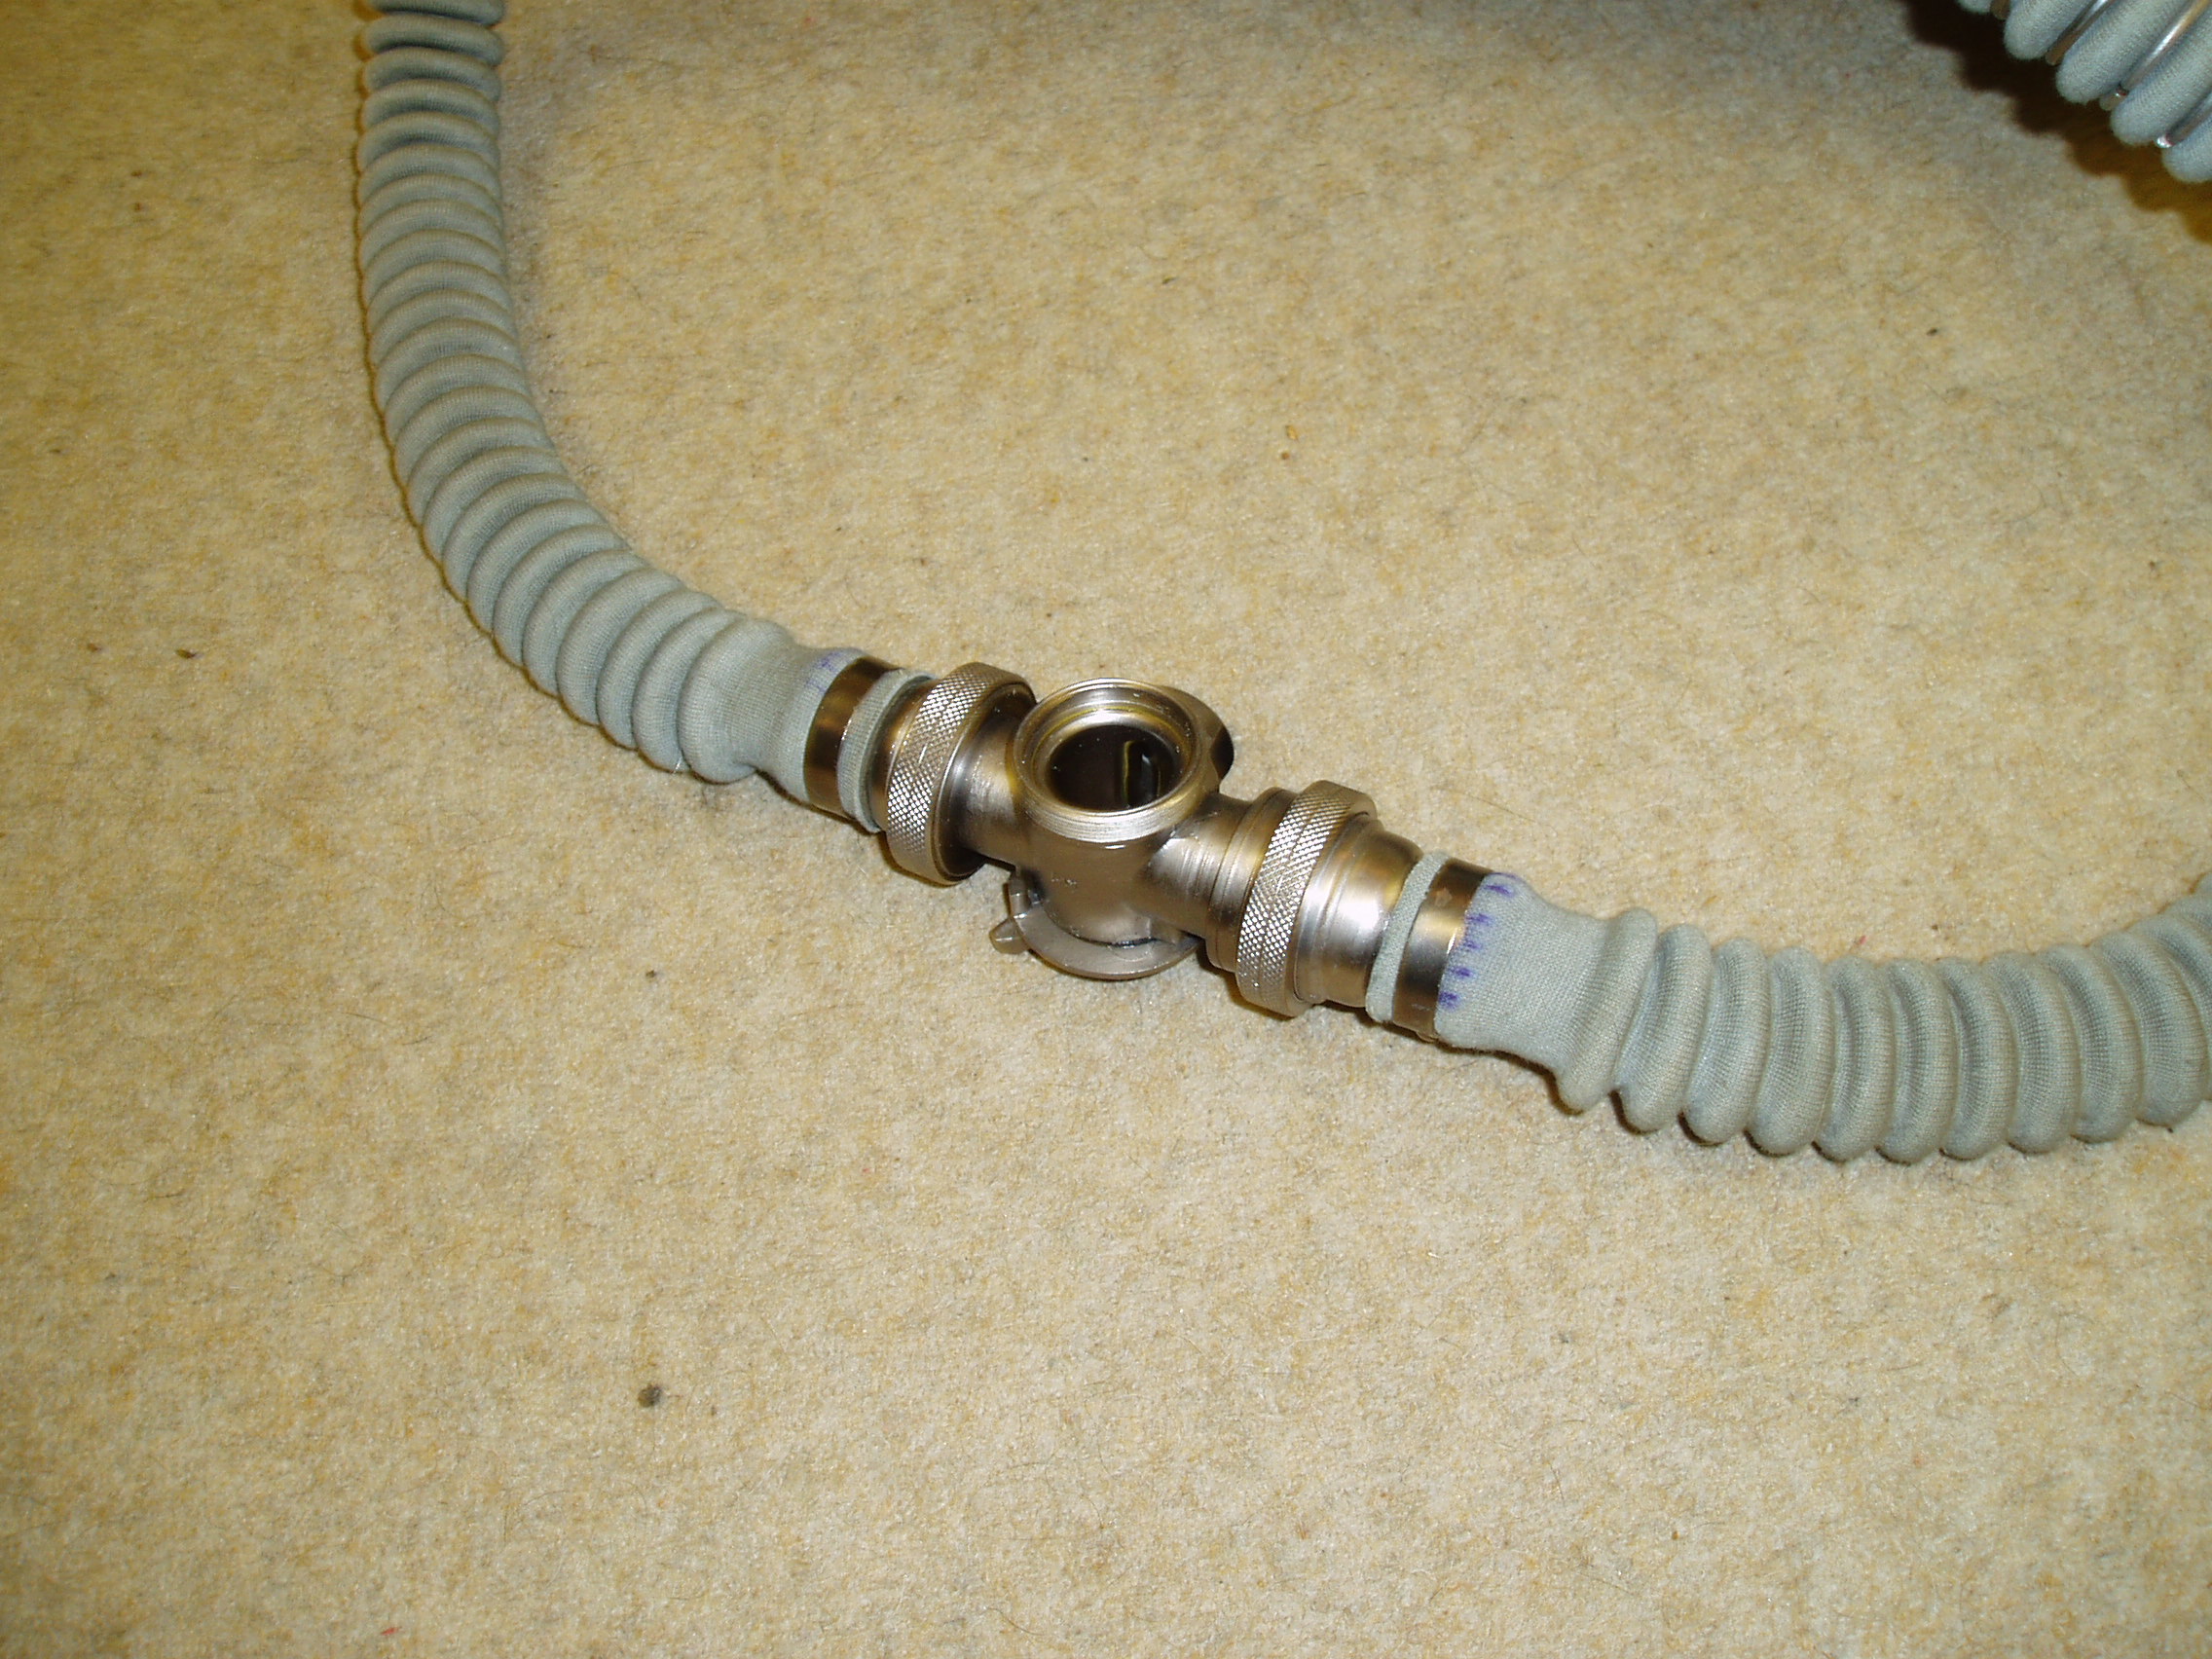
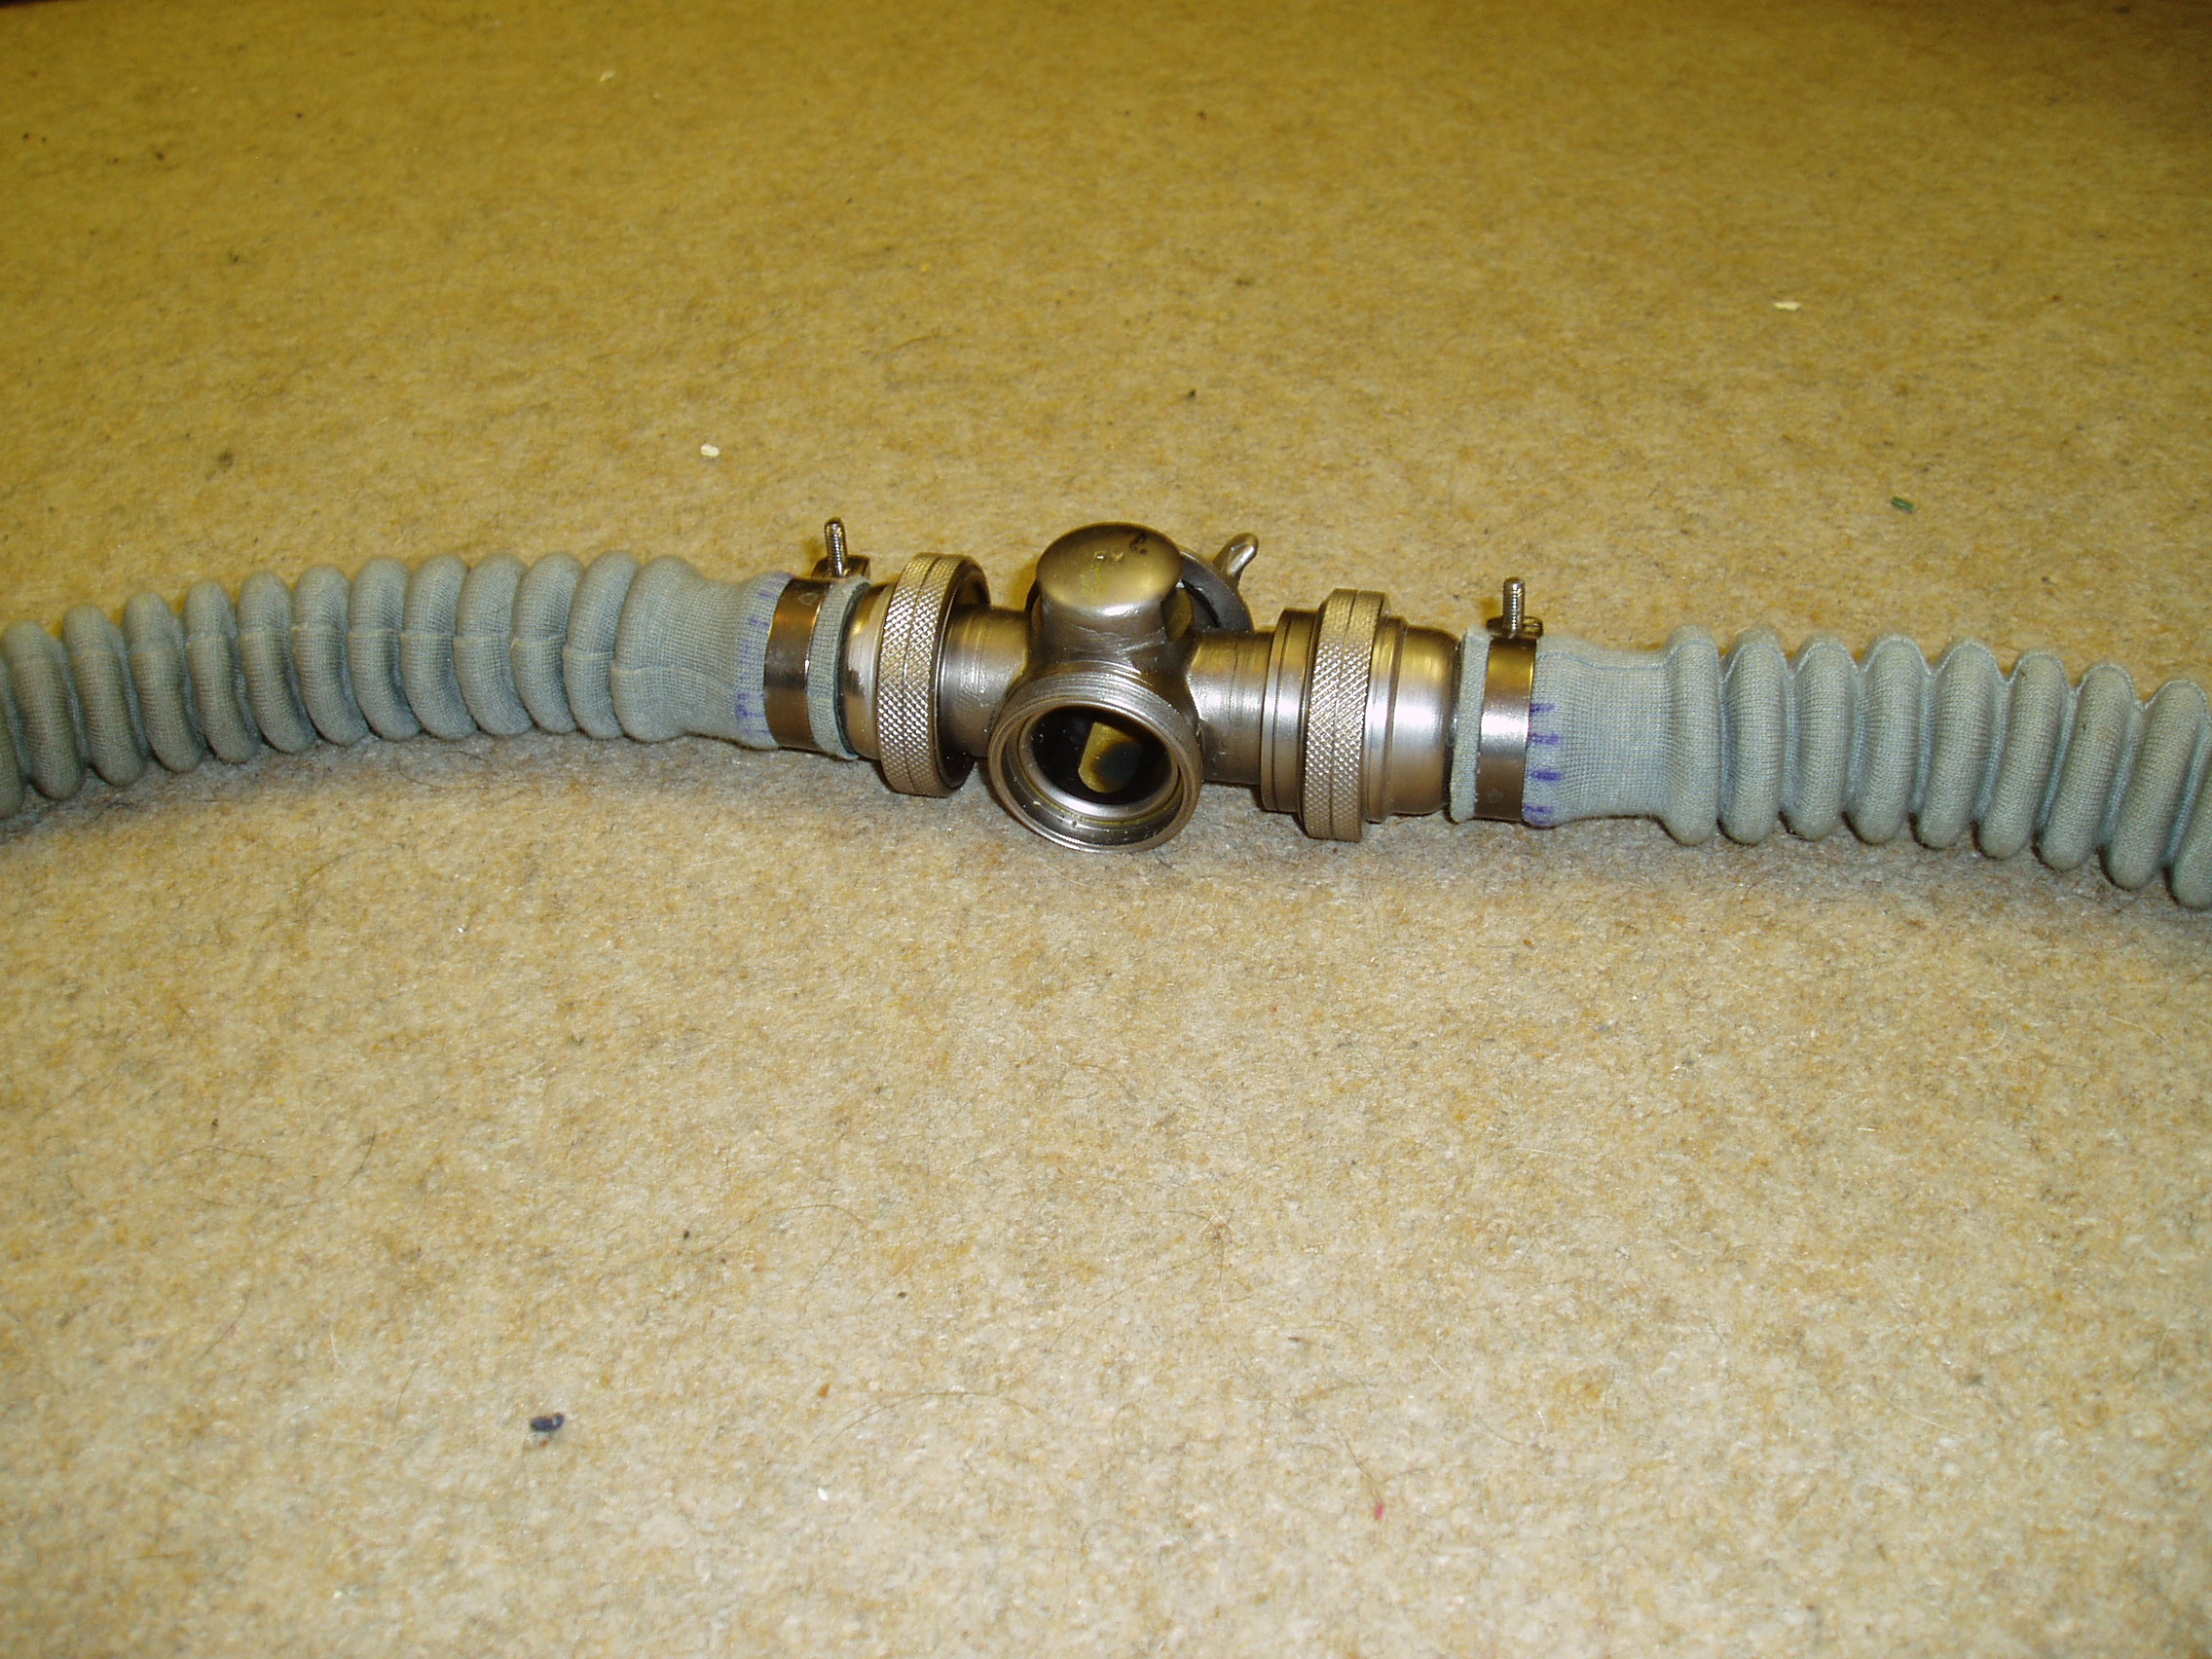
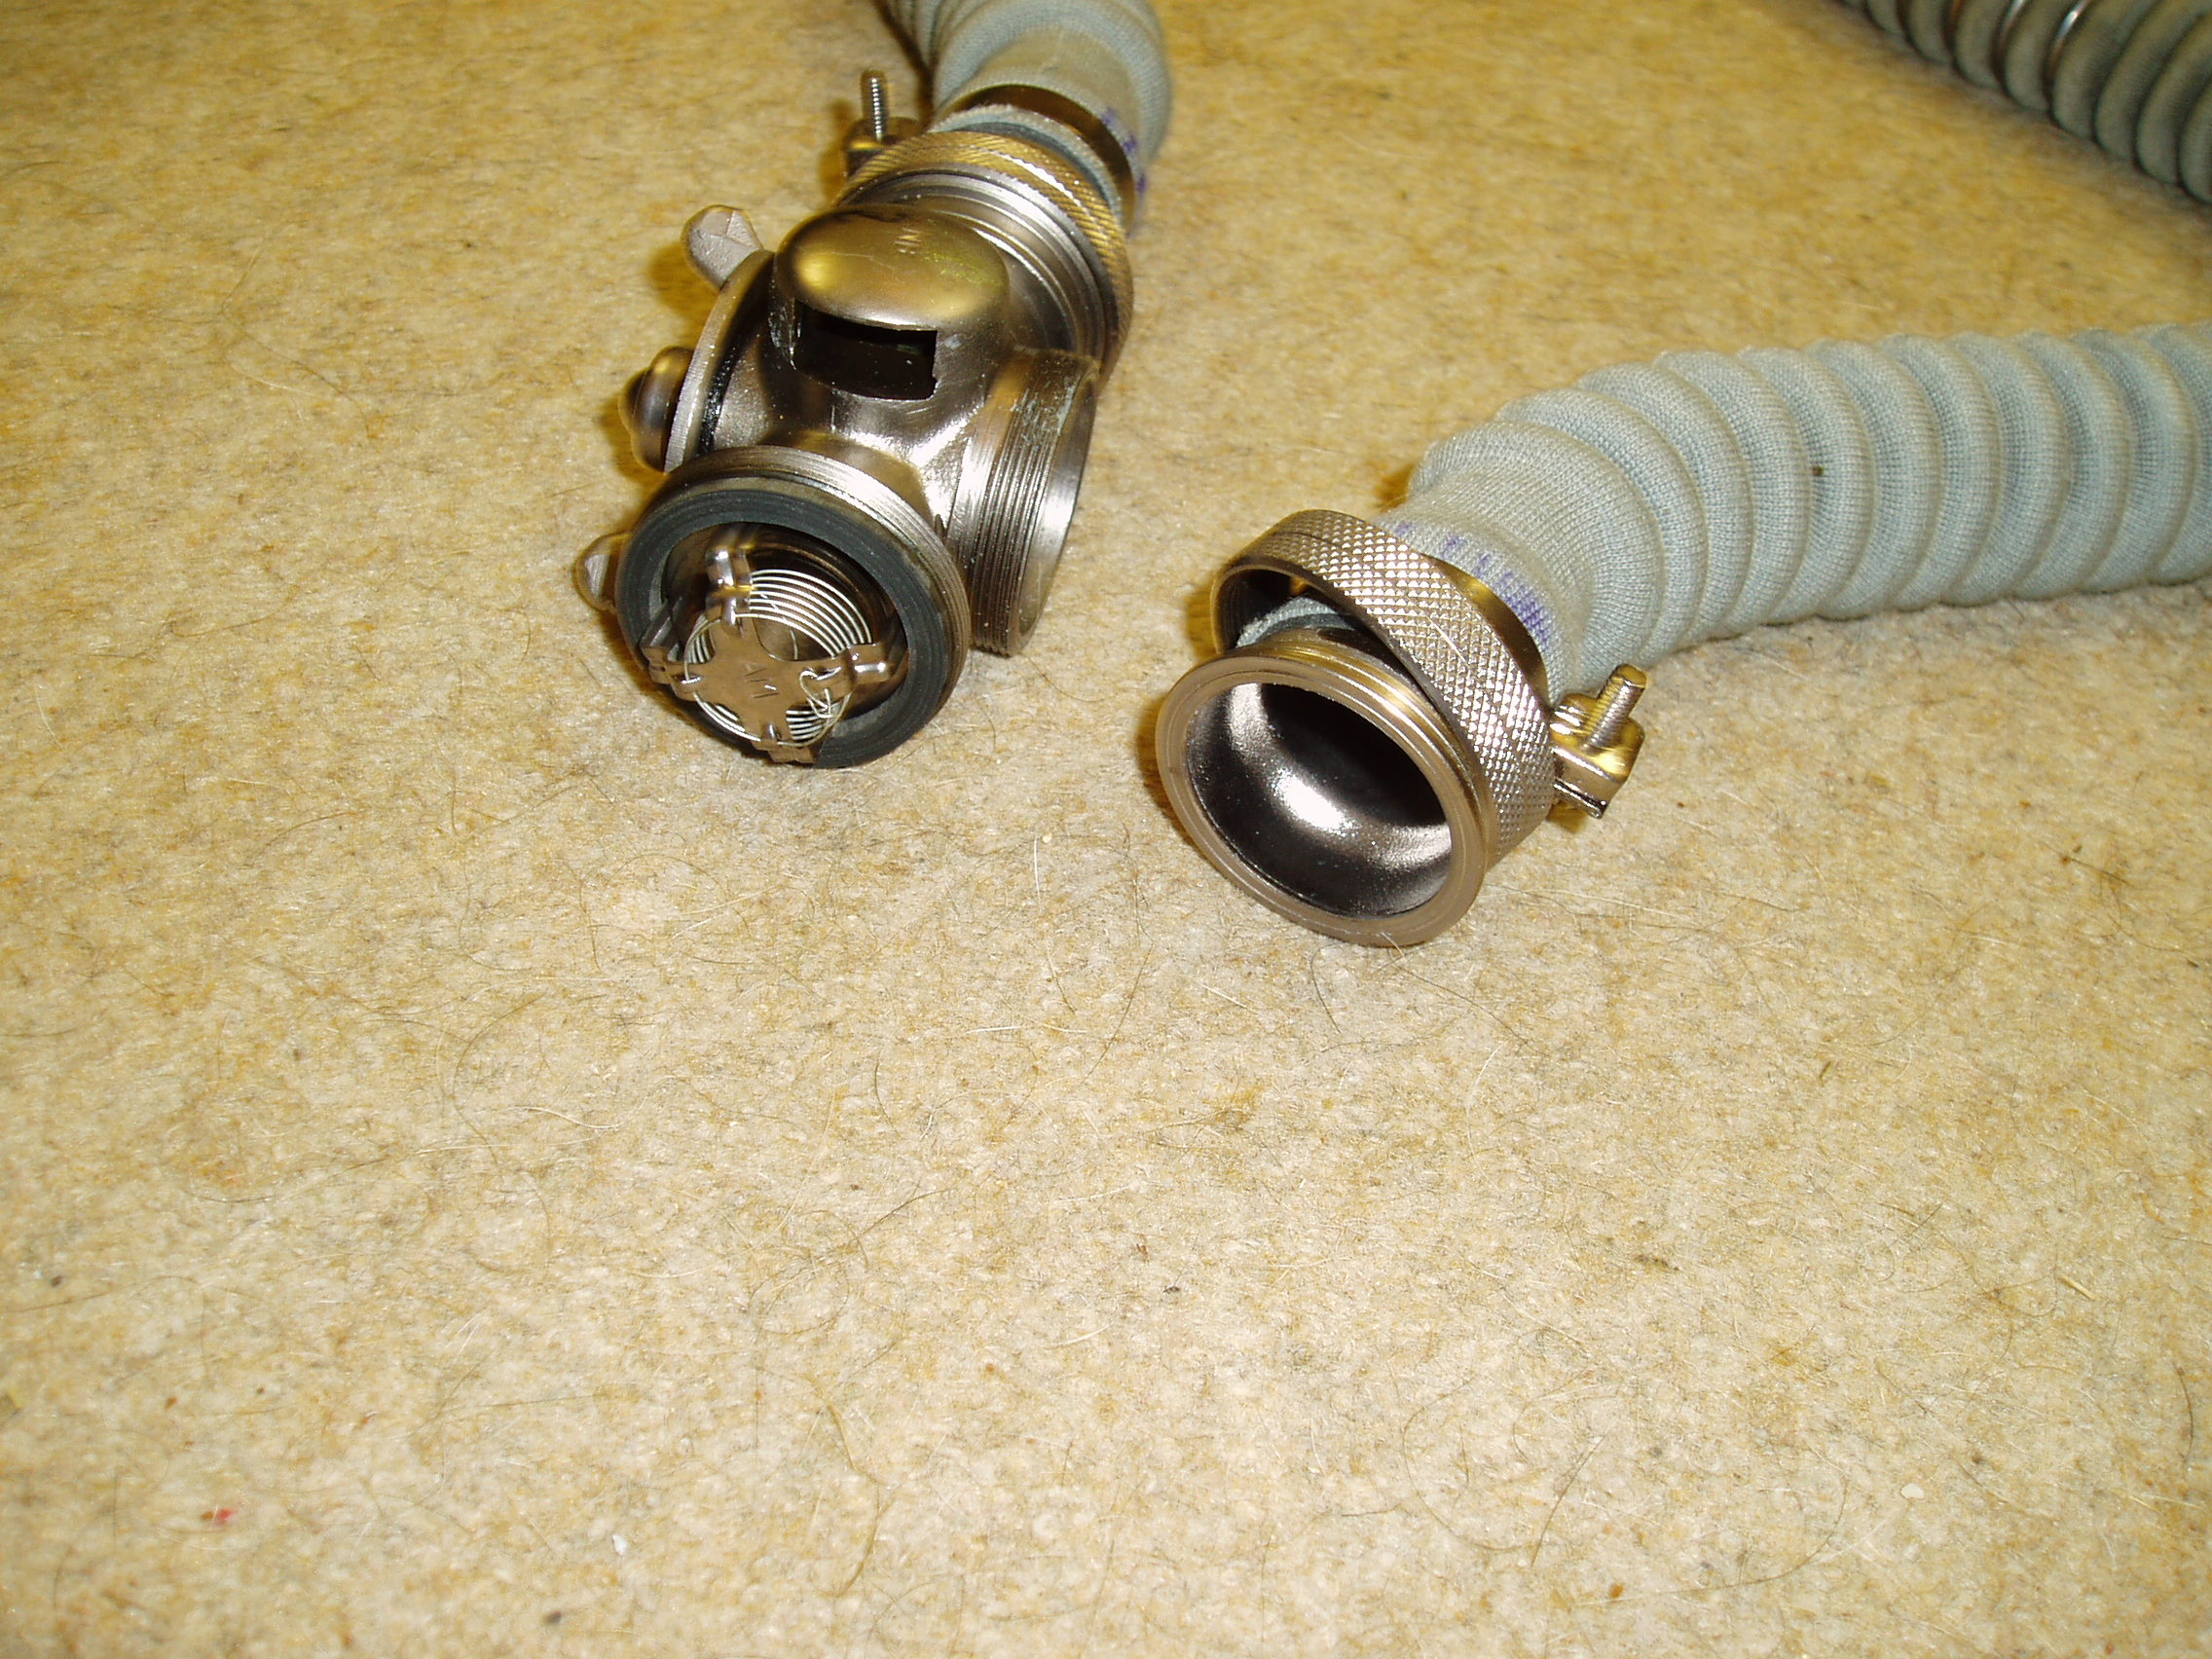
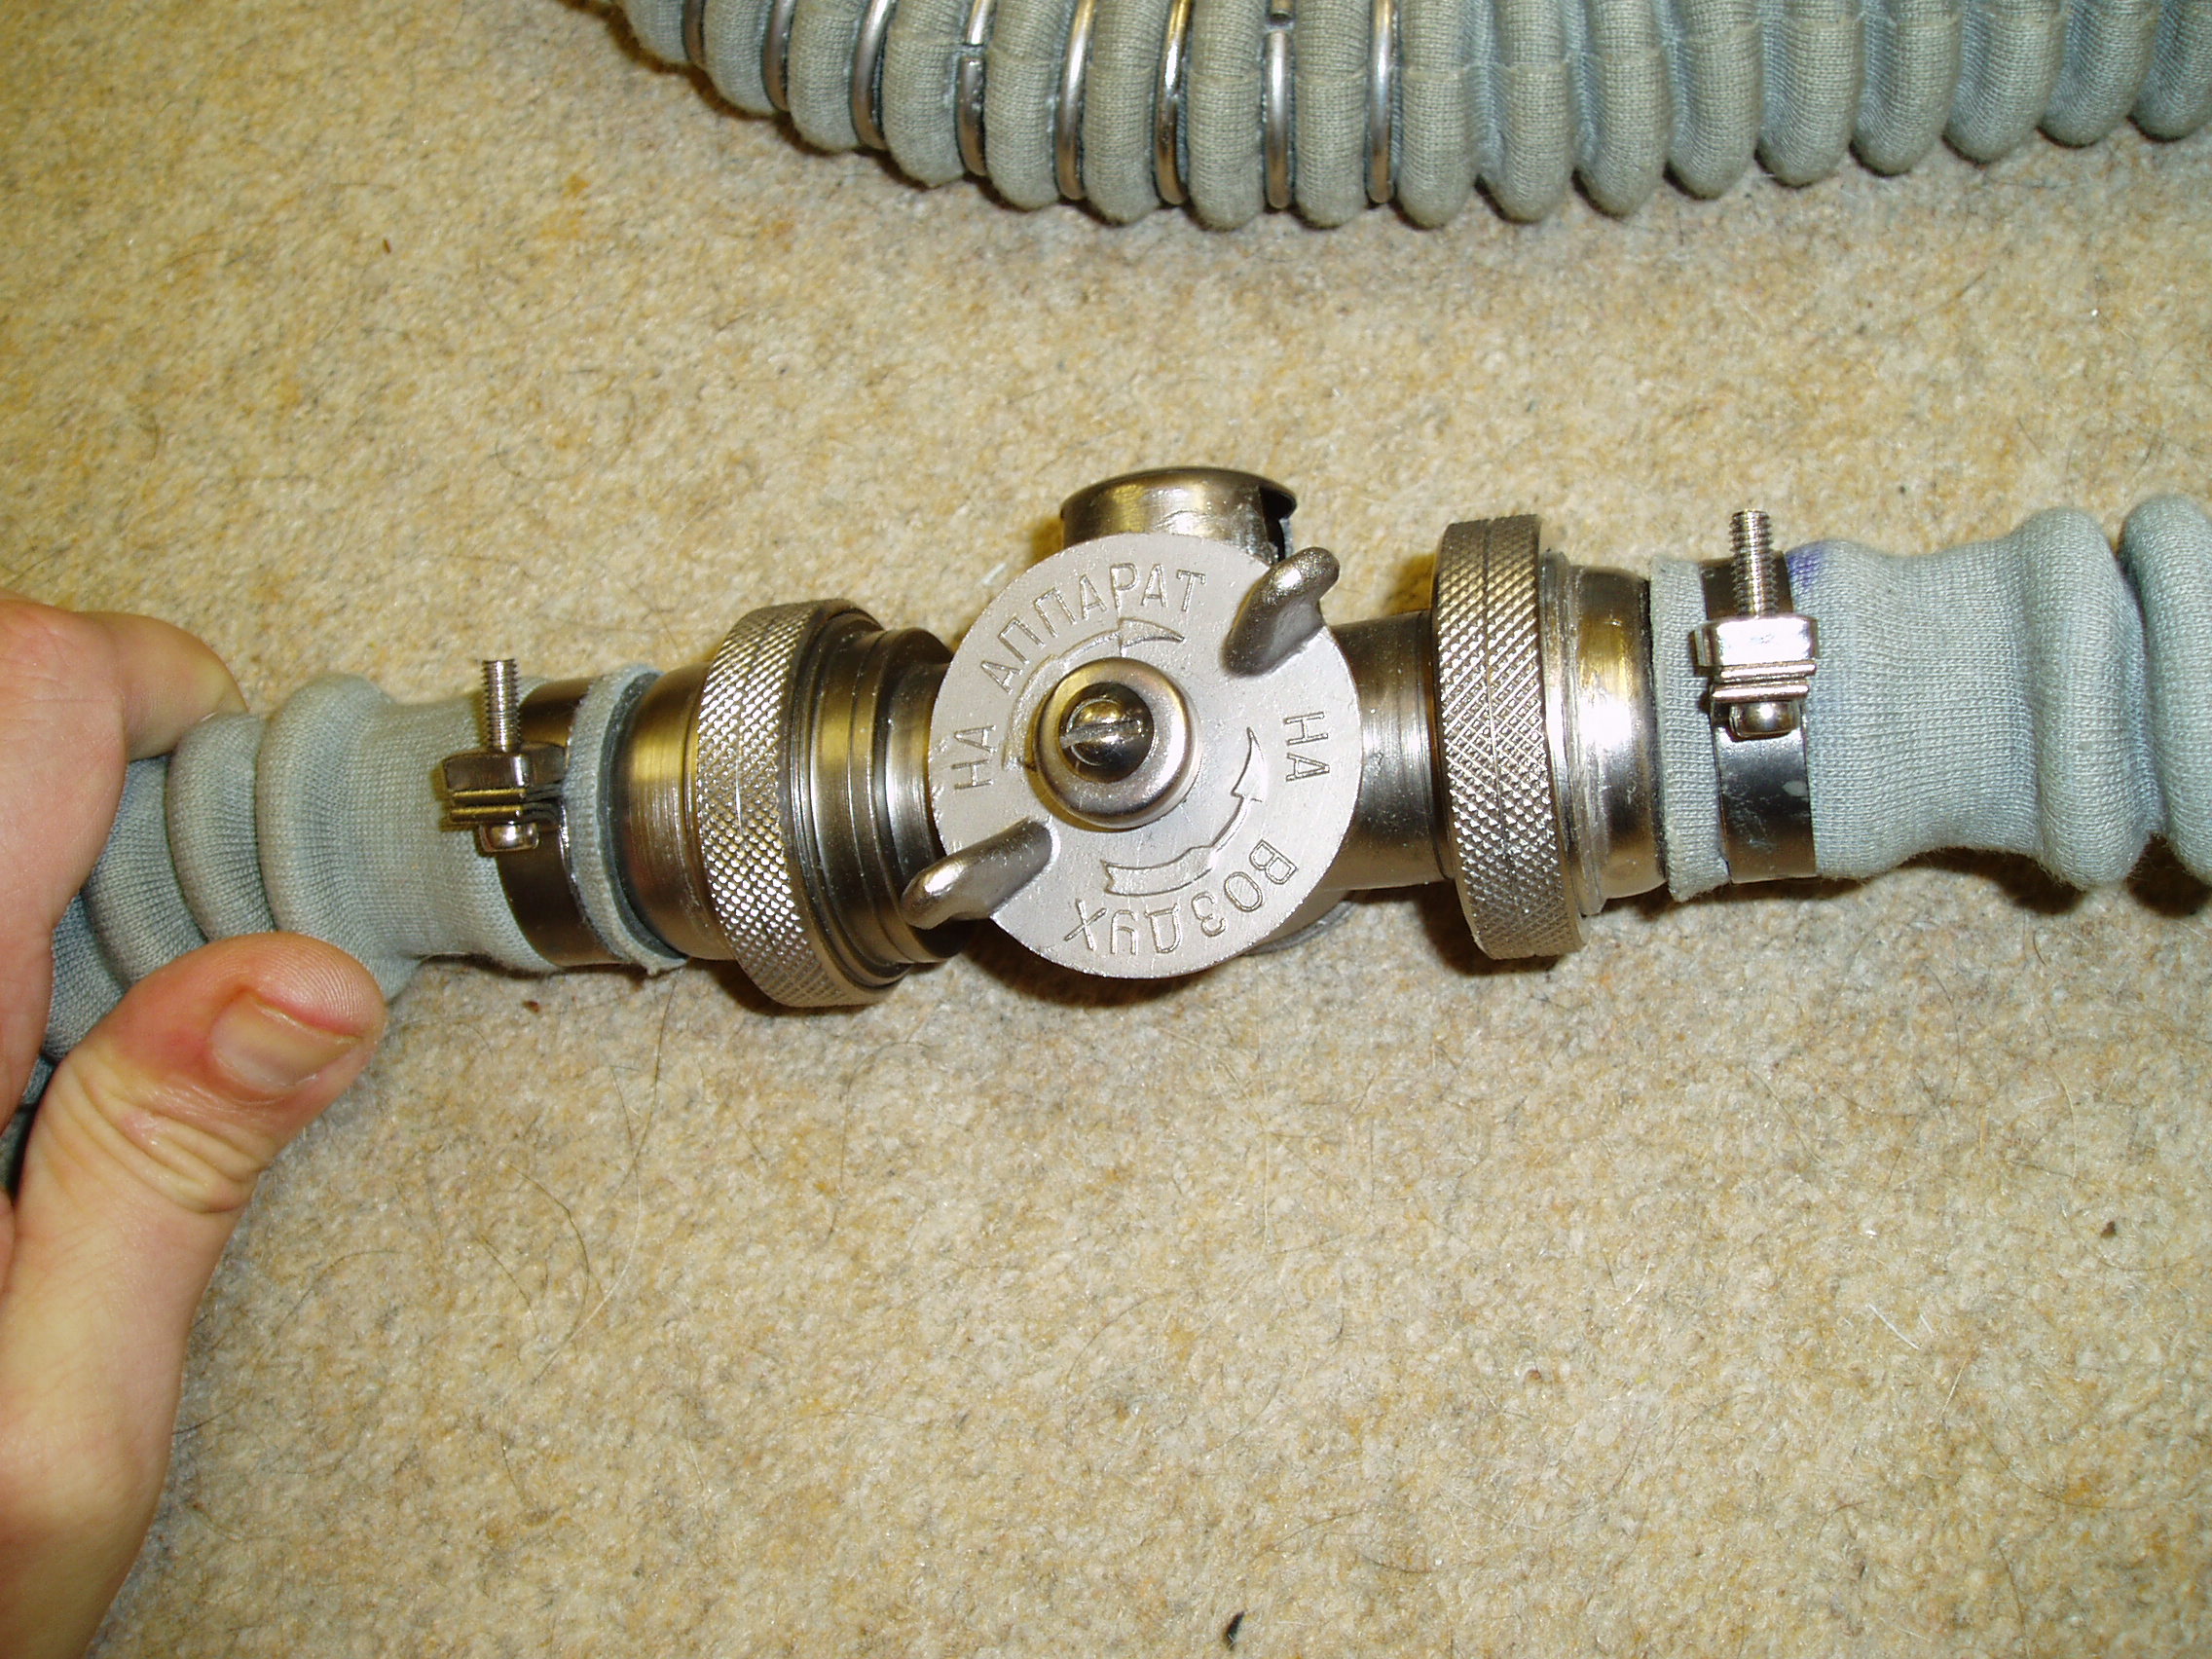
This is the mouthpiece. Notice the weights on the hose as it comes over the
shoulders. The switch on the front is either rebreathing or external feed.
Remember that this is conventionally used with a full face mask.
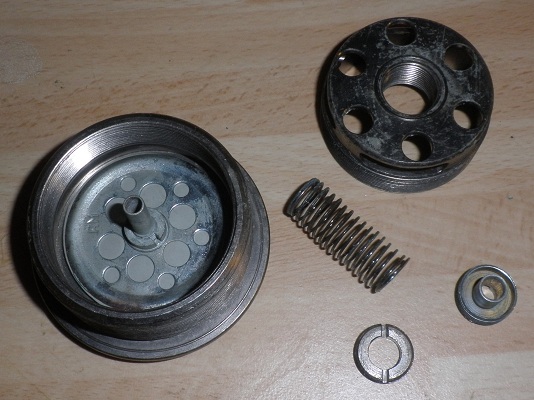
Isn't it beautiful? That is a spring pressing on a mica disk. Quite the
most exquisite one way valve imaginable. Clearly built on a defence budget
where we were the baddies.
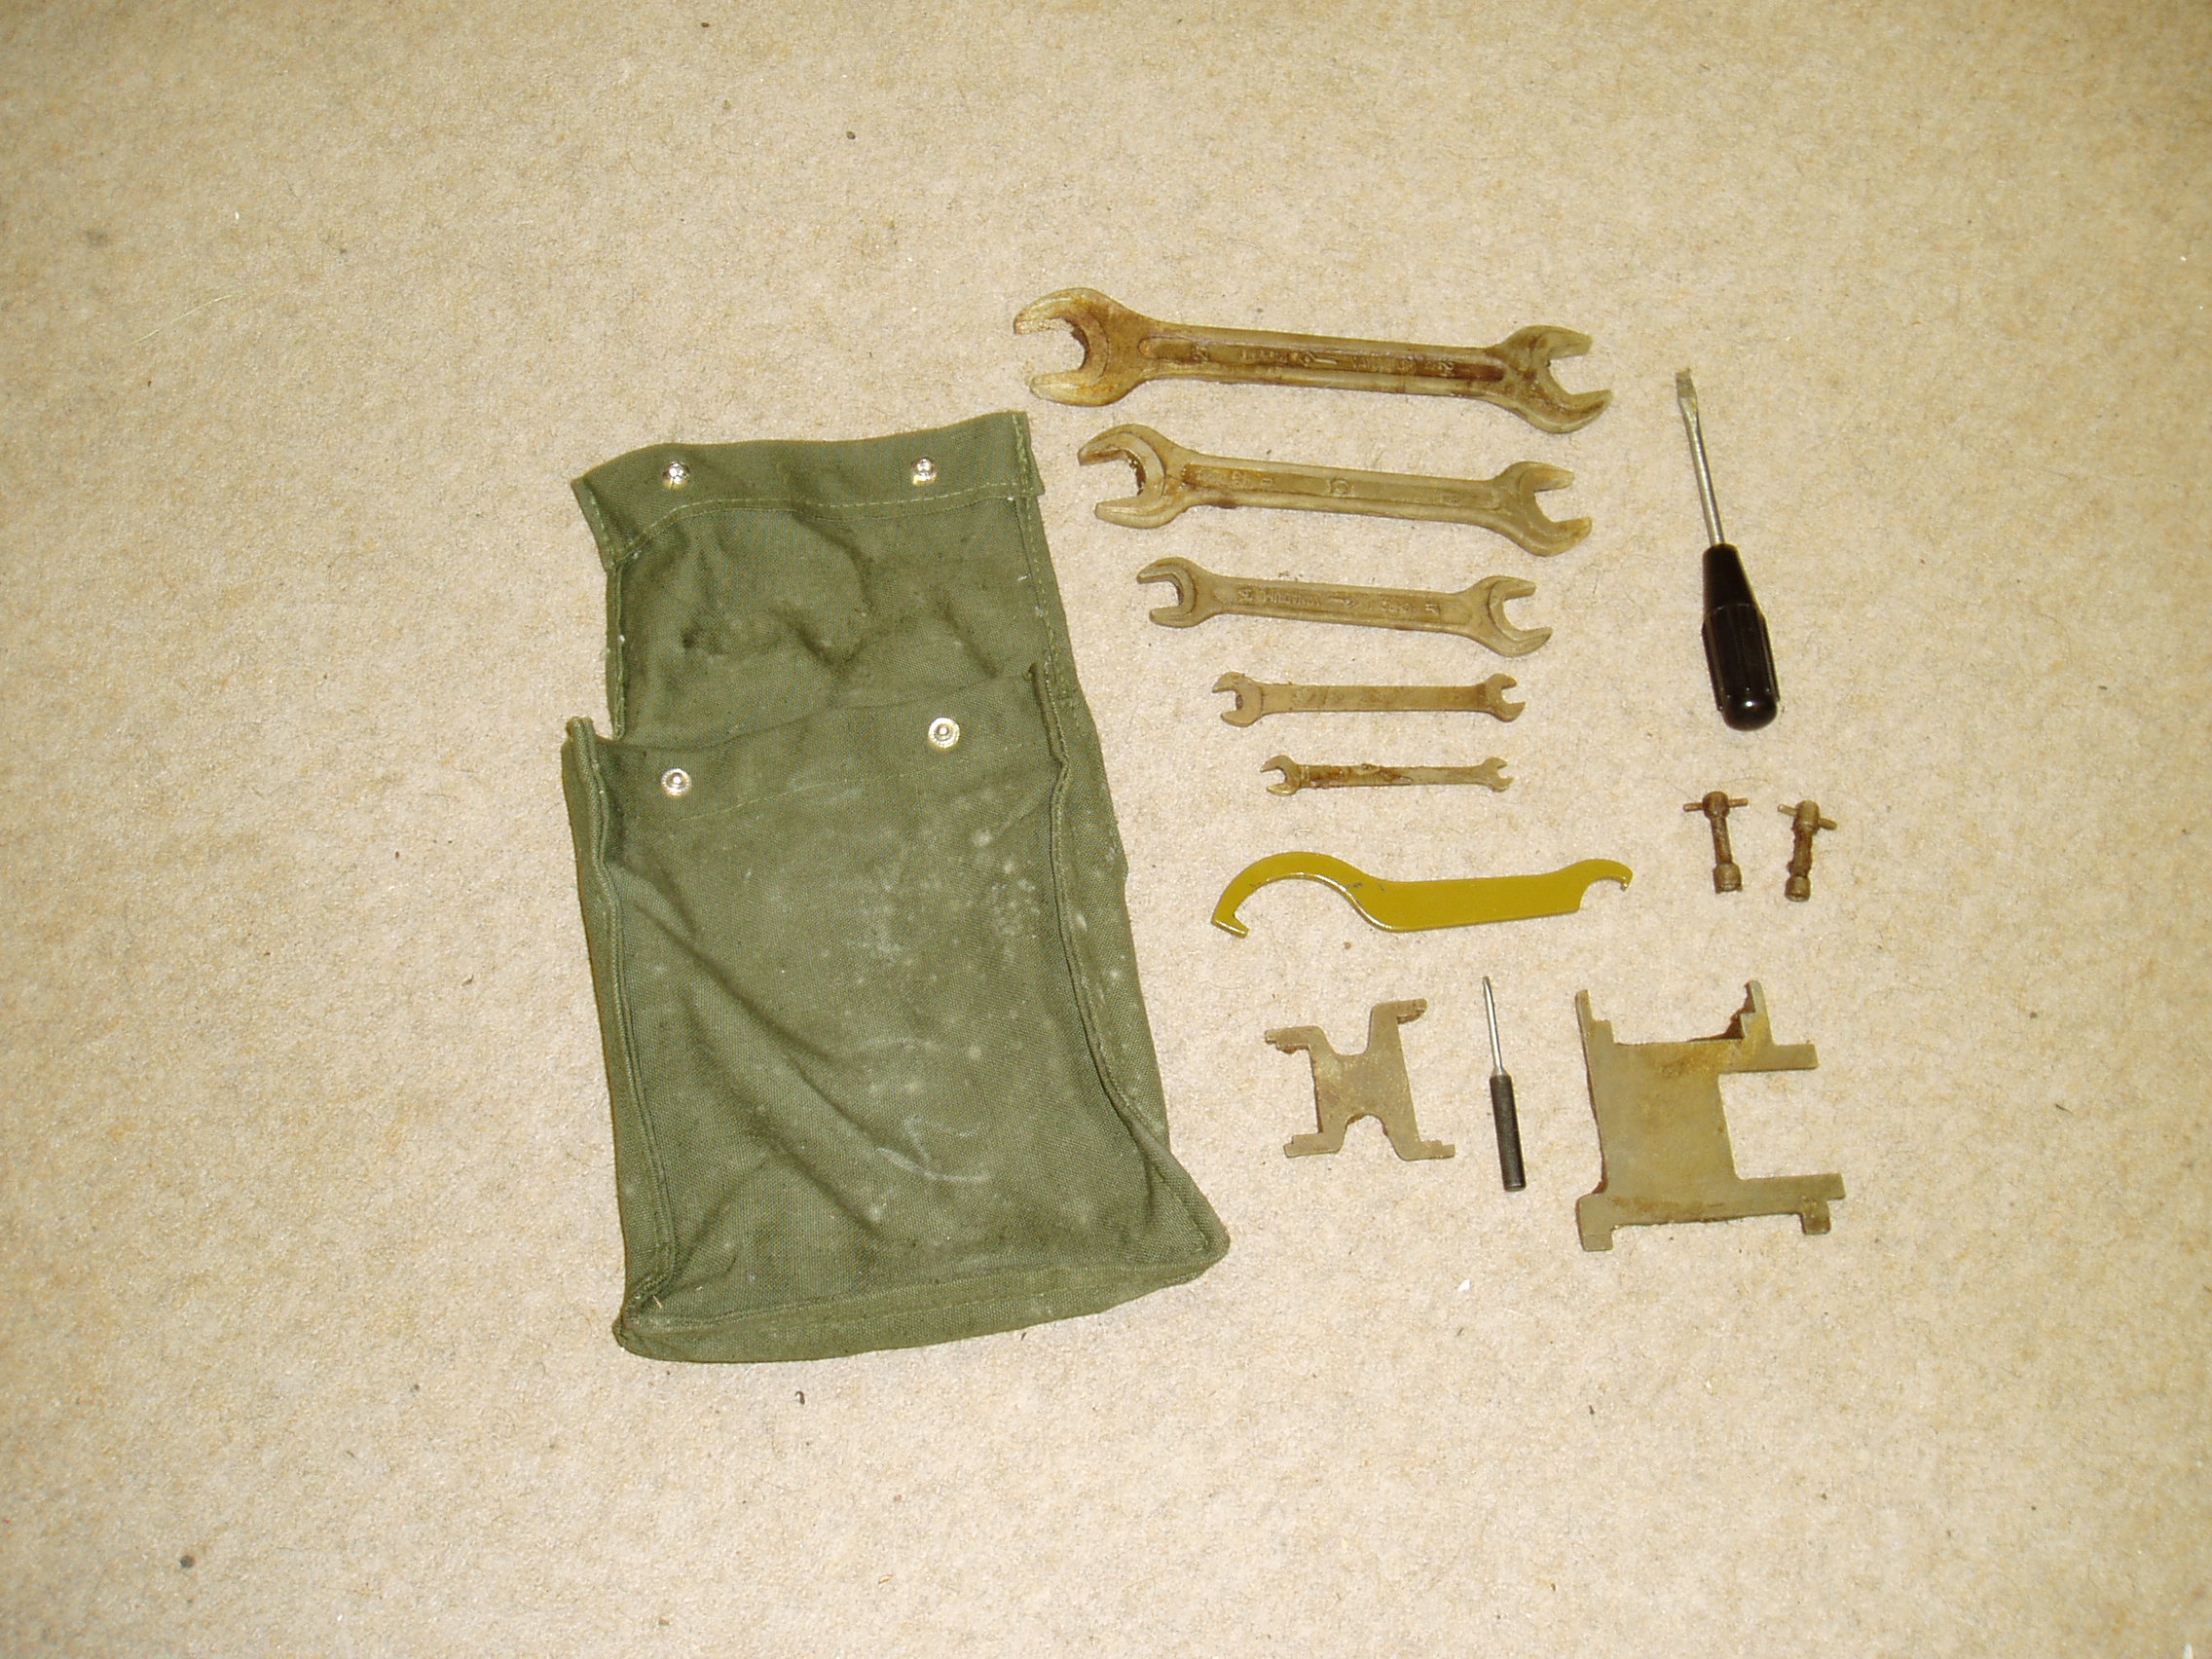
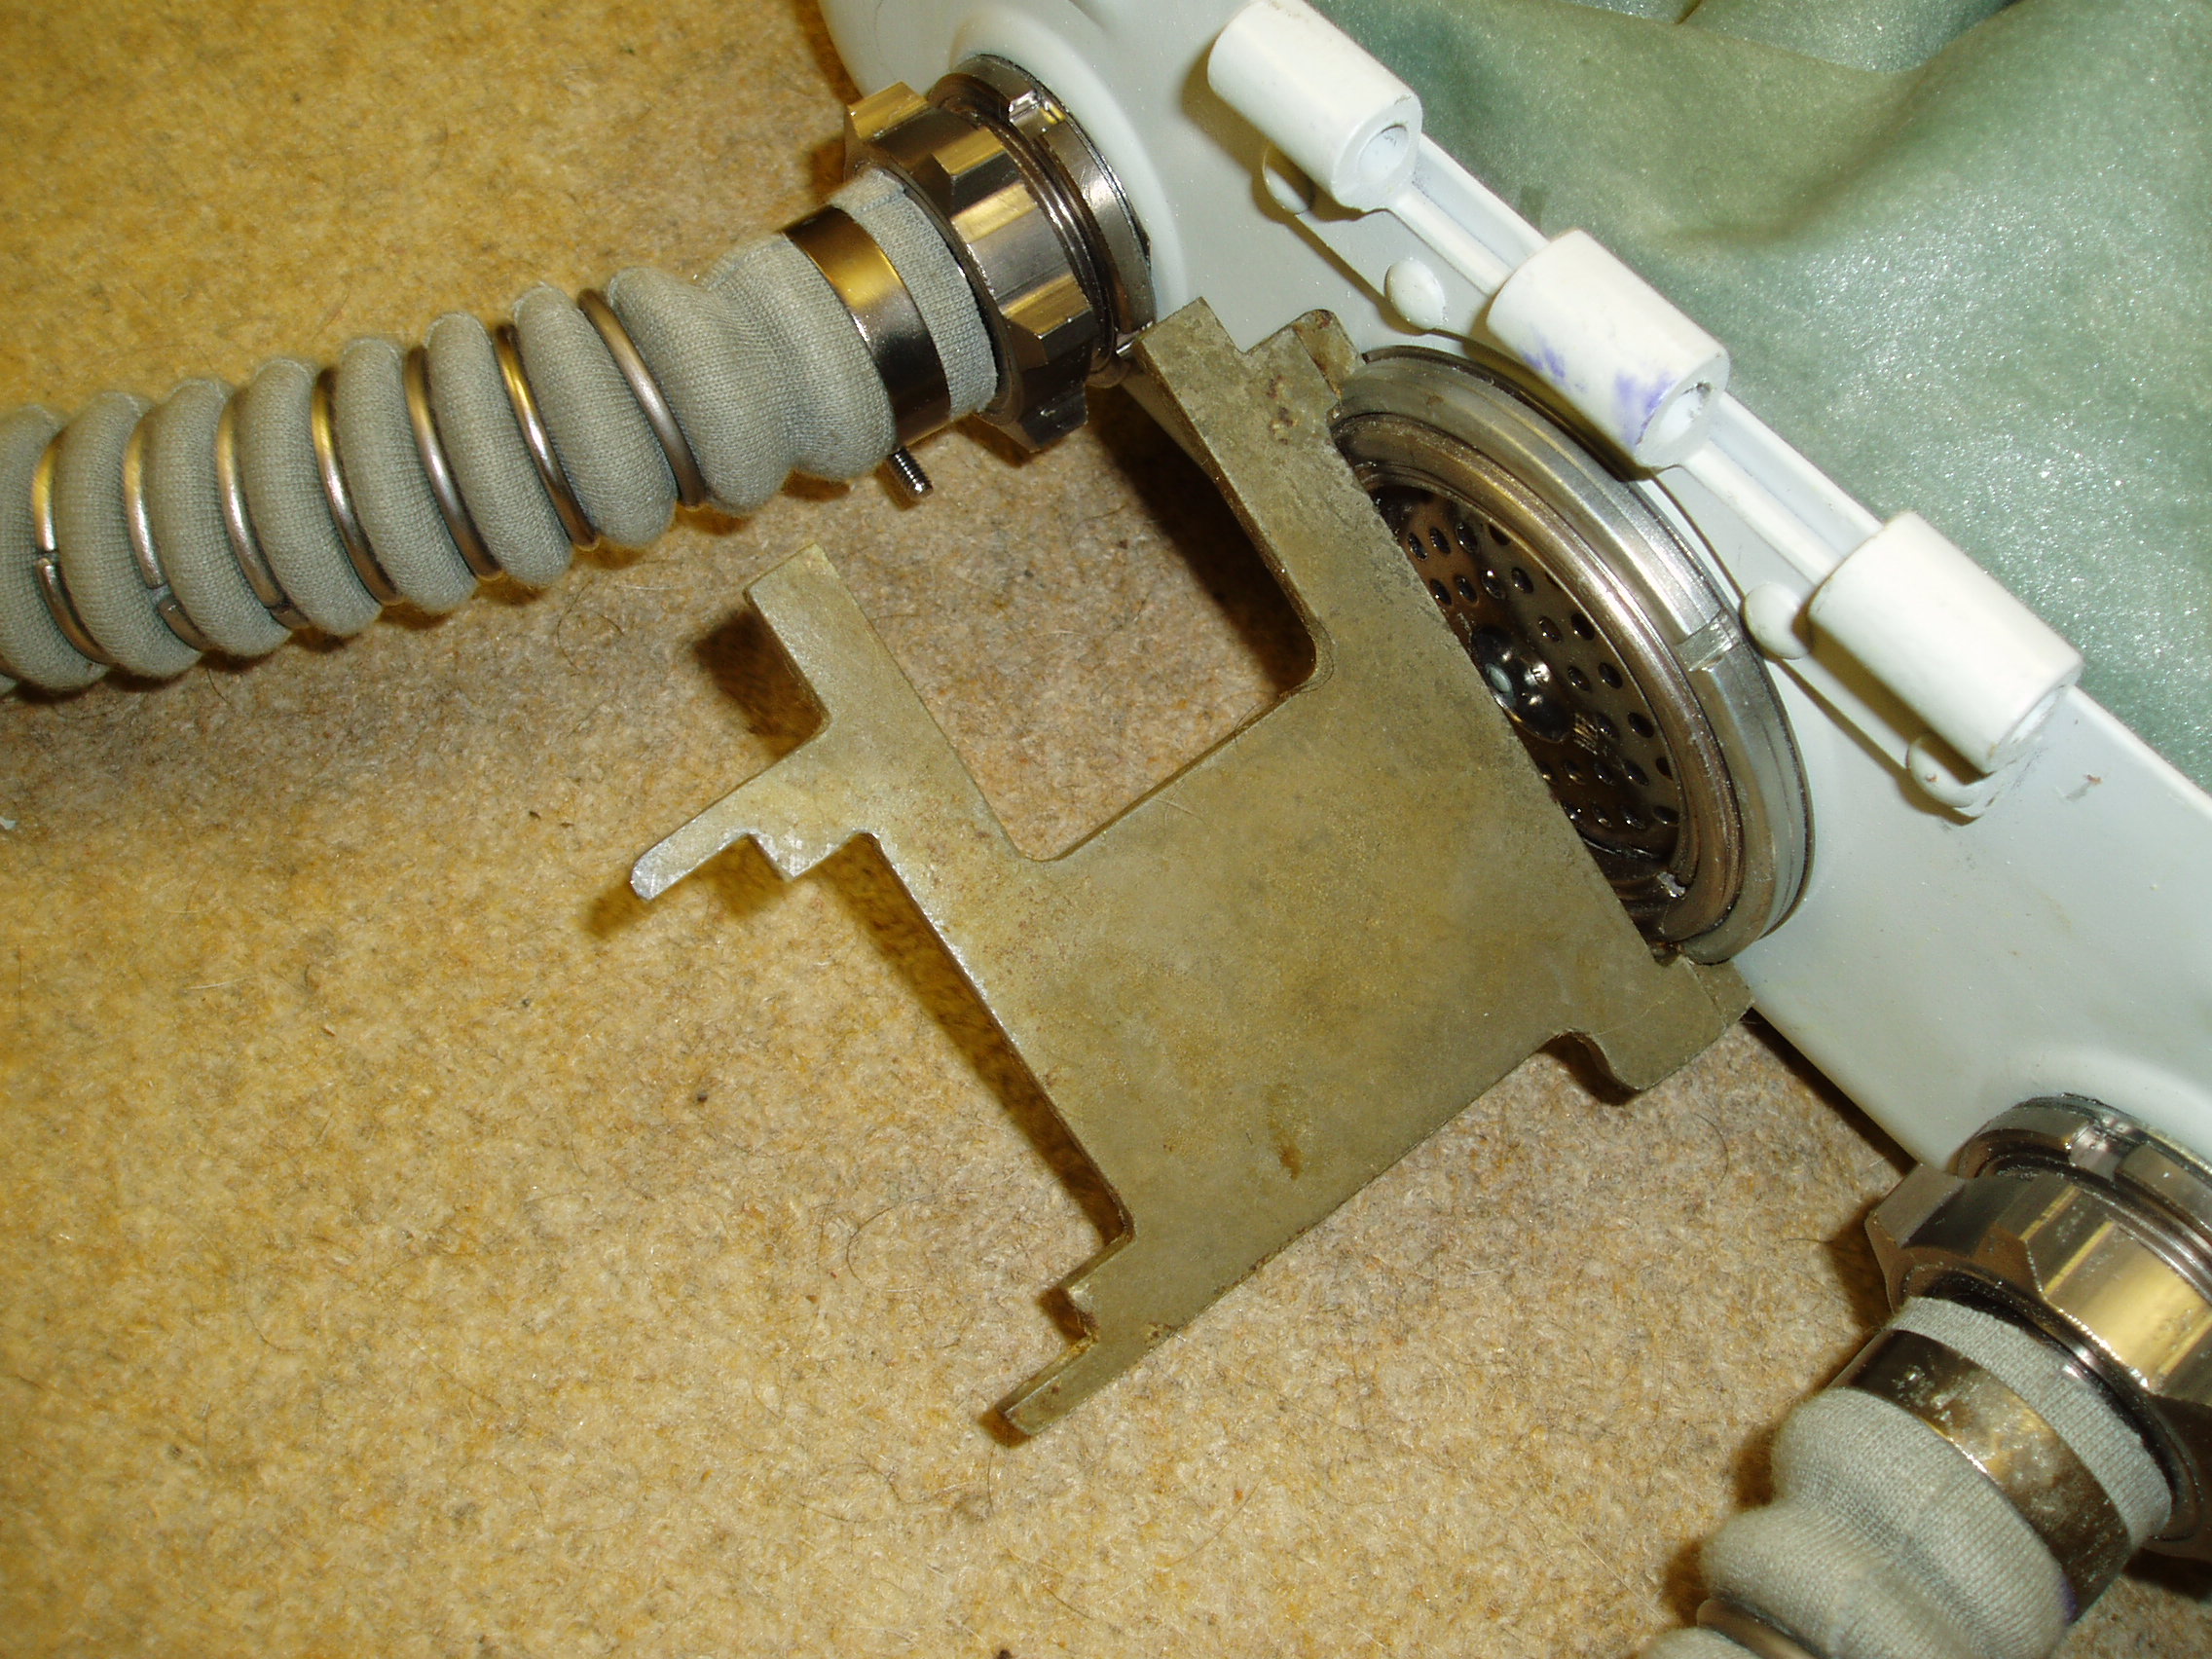
This is the tool kit. The lumps of metal at the bottom perplexed me until
I offered one up to a valve. As you can see the kit is comprehensive and, in
fact, fits some of the things I have here that I haven't got spanners
for.
Some time ago another IDA64 owner with less of the kit than I have asked for
the details on the tools so here is the dimensioned picture I sent him.
Can you guess what it is? I couldn't. Thanks to Dave Sutton a Florida diver for
an explanation. Apparently I have box one of two. The suit, mask, fins and
stuff were shipped separately in a second, standard navy sized crate and this
is the suit inflation bottle. At most it is 800ccs and it is marked 150att so
not much volume. I can only assume the curve is so it can fit in a body hugging
pocket.
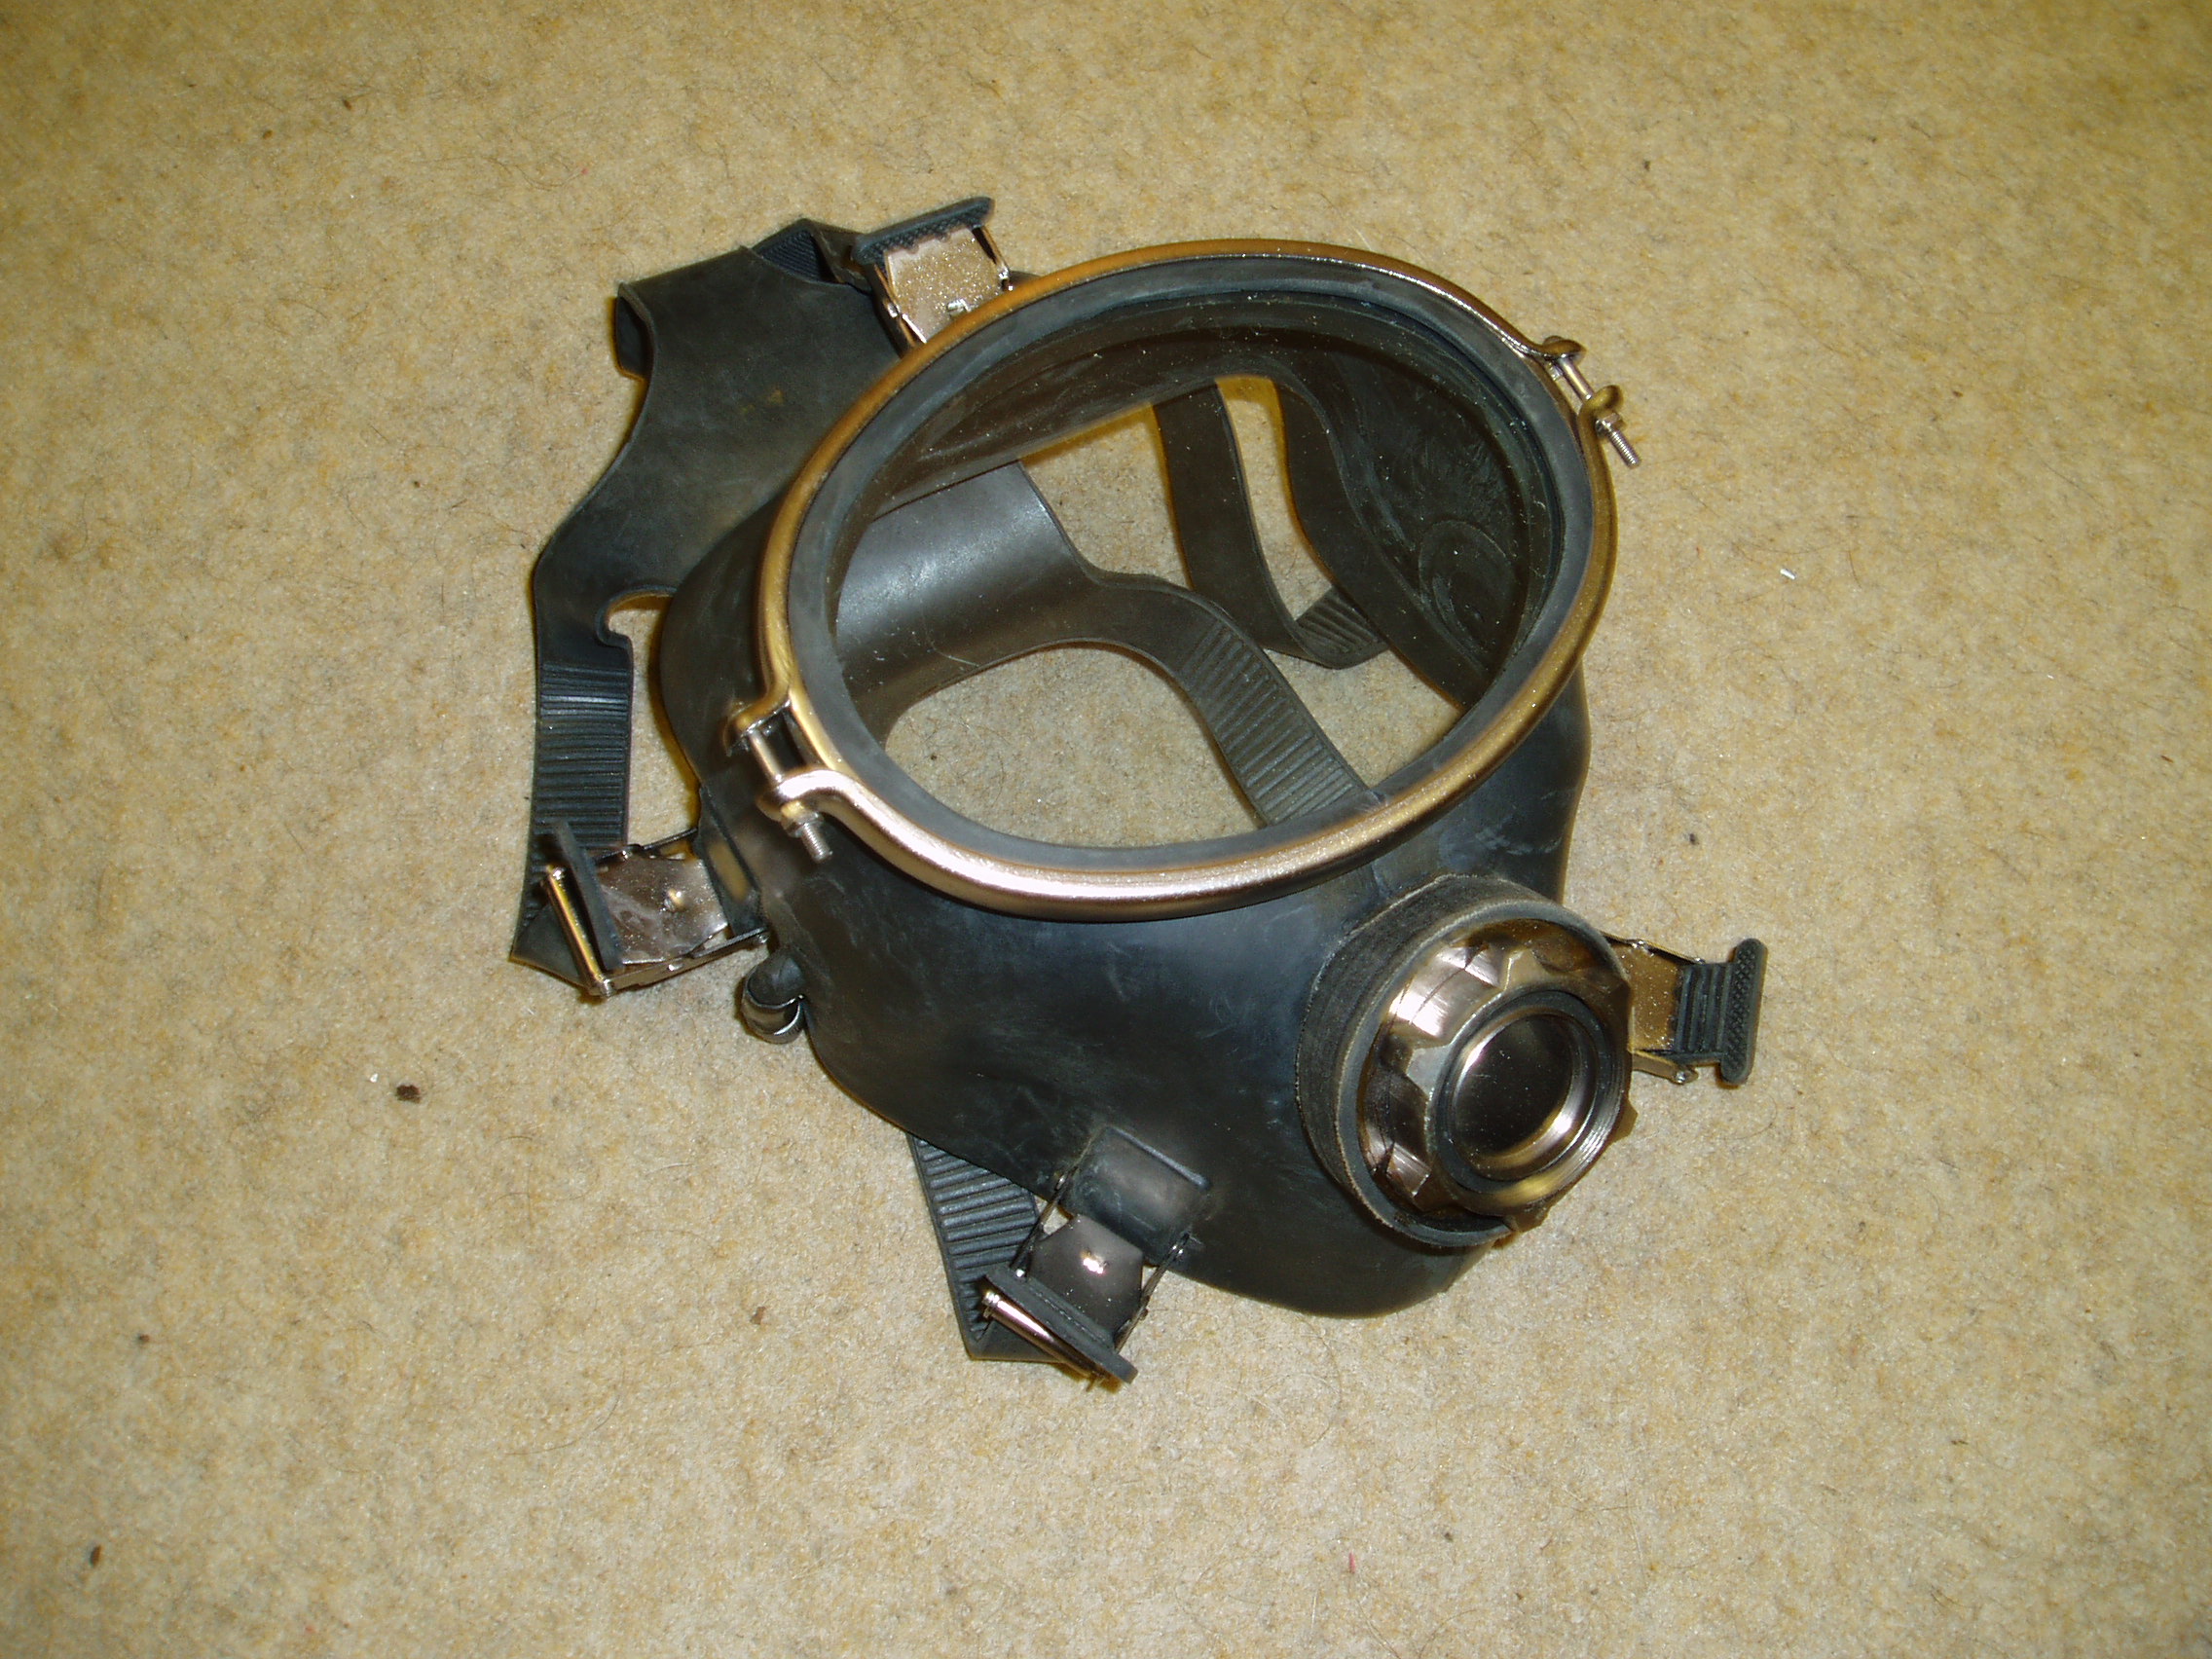
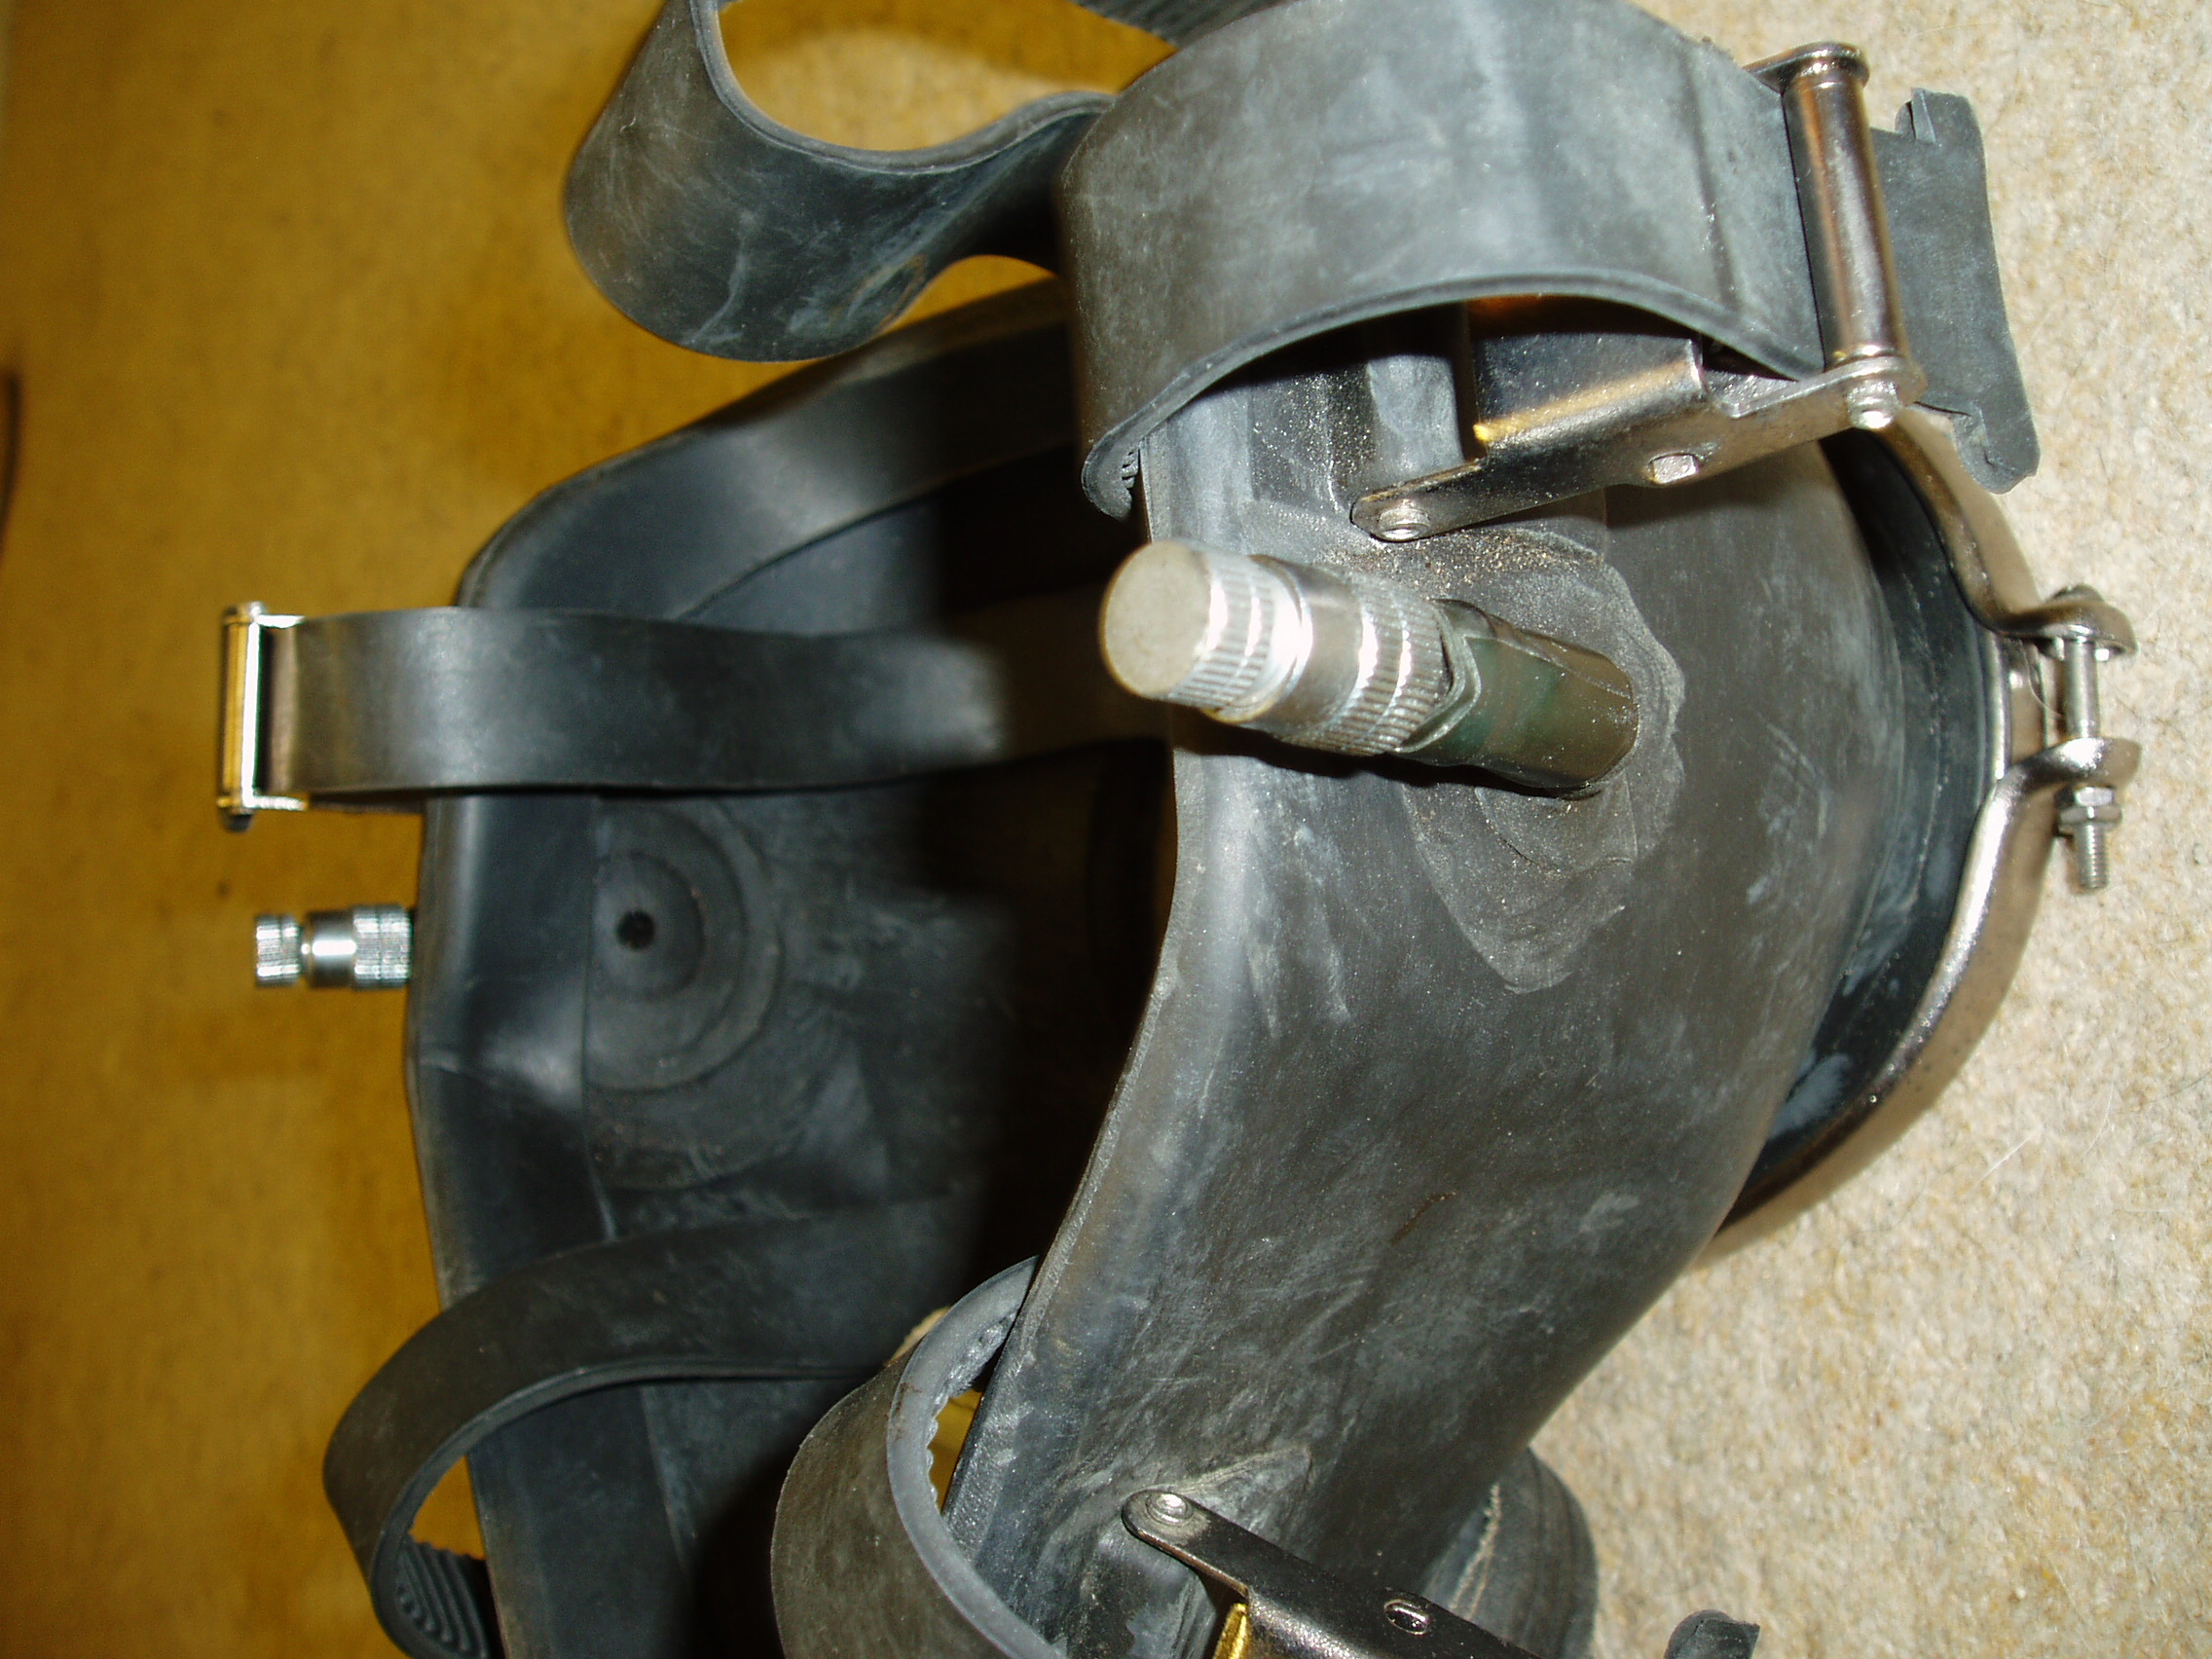
The mask, since it came in the other box, was missing. This was a chance find
on EBay. A diver in Hawaii had it and was getting asked questions about
dimensions by a Canadian because there are two slightly different variants.
However when it came right down to it he didn't want it as much as I did.
It measures right as it fits my rebreather.
Clearly you need to learn some of the hands off methods for clearing
your ears since you can't touch your nose but my freediving jaw-thrust seems to
work.
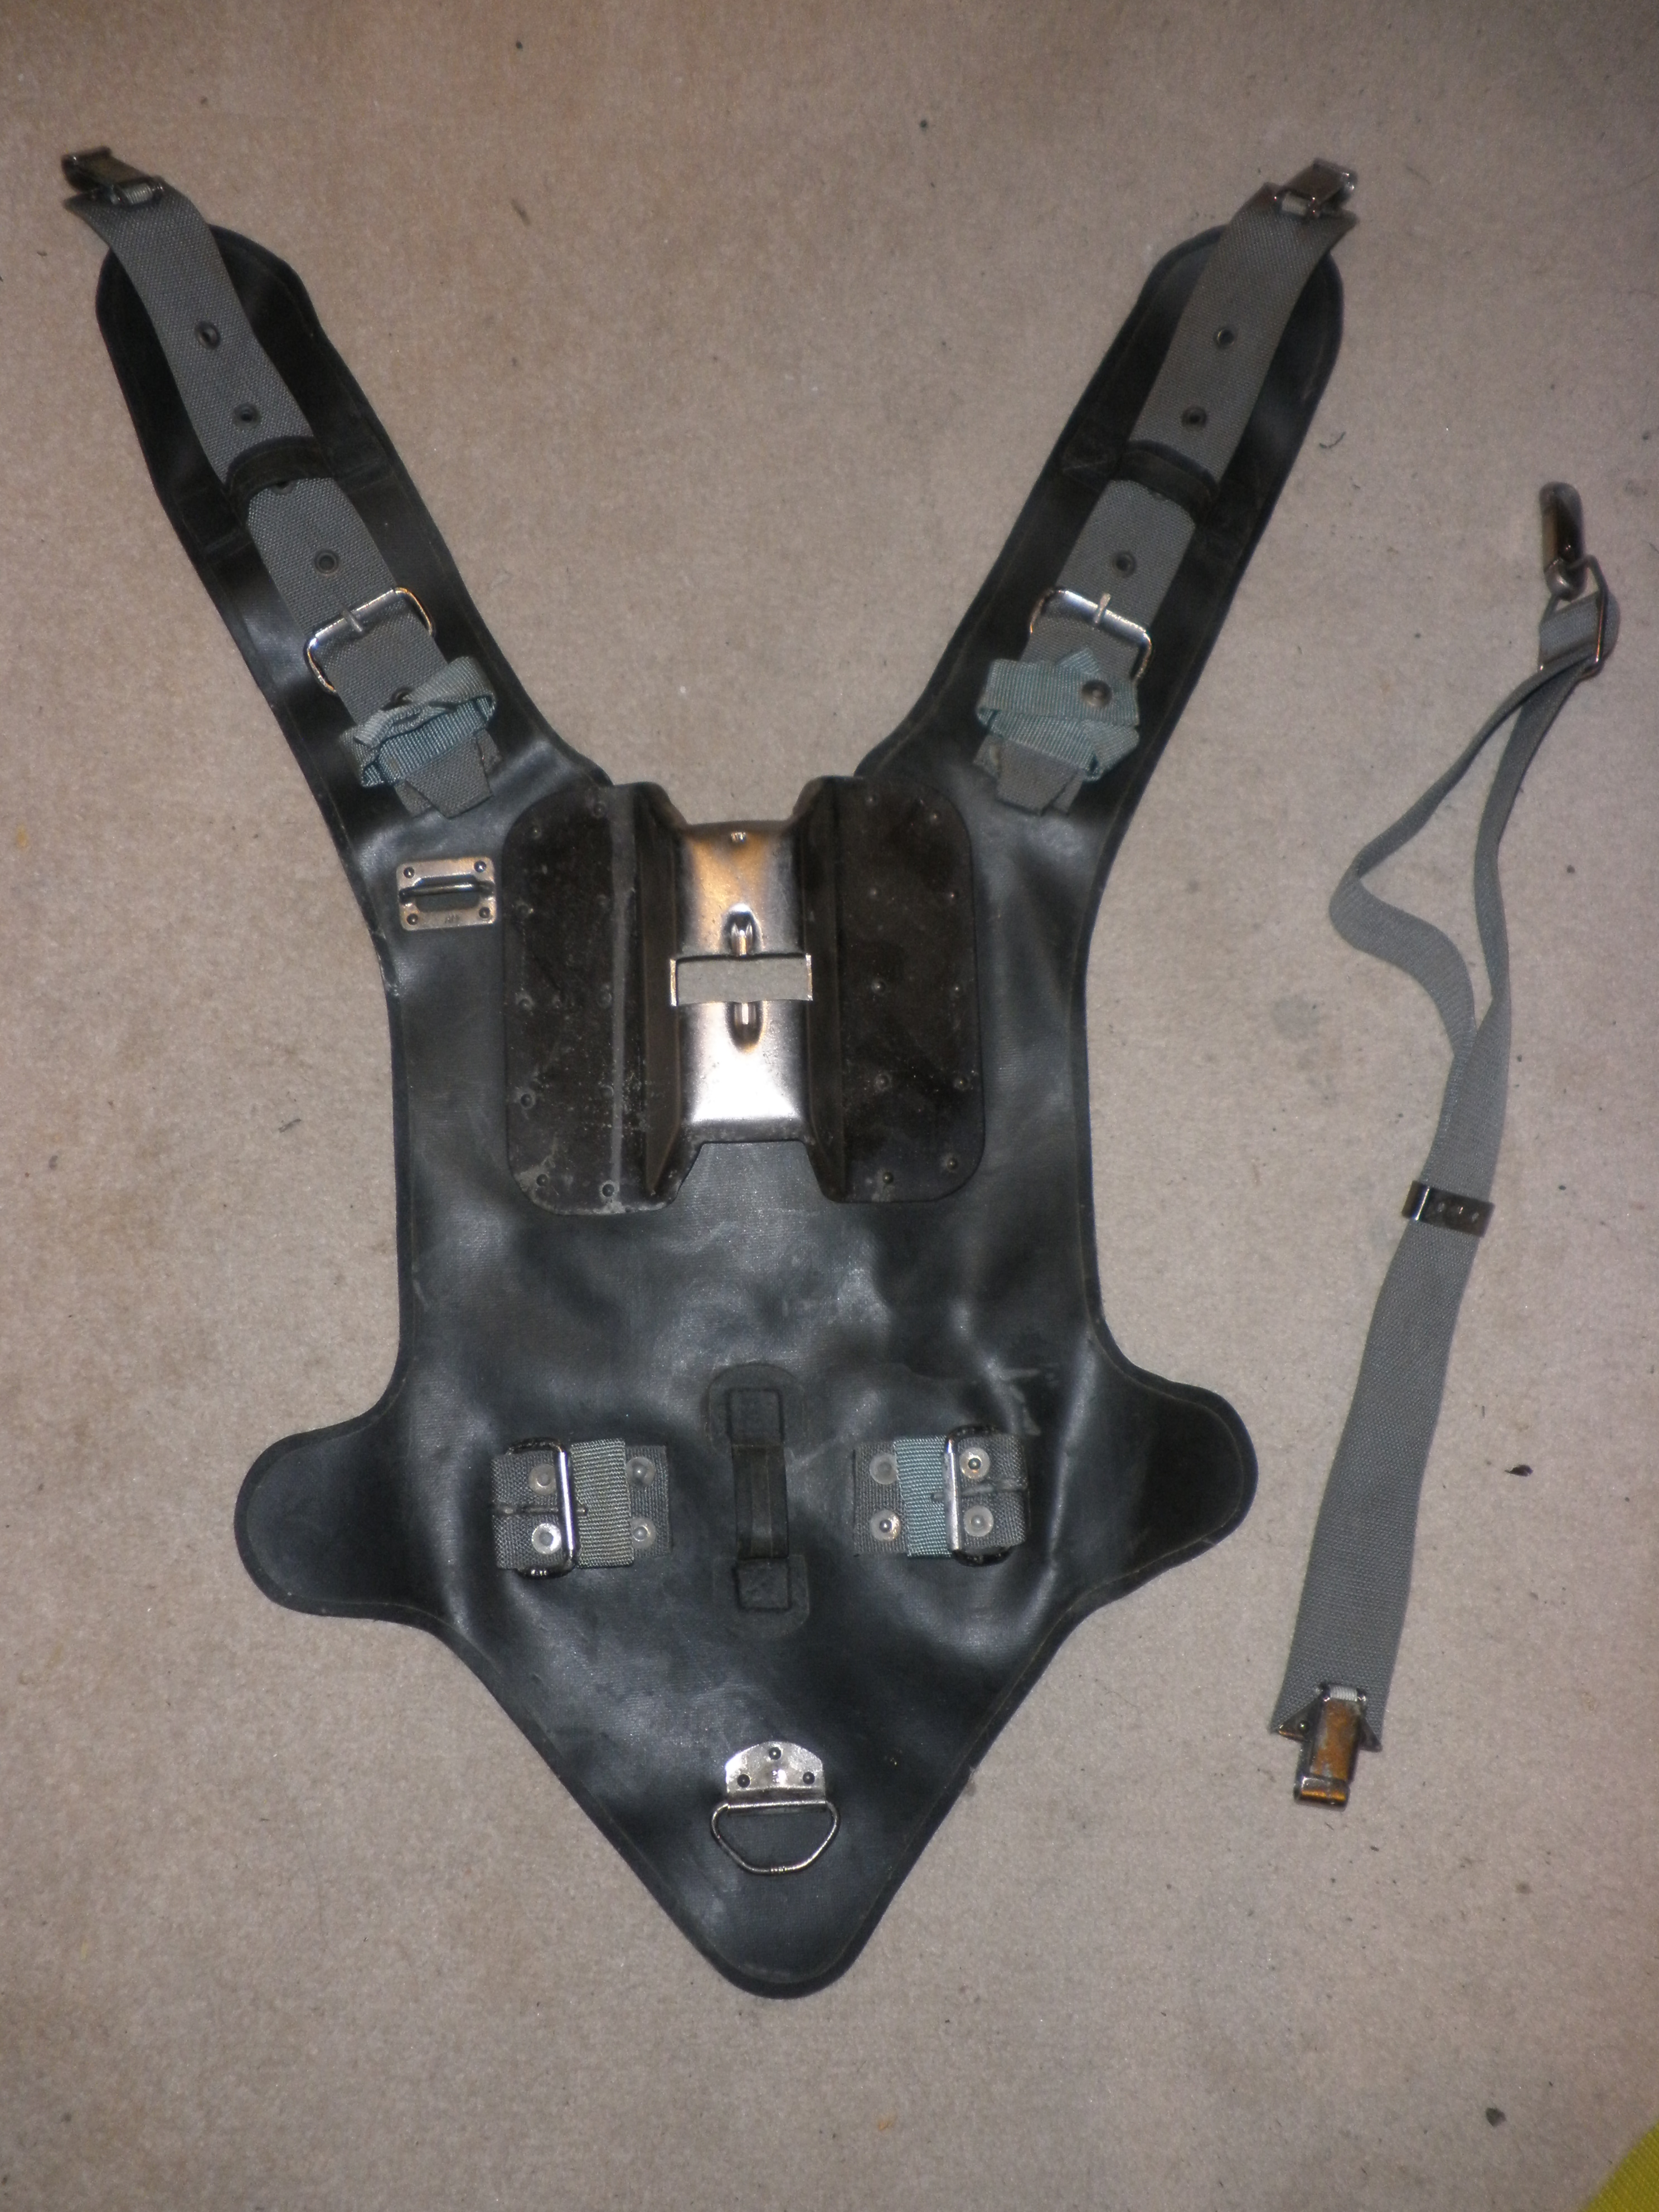
The harness. Well it's actually a chest piece and that strap is the crotch
strap. The waist band goes into the buckles on the front and the shoulder
straps reach over and clip to the top of the case. The clip on the right hand
side of the chest is for the contents gauge.
For years I've been saying that valves behind your head is not a military or
commercial diver feature but an amateur quirk but here we have one. The Oxygen
inject button is on the top of the case but it is snug up against your back and
even I can reach it. What I can't do is work it in gloves.
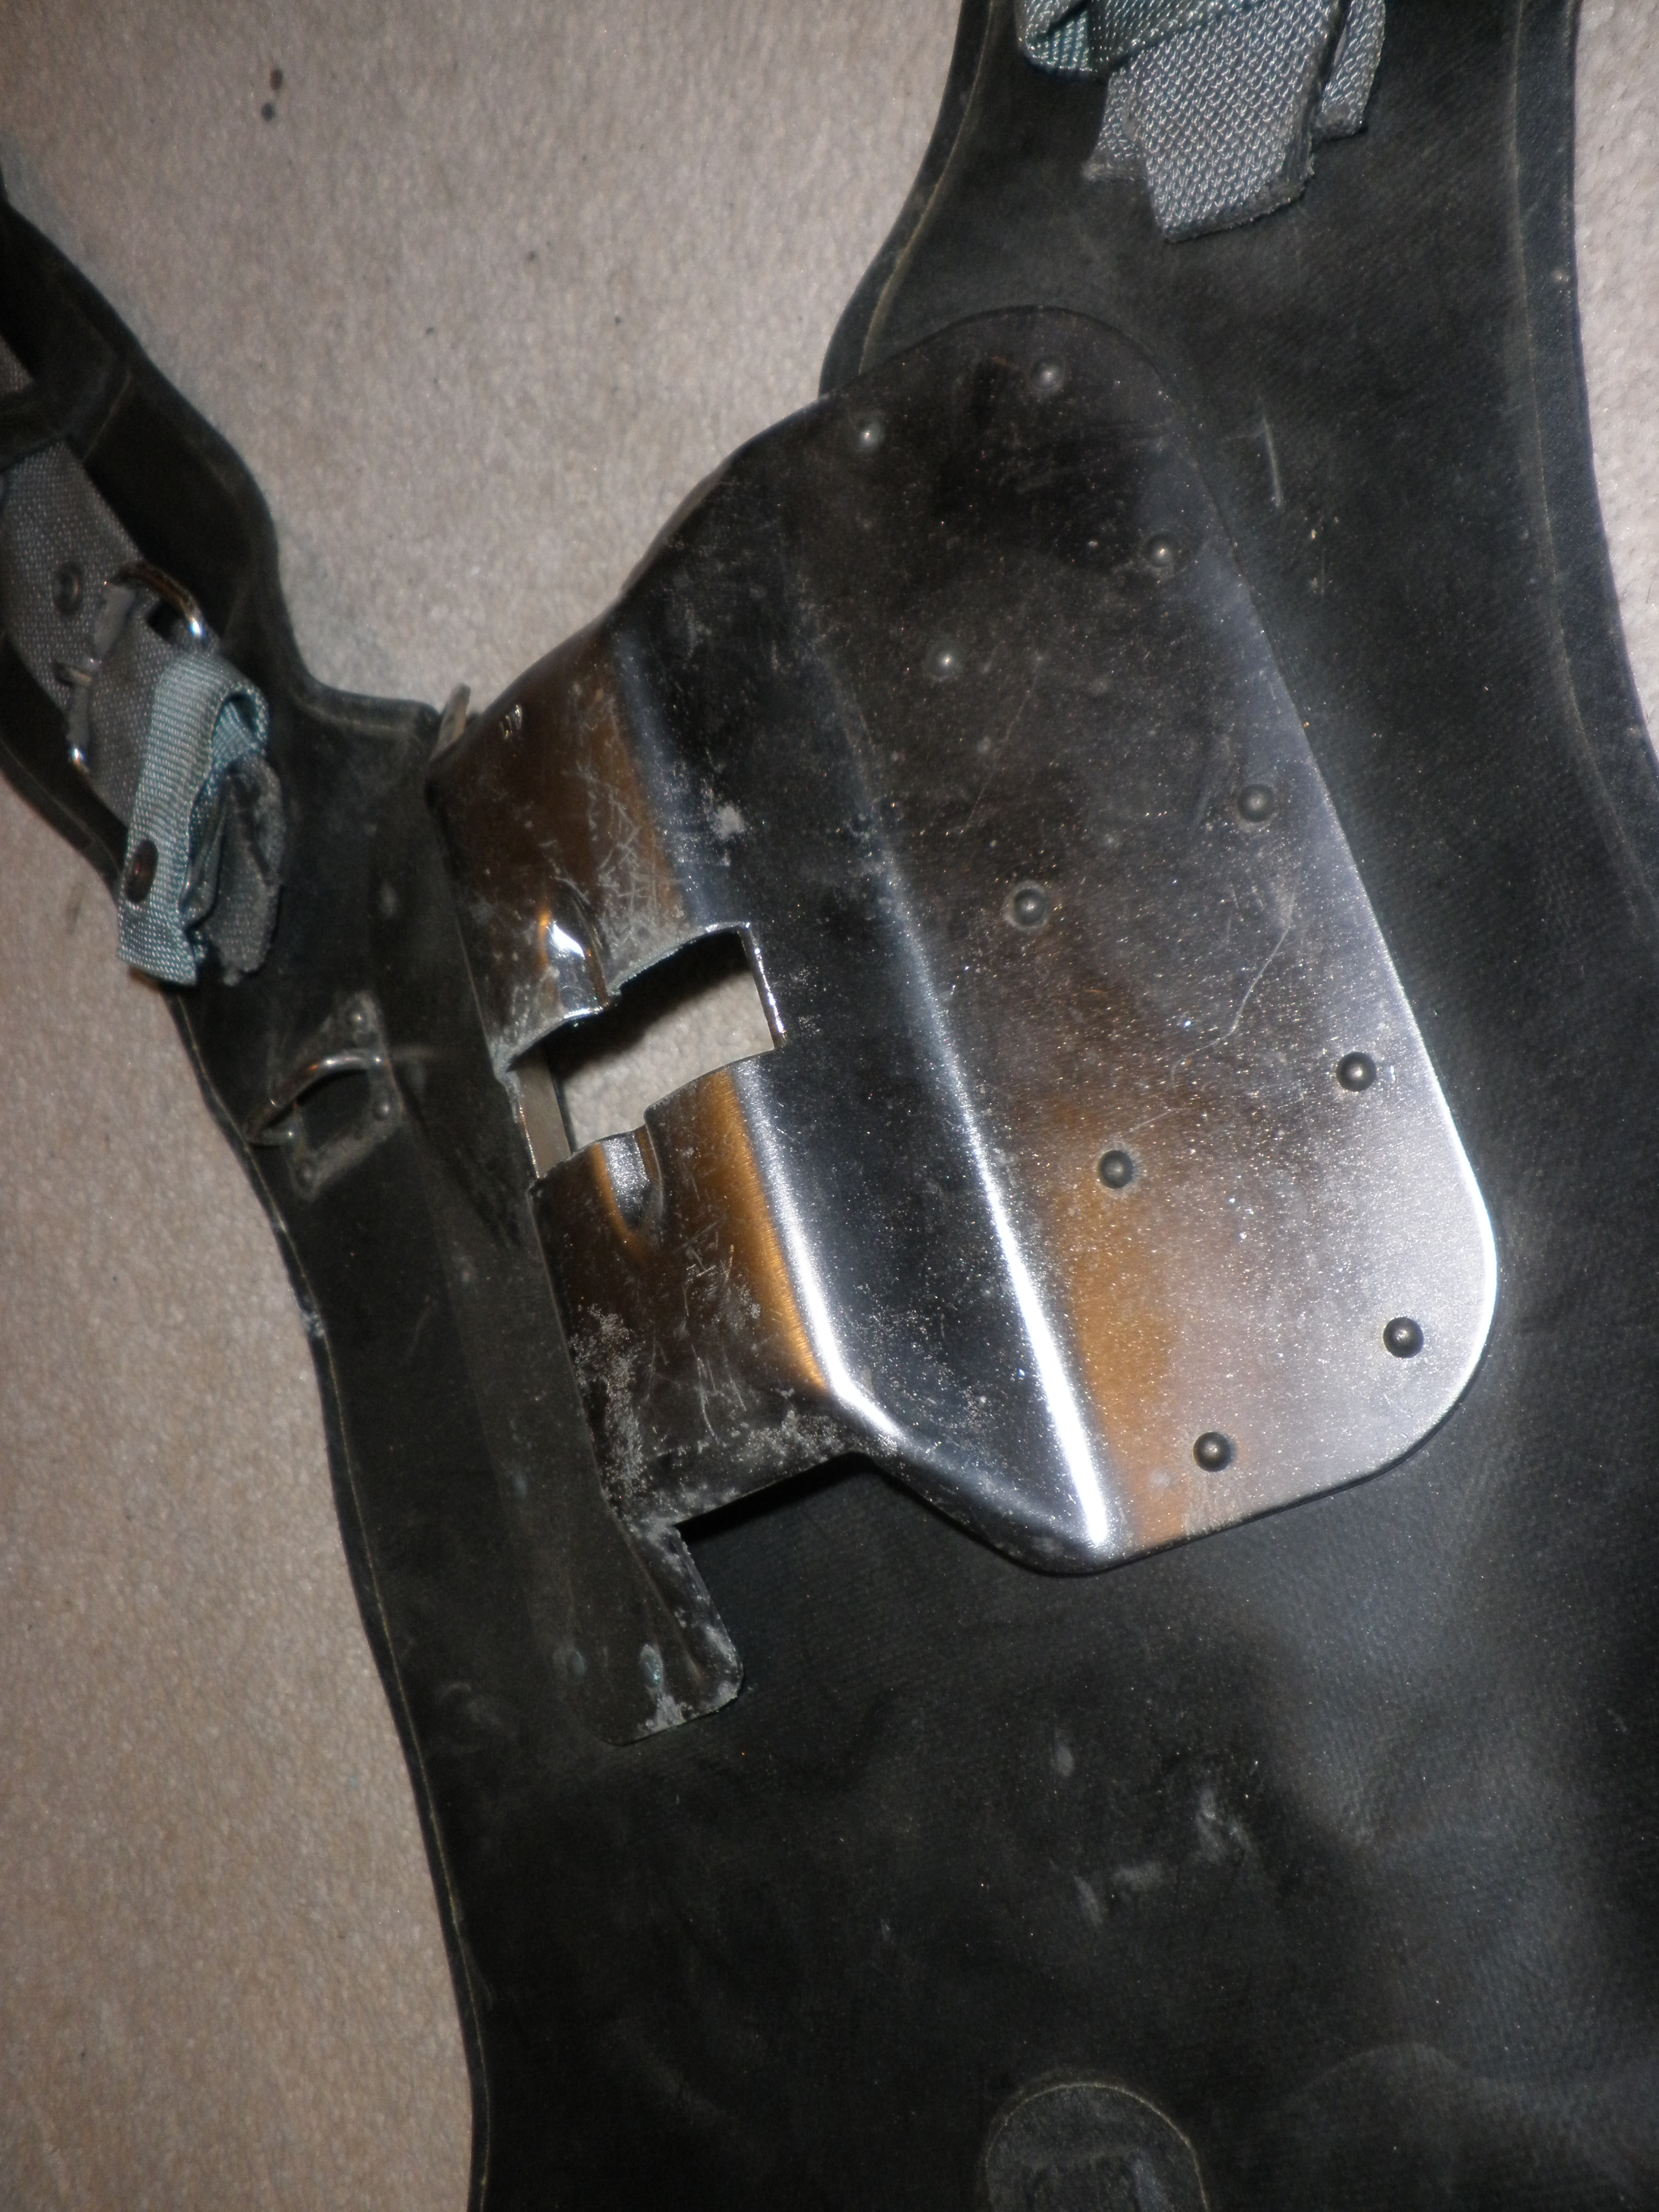
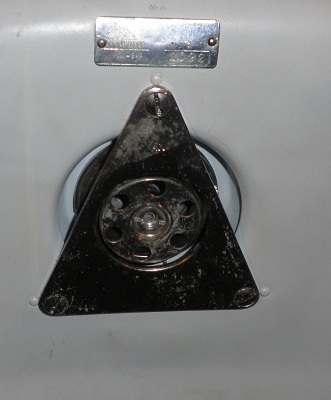
So the last question has to be 'What on earth is the metal thing on the chest?'
Well I've heard lots of explanations and the one I like is that it is the
correct fitting for a Warsaw Pact standard issue limpet mine. However the truth
is that I don't know. It doesn't get a mention in the manual other than a label
saying КРОН-ШТЕЙН which
Google Translate assures me means Crown Stein or, if you remove the
dash, a far more probable but far more boring Bracket. I'm going to
stick with the limpet mine theory because it's so much more fun but, sorry, no
evidence.
 |
|
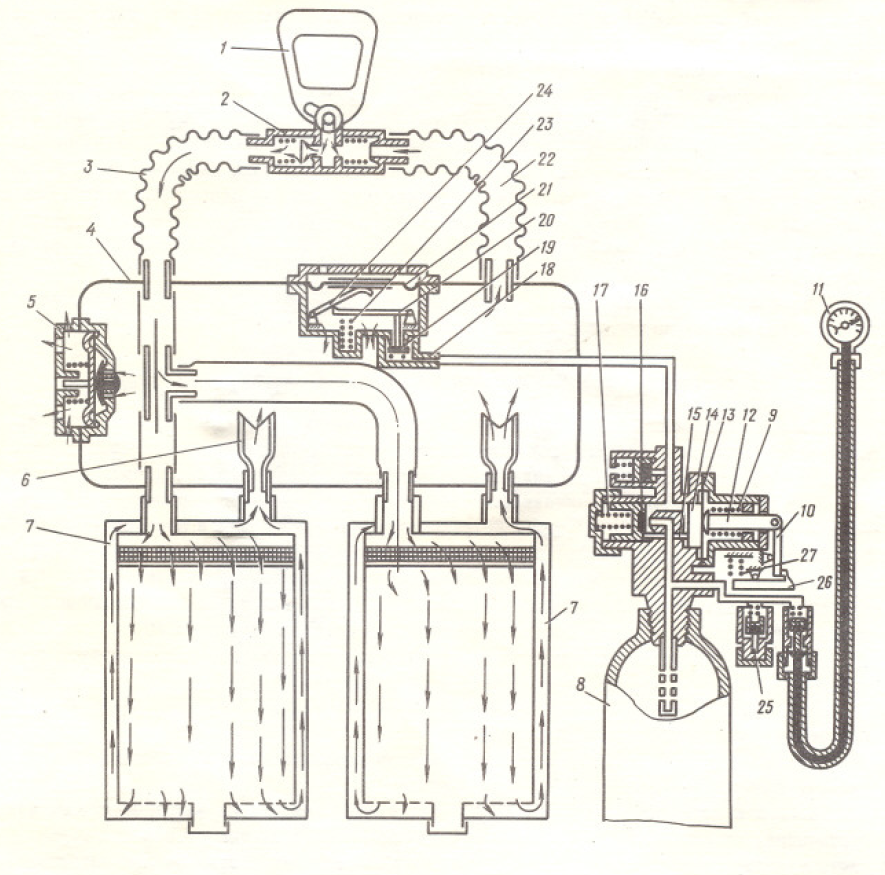
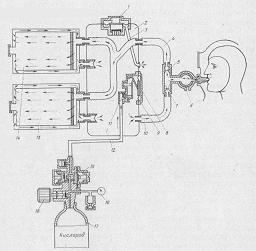
Finally some drawings. They might look a bit primitive but actually they
diagram all the parts and how they work so they are quite handy.
I do have a manual but my Technical Russian is not just poor but virtually
nonexistent so I rather treat it as a picture book.
- Over pressure dump valve
- Counterlung (inhale only)
- Dump pipe to bubble supressor
- Exhale hose
- Exhale one way valve
- Surface/Loop switch
- Inhale one way valve
- Oxygen Addition Valve
- OAV diaphram
- Inhale hose
- Oxygen addition mechanism
- Oxygen feed pipe
- First scrubber canister
- Second scrubber canister
- Oxygen pressure reducer valve
- tank contents gauge
- Tank shutoff valve
- Oxygen cylinder
|
 |
Sadly most of the other IDA 64 links I used are now gone. I used to list seven
but only one still worked last time I tried them:
Jan
Bech's oxygen rebreather database
I have used information from many people in my work to dive this unit and I
would like to thank them for sharing the information without cost on the web.
More details as I need to work on things
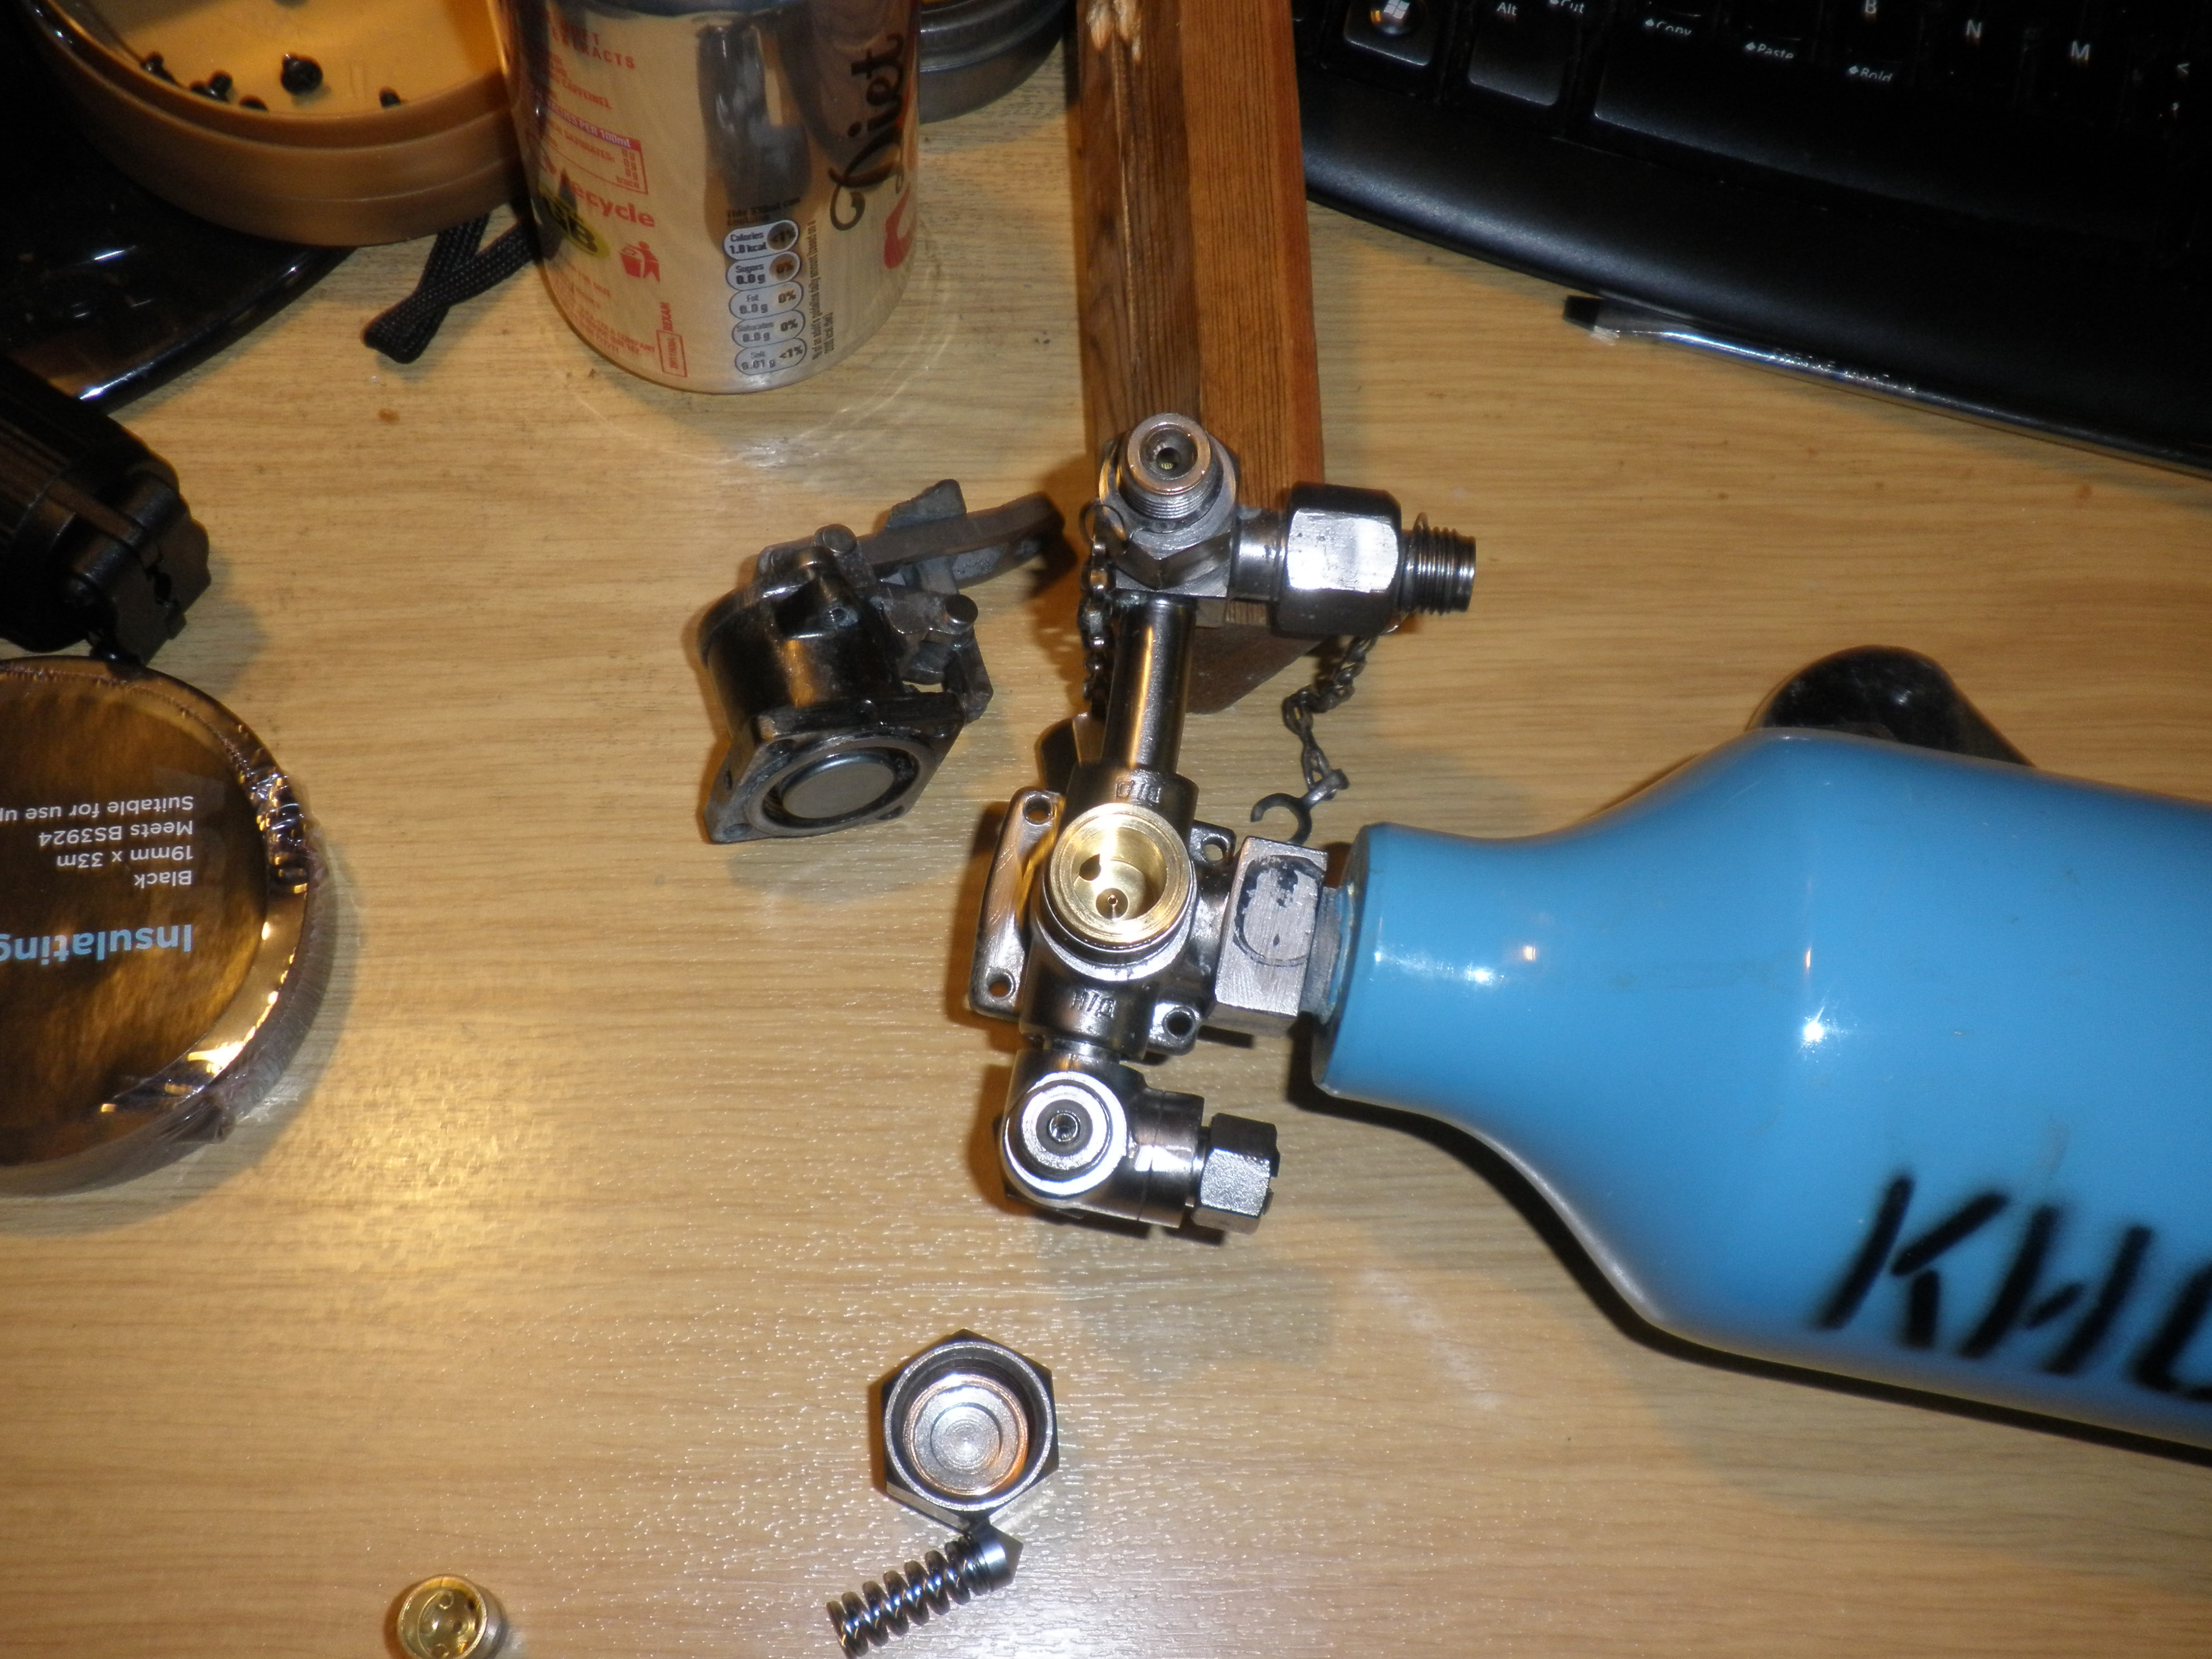
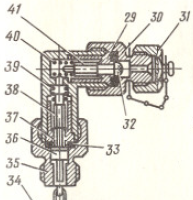
Start with the fill valve. Right we are dealing with high pressure Oxygen here
so no messing about. What's the first thing you notice? No O rings covered in
expensive Oxygen compatible grease.
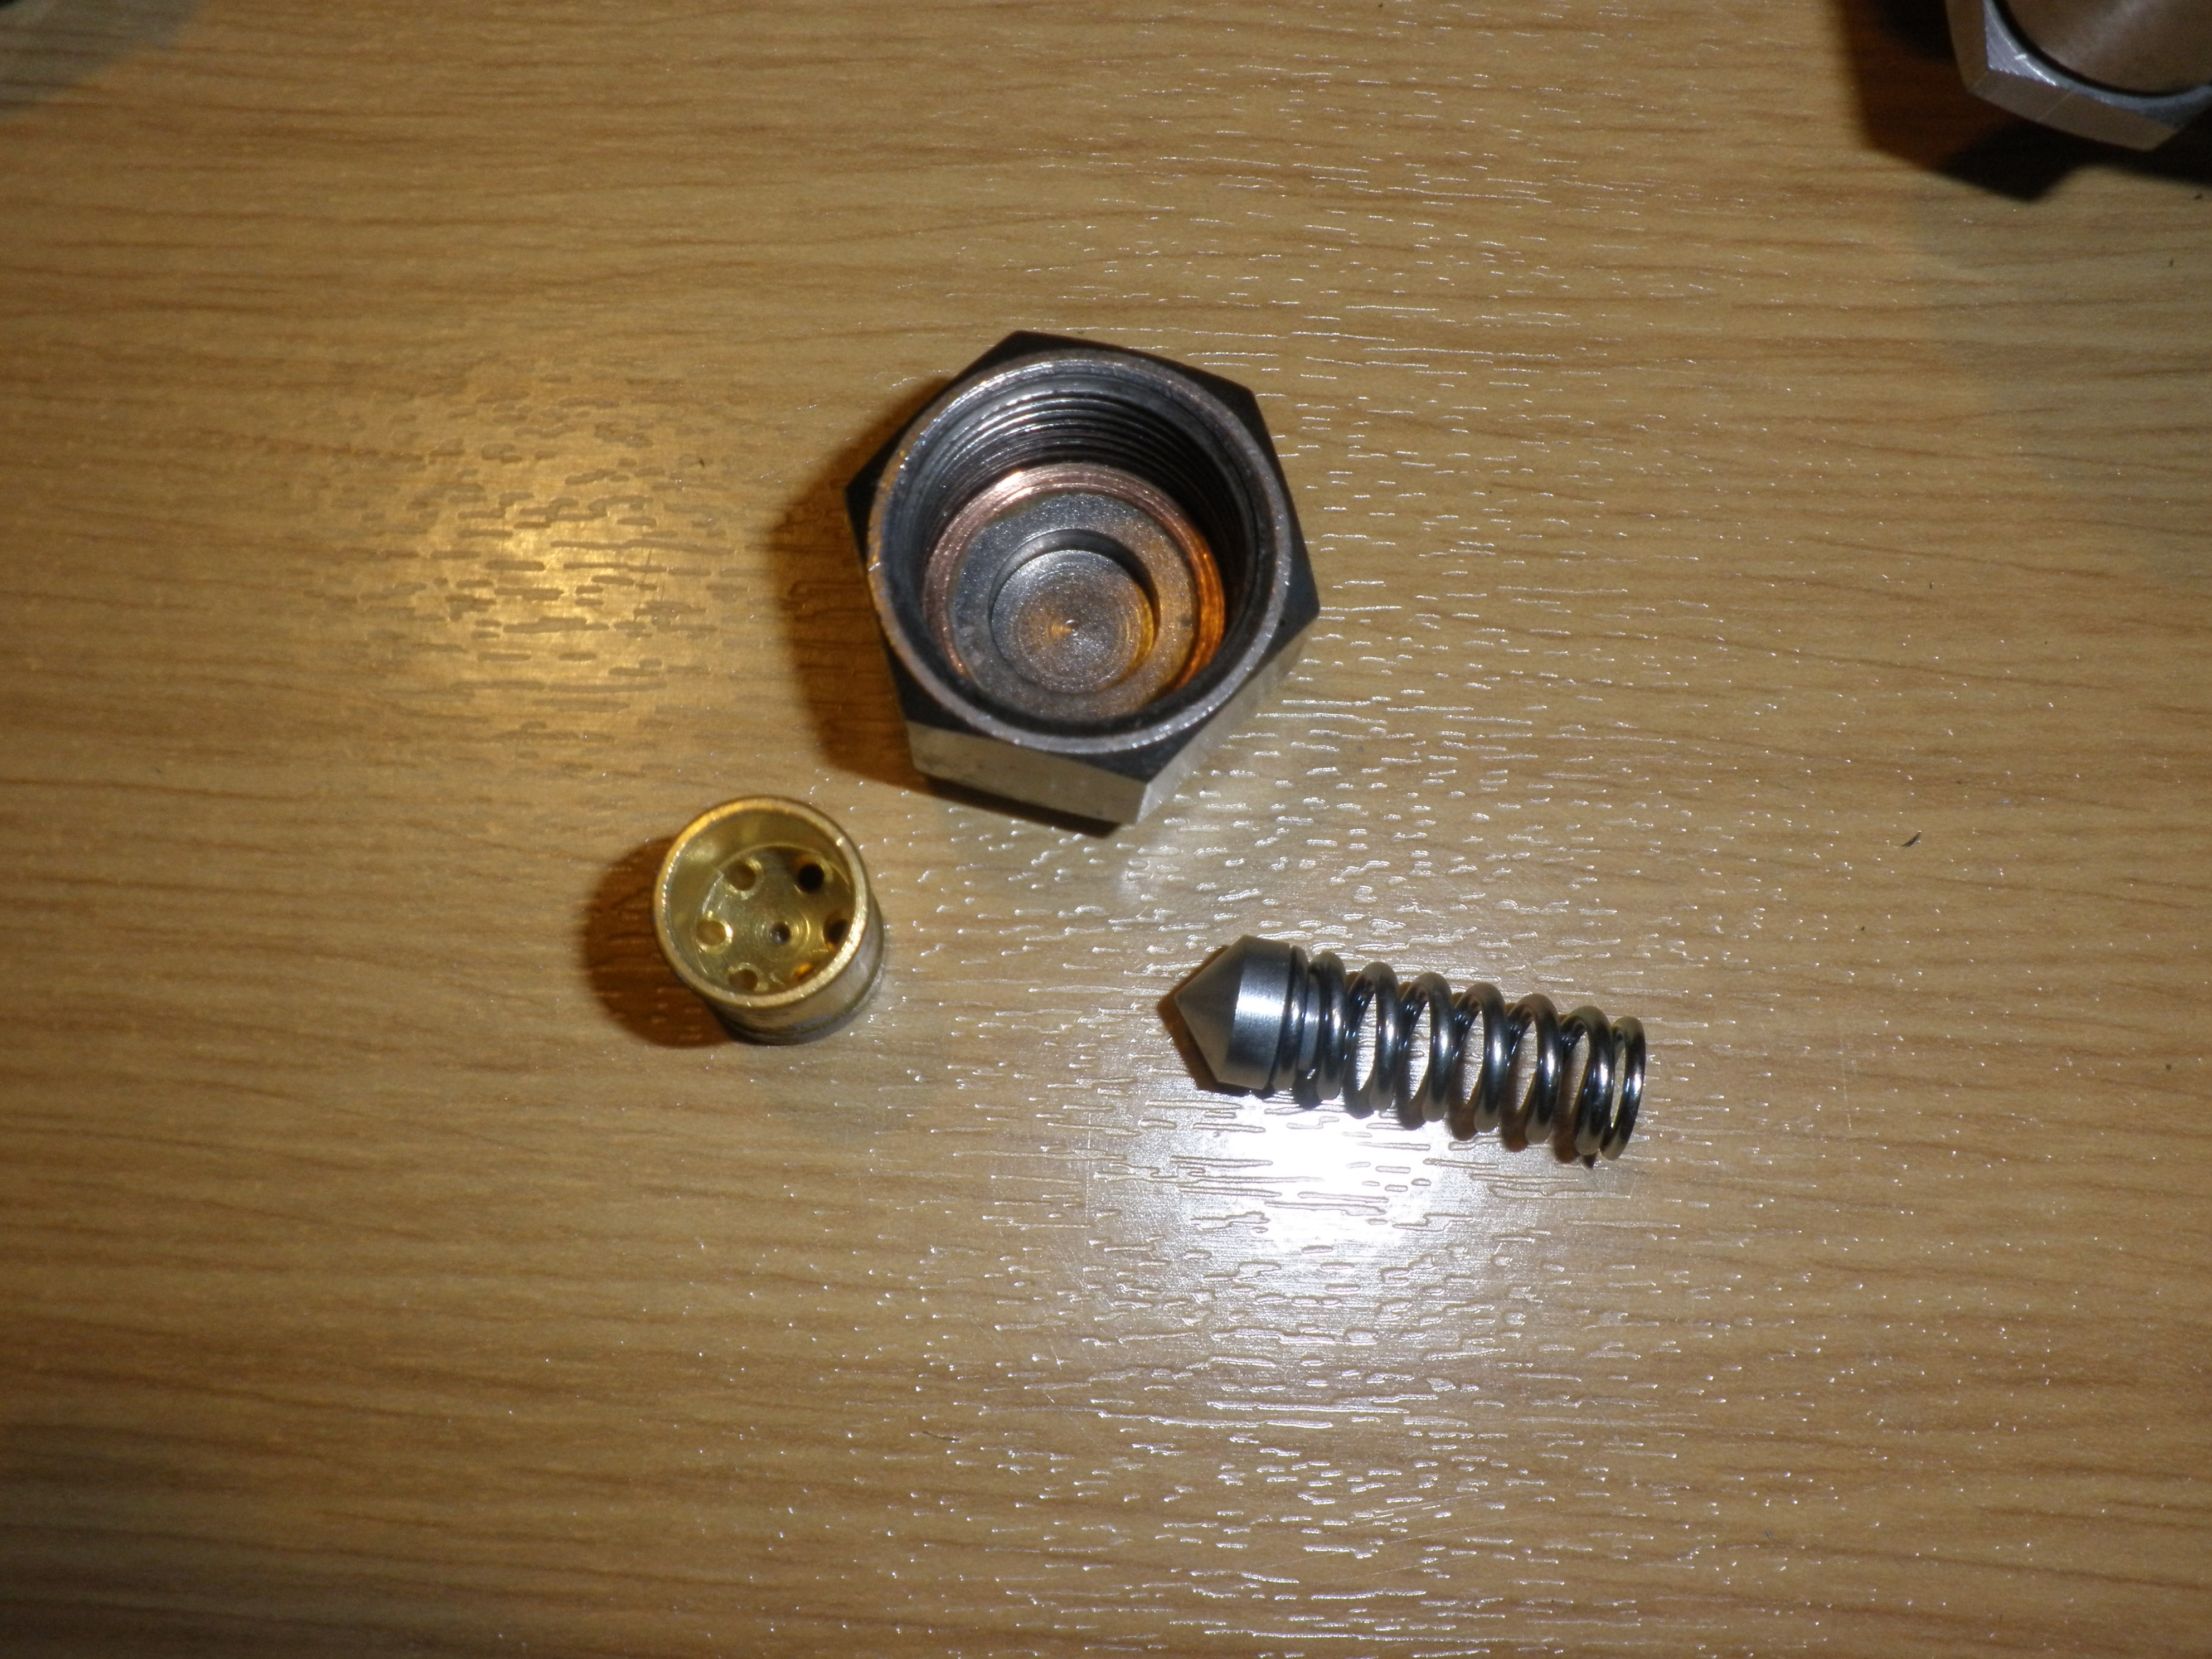
So the square part (41) has an insert at its top end that seals with a sharp
edged collar inside the mushroom shaped part (29) under the pressure of the
spring (40). The copper washer with a brass filter (32) is the 'o-ring' that
seals the top. The spring, by the way, is 10.5mm by 6.8mm diam and runs at
about 30gms for 5mm compression. Also there are none in the spares kit I have
so when you drop one you really have to find it.
Of course with metal to metal seals like this you have to be consummately clean
but, heck, this is pure oxygen at 200 bar so you were already getting
reasonably neurotic about that one any way.
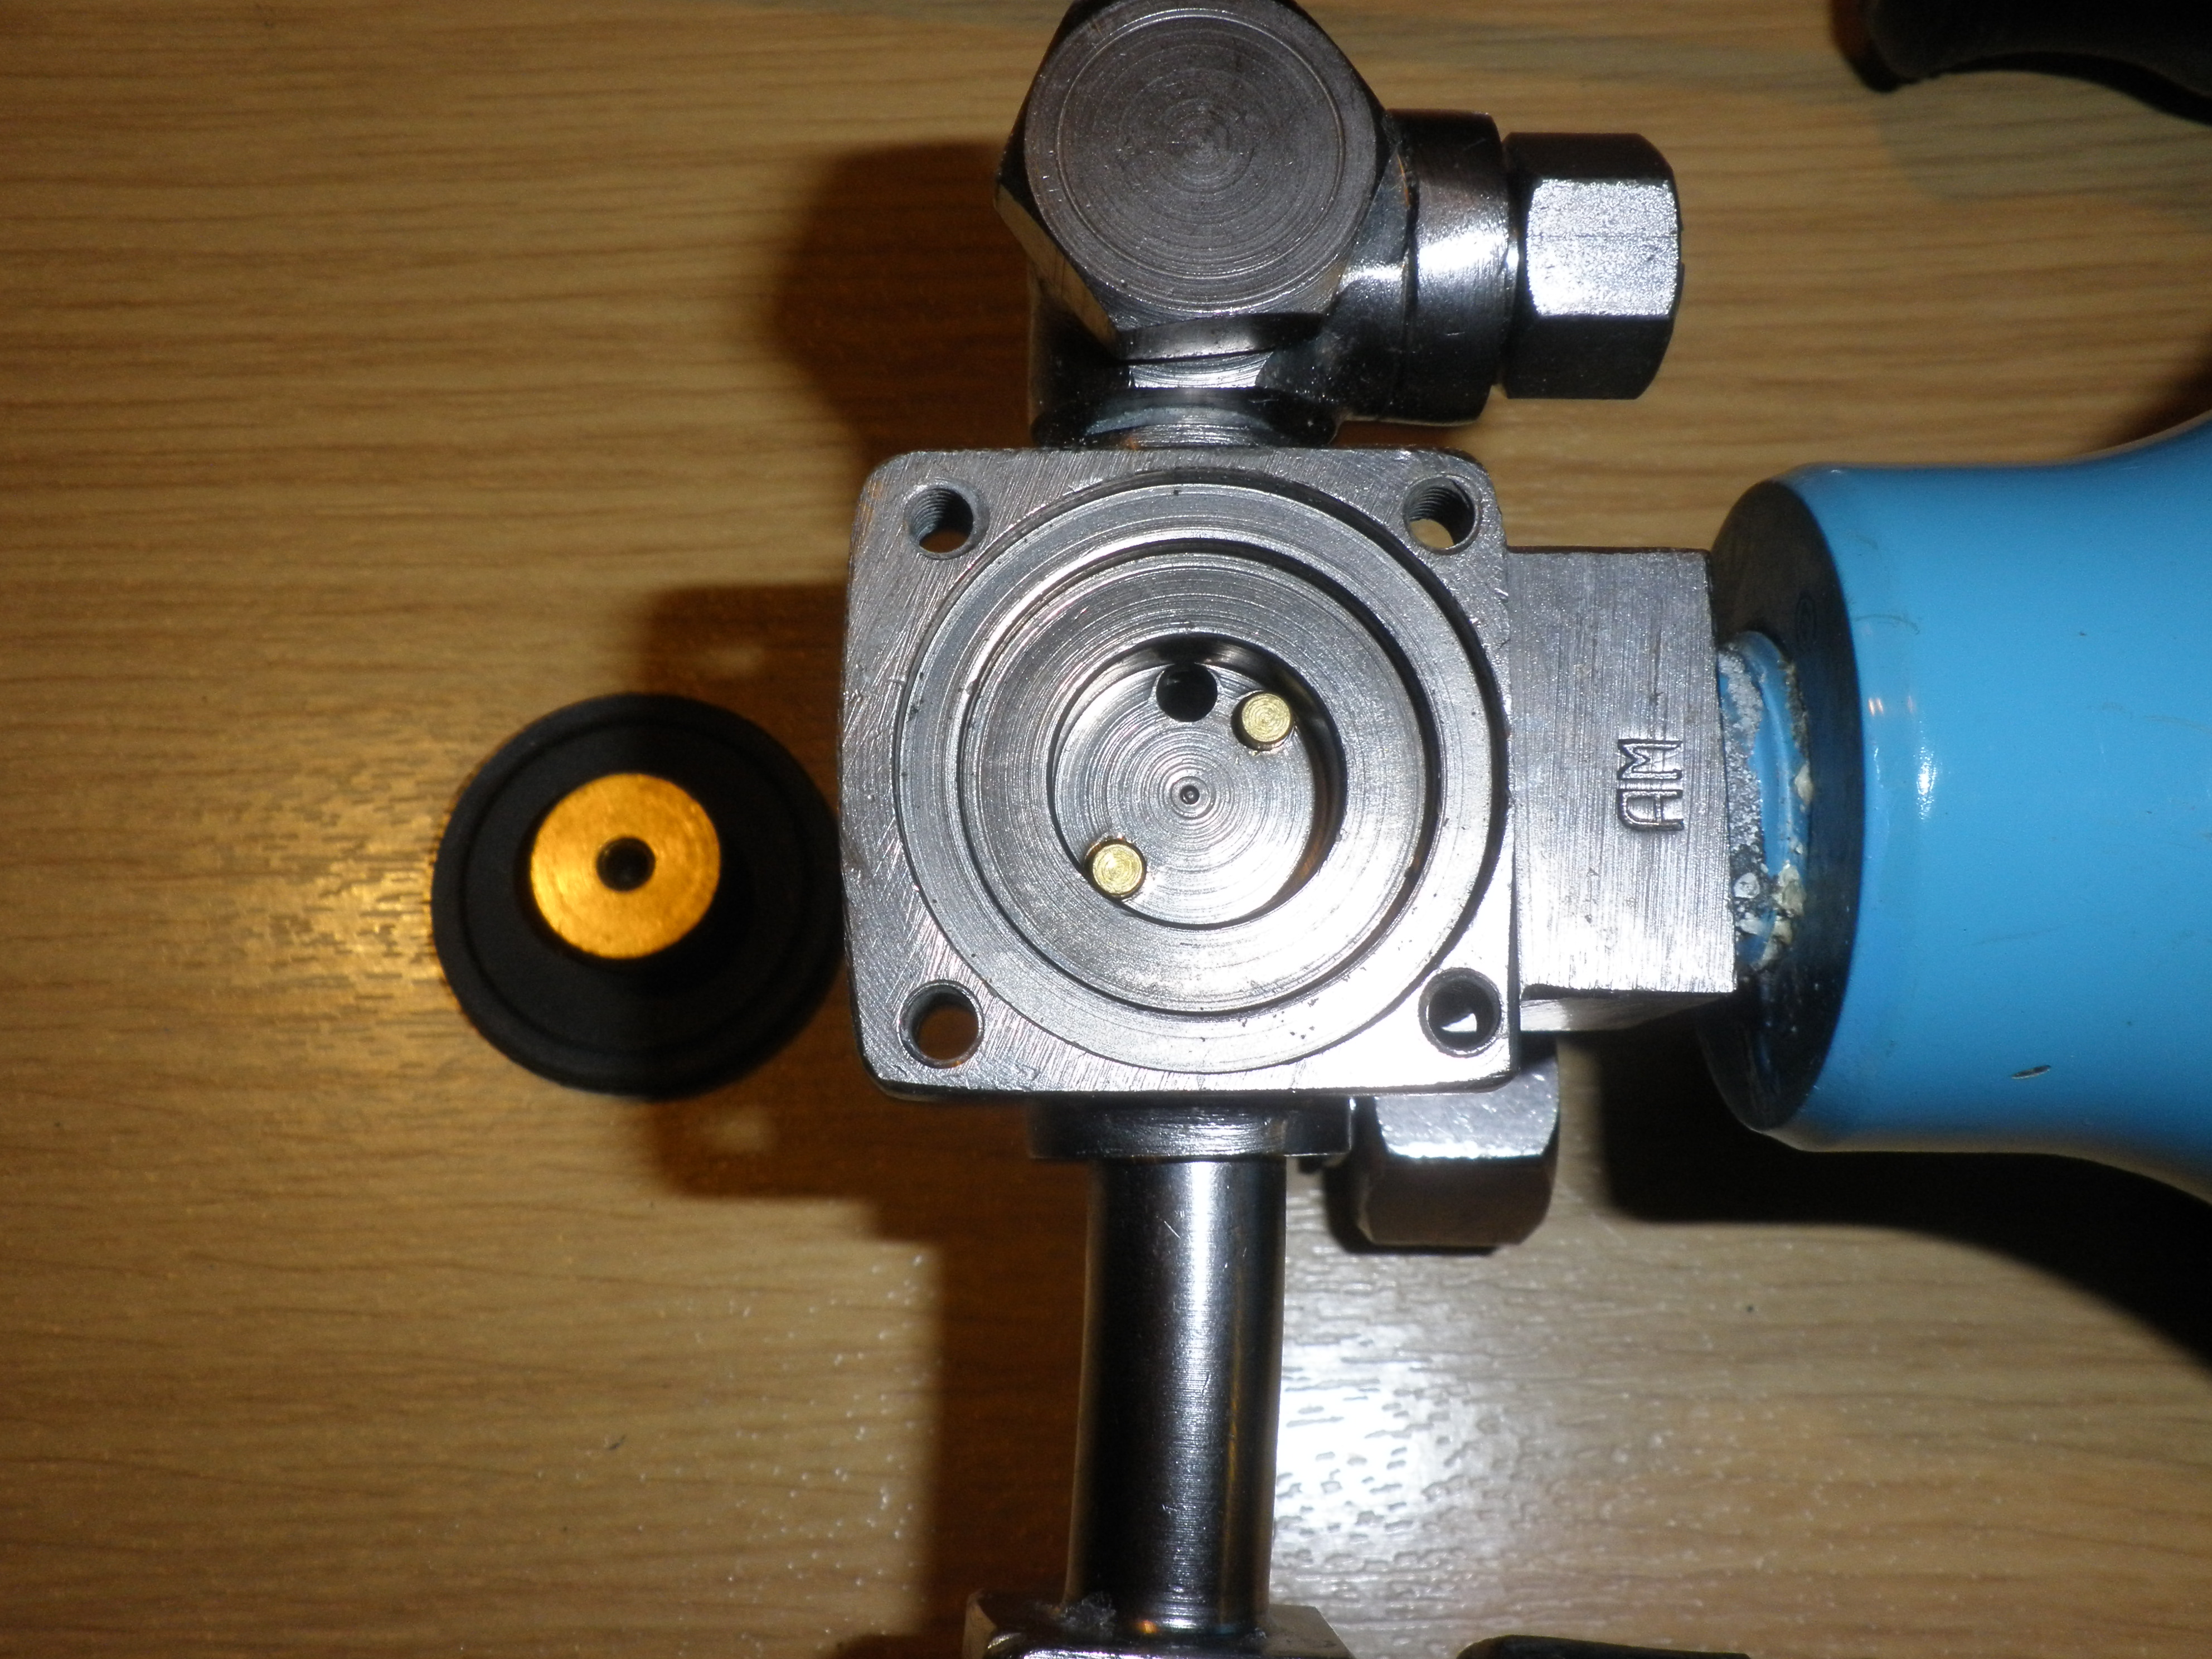
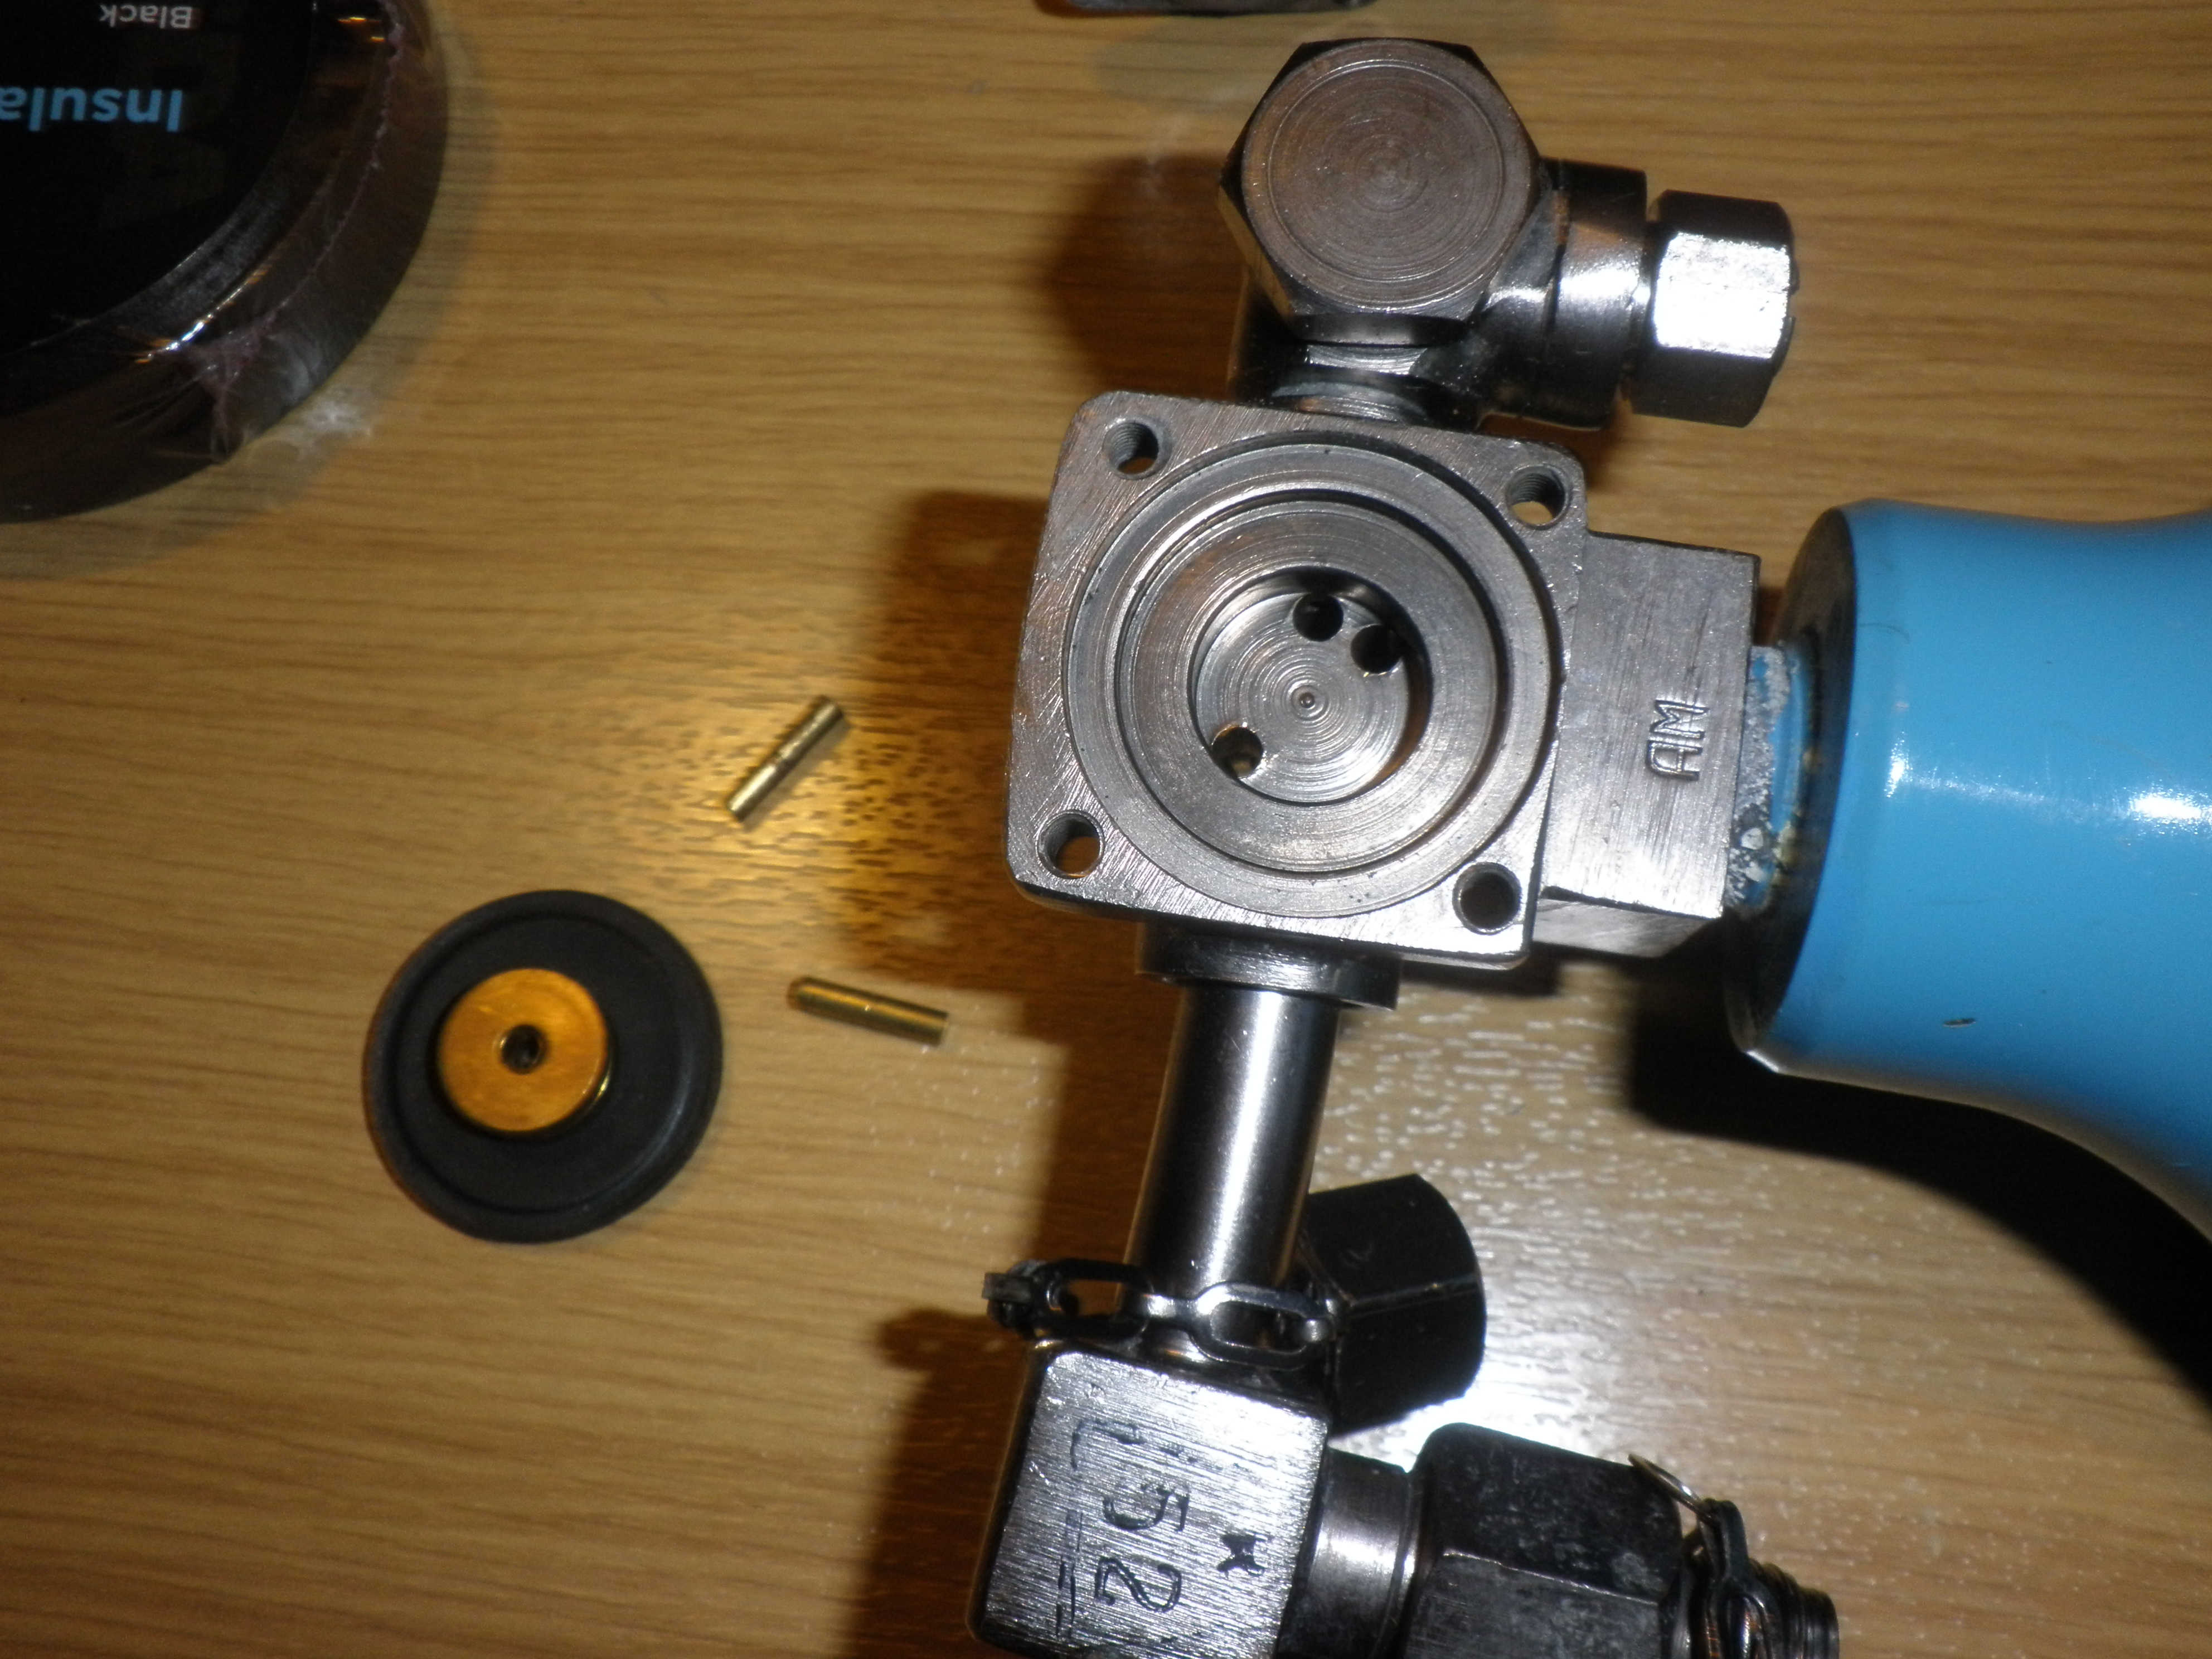
Then the high pressure take off for the gauge. The same square peg (38), spring
(39) and mushroom (37) but this time just a copper washer (33) and the top nut
has a pin (36) that is pressed down when the gauge is fitted to open the gas
path.
Right so why do they get a special slot here? Well they both leak like a sieve
down round the nut. My feelings were that it was the seal where the mushroom
was seating on the body of the valve. That metal to metal joint was brass on
brass(?) and didn't work like a nice squishy copper washer. However the diagram
doesn't show a part in there so what was the trick?
Well the first idea was obviously an O-ring but what could it be made of?
Rubber from the scuba o-ring box is just going to extrude out of the gap as I
spanner it up enough to seat the copper one. Copper would be nice but how do I
cut a ring with a 8.84mm hole and just 1.4mm wide in thin material? I can get
copper washers from GWR, the steam people, but what did a Russian Combat
swimmer have to hand that was so easy that it didn't need to be included in the
spares kit? At a guess: string.
OK four turns of PTFE plumbers tape sorted one and vastly improved the other
but my test bath had dumped 15 litres of water on the workshop floor (it was a
plastic storage box and I didn't notice the crack) so it was a pressure gauge
check not a bubble test. I'm not really too keen on PTFE near oxygen, the
combustion products aren't the kind of stuff you'd want on your fingers before
you even consider breathing them, but I won't overlap a free side. I gave it 10
minutes and my digital gauge was vacillating between 7.7 and 7.8 all the time
so I blew it to 30 bar but it started to hiss at the filling joint so that
needed a rebuild.
The filling fitting problem was all my fault because I had done a quick fix. I
had sent my original fitting to some poor guy a long way away and needed to
build a new one. This is what it should have been and this one doesn't hiss and
just works. It is a pair of
Subaqua Products parts screwed
together.
The bottom is a 300bar DIN to female to 1/4" BSP female adapter.
The top is a 1/4" BSP male to 1/4" BSP female adapter intended to fit gauges
onto your charging system. There is an O-ring between them. The gauge part has
a PTFE washer at the bottom so keep the red plastic screw that is supplied to
keep the dirt out so it can't fall out and get lost. I might put a drill down
it later to make the hole a bit bigger but I fill oxygen especially slowly on
old Russian gear so it isn't a problem or at least it hasn't been a problem
yet.
Please don't give me grief about putting Oxygen through 300 bar fittings. I do
know what I'm doing and the limiting factor here is old Russian gear. I know
how to boost Oxygen and my gear maxes out at about 345bar (over 700bar on
inerts) so I can destroy anything you like. Look at my 1400bar hoses and weep.
I may be a kit nerd but I'm an ace kit nerd.
The other thing you need setting up this gear is a big butch rubbish bin that
is water tight. I tried a plastic storage box and got a wet floor so I swapped
out this old thick bin you see here from rubbish duties for a cheap ASDA one
that looked a bit flimsy when confronted with 40 kilos of water. The key
measurement is 15 inches so the valve is on top but just under water. I guess a
fish tank with all round 'see through' would be nicer but a rubbish bin is a
few quid while big fish tanks make your wallet bleed. Check for holes at the
bottom before you buy. Don't skim on this one. As shipped the IDAs are not gas
tight and it takes a lot of sessions in the bin, getting better and better each
time, until it finally held 50 bar overnight. Any of the seals that have been
under load for 35 years are suspect and probably distorted. The copper ones
probably and the rubber ones definitely. A quick easy check is vital.
Some of the rest of the reassembly pictures replacing what I can...


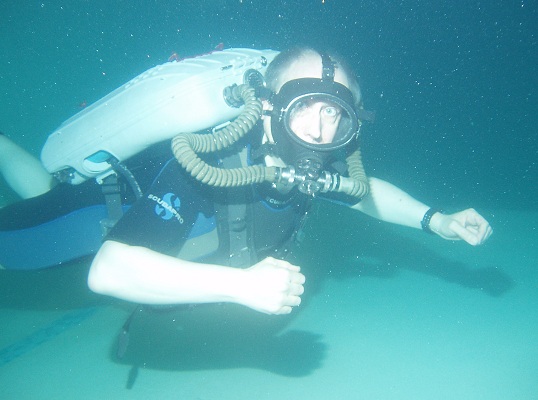
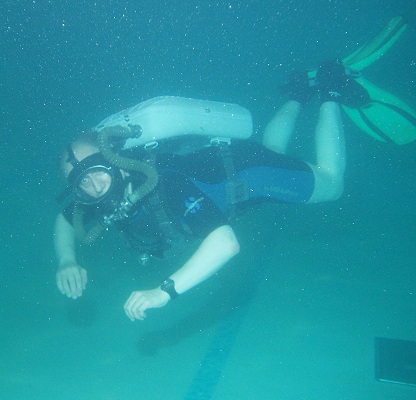
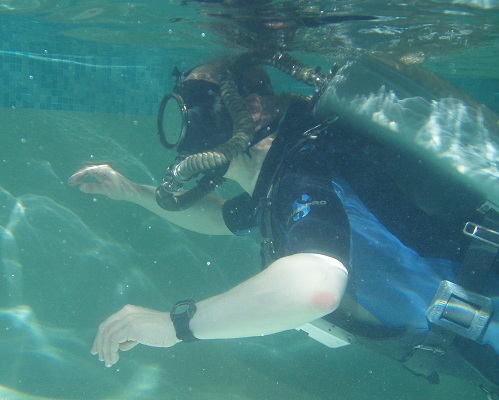
And some shots in the pool...
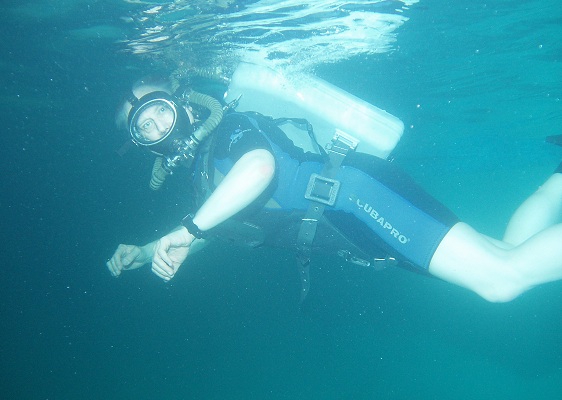
So the big question is "What's it like to dive?"
Well I had had some disappointments before when I took it to the pool and
couldn't dive it but this was the first time I really felt confident that I had
everything together. Hence, when it was actually rather good, I was pleasantly
surprised as I was dreading it being horrible after all that work. One thing I
liked in the pool session that the photographs are taken from was that it was
pleasantly neutral. That's neutral for total weight and neutral for balance. I
needed the same 3Kgs I use to free dive that shortie in the pool so I threaded
it into the belt. That left me swimming up and down and pretty much staying
where I wanted to be. When I ascended I felt a bit light but exhaling a little
through my nose corrected the counter lung and it was back to in trim. I had
assembled it with the right hand hose a bit twisted, so you can see it's
getting a bit friendly with my ear, but I'll know how to do it better next
time. Also when I did the spit and rinse on the mask I had left the BOV on loop
so it gurgled a bit all the session but that's just another lesson for next
time. The mask didn't mist up so no problems there. My freediving jaw-thrust
ear clear didn't seem to work so well with the mouthpiece in but the pool is
only 3m and there was no discomfort so it might have worked, I just didn't get
the same sensation.
On that first session I blew 200bar into the cylinder before I left home and by
the time I had finished messing about setting things up and flushing the loop
the gauge said 150bar. Remember it is only a 1 Litre tank. After the best part
of 40 minutes I was down to 50 bar so I called it a day. I never once felt the
O2 add kicking in nor the OPV venting but, as I'm still here, the add must have
worked. I think the mouth-piece would be a bit better aligned if I wore the
mask about half a cm higher as it was always pulling down a bit but it never
leaked and it was comfortable. I must have a Russian shaped head.
Oh, and on another day pool diving it, from lifting it out of the car to
putting it back in I use 25bar for a half hour dive and that includes the setup
tests and a loop flush. Not bad for 1.02 Litres.
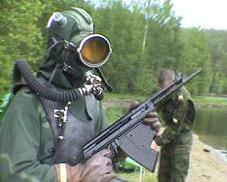
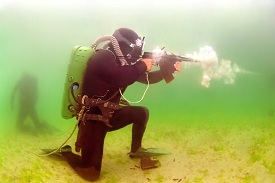
All I need now is the limpet mine and the APS amphibious rifle and I have the
full set.
Thanks to Georgio for doing the pool pictures.

|